36
|
VIKING 4G E, S
Rev. 1.0 (29.1.2020)
Installation
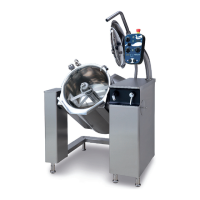
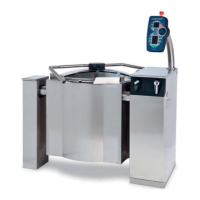
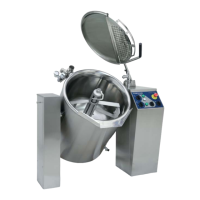
6.6. Free standing kettles
Installing the fi rst left hand kettle or a single kettle
• Lift the forklift trolley so that it supports the kettle preventing it from tipping over when the transport
brackets are removed.
• Remove the kettle from the transport brackets by loosening the bolts.
• Lift the kettle off the pallet.
• Move the kettle with the forklift onto the free standing frame and lower it into place.
• Attach the kettle to the free standing frame with M10 bolts.
• Move the kettle to the installation site and check that it is horizontal. Adjust if needed using the adjus-
table feet on the free standing frame.
40 - 200 liter kettles
40 - 200 liter kettles are delivered attached to a pallet with transport
brackets, the free standing frame is delivered on a separate pallet.
Move the kettle to the free standing frame as follows:
• Cut the longitudinal boards of the pallet and push the fork-lift trolley below the kettle.
Care must be taken that the lifting arms of the fork-lift trolley do not hit the parts protruding from the
kettle bottom, i.e. the mixing motor cover box (40, 60, 80, 100, 150, 200) as well as the drain and dis-
charge pipes. Lift from the edges, NOT from the bottom plate
It should be observed that the kettle pillars move. It is advisable to put a piece of foamed plastic or a
rolled cellular board between the kettle and control pillar so that they do not hit each other.
Locking nut
• Be sure to tighten the foot in the back corner of the support pillar side tight to the fl oor, otherwise it
may lift when using the mixer with heavy loads or when tipping the kettle.
• Tighten the locking nuts of the adjustable feet after the adjustment.