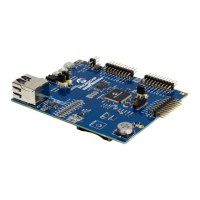
Connecons
User Guide
© 2023 Microchip Technology Inc. and its subsidiaries
DS-50003529B - 12
Related Links
10.2. Power Specications
8. Error Messages
10.3. Indicator Lights (LEDs)
3.2 PC Connecons
MPLAB
®
ICD 5 In-Circuit Debugger can connect with the PC (and MPLAB X IDE/MPLAB IPE) using the
connections in the table below.
Connection Type Connection Details Programming and
Debugging*
Trace* MPLAB Data Visualizer
Support
USB Type-C
®
(default) HS USB 2.0 Yes (USB 2.0) Yes (SWO) Yes
Ethernet Direct or via network Yes No No
* For speed specications, see 10.4. PC Connection Specications.
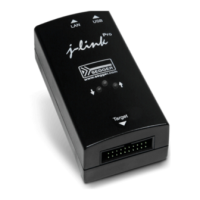
Figure 3-2. MPLAB ICD 5 Power and PC Connecons
Begin with the USB (default) connection. Then switch to Wi-Fi or Ethernet using the “Manage
Network Tools” dialog found under Tools>Manage Network Tools. For details, see the following topics.
Selecting Ethernet communication instead of USB has several uses:
• Access a target remotely. The debugger and target can be in one location and a PC in another.
• Isolate the target. Targets that need to be in a controlled environment can be separate from the
PC location.
Related Links
10.4.1. USB Type-C Connector (J1) and Cable
10.4.2. Ethernet Connector (J6) and Cable
3.2.1 USB Default Connecon
The default connection between the PC and MPLAB ICD 5 unit is USB using a USB Type-C cable. It is
recommended that you use the cable that comes with the kit to avoid communication issues.
Note: Only USB communications can be used for trace.
Note: MPLAB Data Visualizer, whether as an MPLAB X IDE included plugin or as a stand-alone
application, can only detect the debugger when it is using USB communications.
If you have problems with the other types of communications, return to USB and then use the
Manage Network Tools (MNT) dialog to switch to Ethernet again.