Connecons
User Guide
© 2023 Microchip Technology Inc. and its subsidiaries
DS-50003529B - 14
...........continued
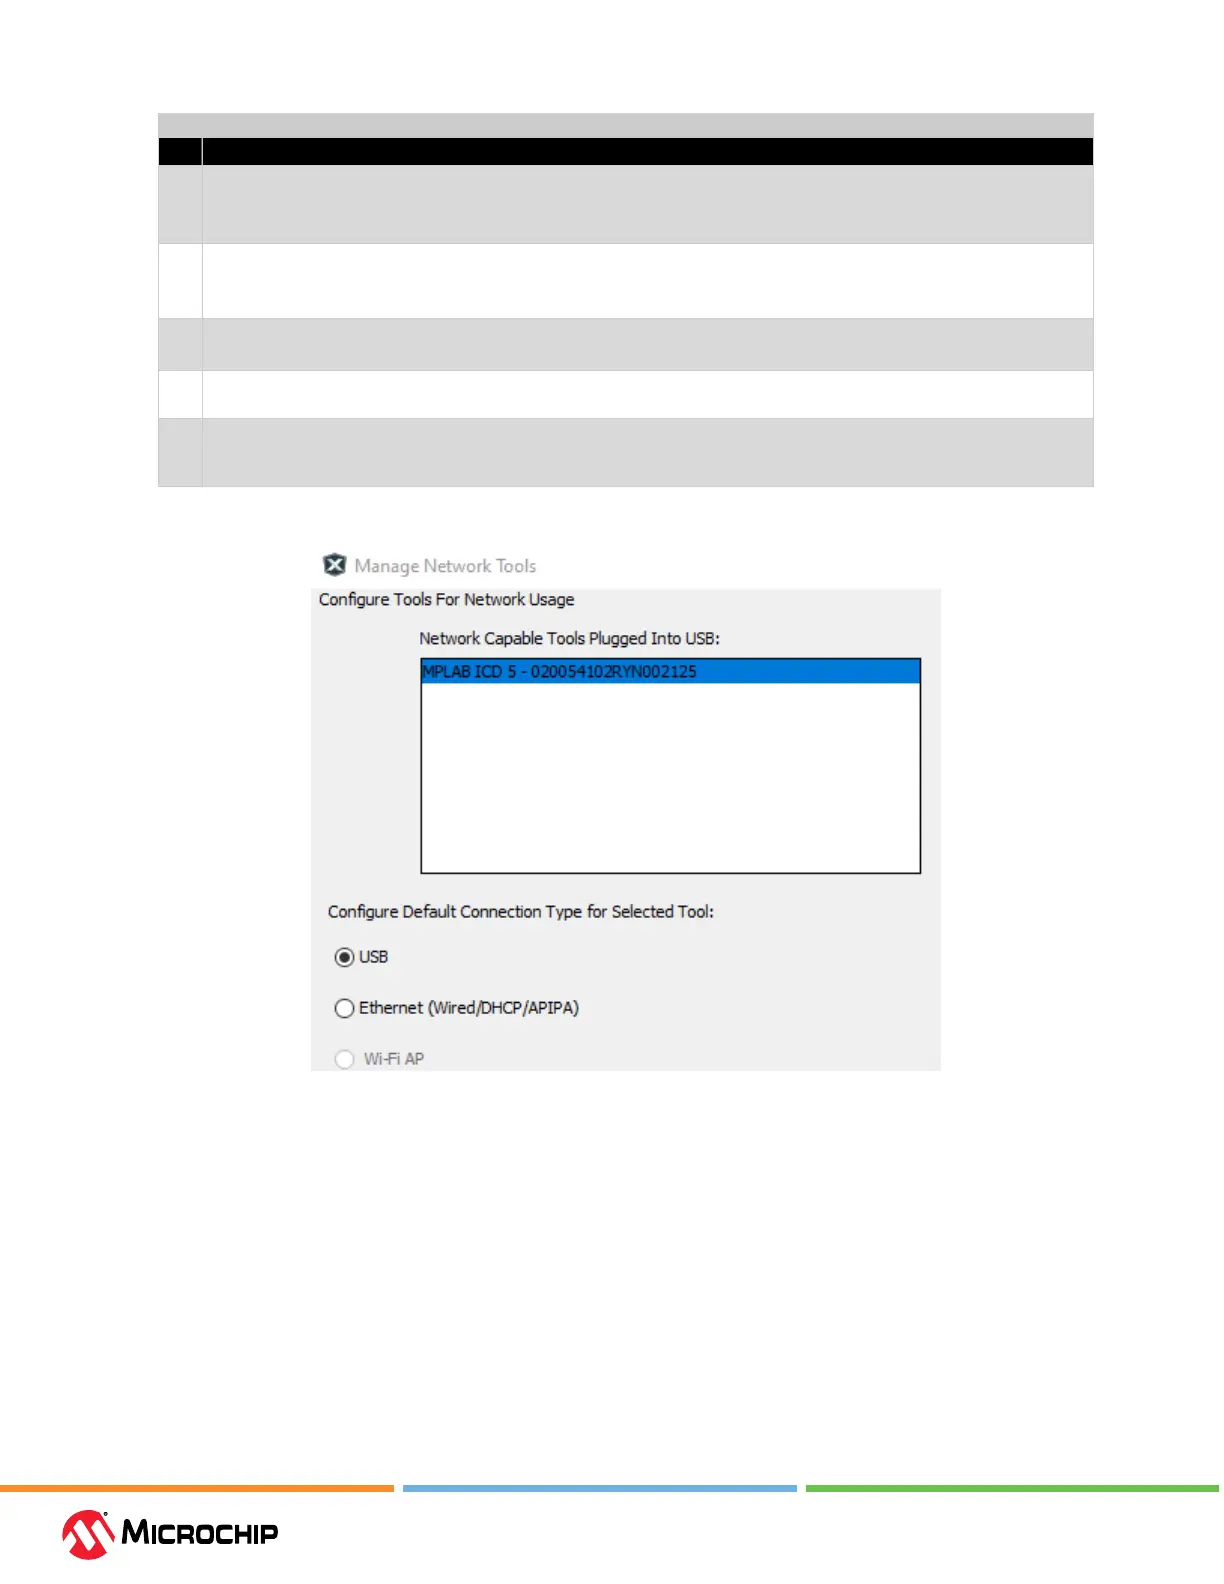
Step Action
4 Under "Congure Default Connection Type for Selected Tool" select the radio button for the connection you want.
Ethernet (Wired/StaticIP): Input Static IP Address, Subnet Mask and Gateway.
Click Update Connection Type.
5 If Ethernet communication was chosen, ensure the PoE injector is connected and then unplug the USB cable from your
debugger unit.
Note: Keep the Manage Network Tools window open.
6 The debugger will restart automatically and come up in the connection mode you selected. Then:
The LEDs will display for either a successful network connection or a network connection failure/error.
7 Now go back to the "Manage Network Tools" dialog and click on the Scan button, which will list your debugger under
"Active Discovered Network Tools." Select the checkbox for your tool and close the dialog.
8 If your debugger is not found under "Active Discovered Network Tools," you can manually enter information in the
"User Specied Network Tools" section. You must know the IP address of the tool (by the way of network admin or
static IP assignment).
Figure 3-3. Inial USB Connecon
3.3 Target Connecons
MPLAB
®
ICD 5 In-Circuit Debugger connects to a target via an 8-pin at cable assembly. For legacy
target connections, an adapter board is available. There is also a Current Sense connection for use
when Power Debugging.
Device and communication types, as well as an available adapter board, are discussed in the
following sections.
Note: MPLAB ICD 5 can power the target. For details, see 10.2. Power Specications. Select
powering the target in the Project Properties window, “ICD 5” category, “Power” option category.