OM-291417 Page 26
F
Complete Parts List is available at www.MillerWelds.com
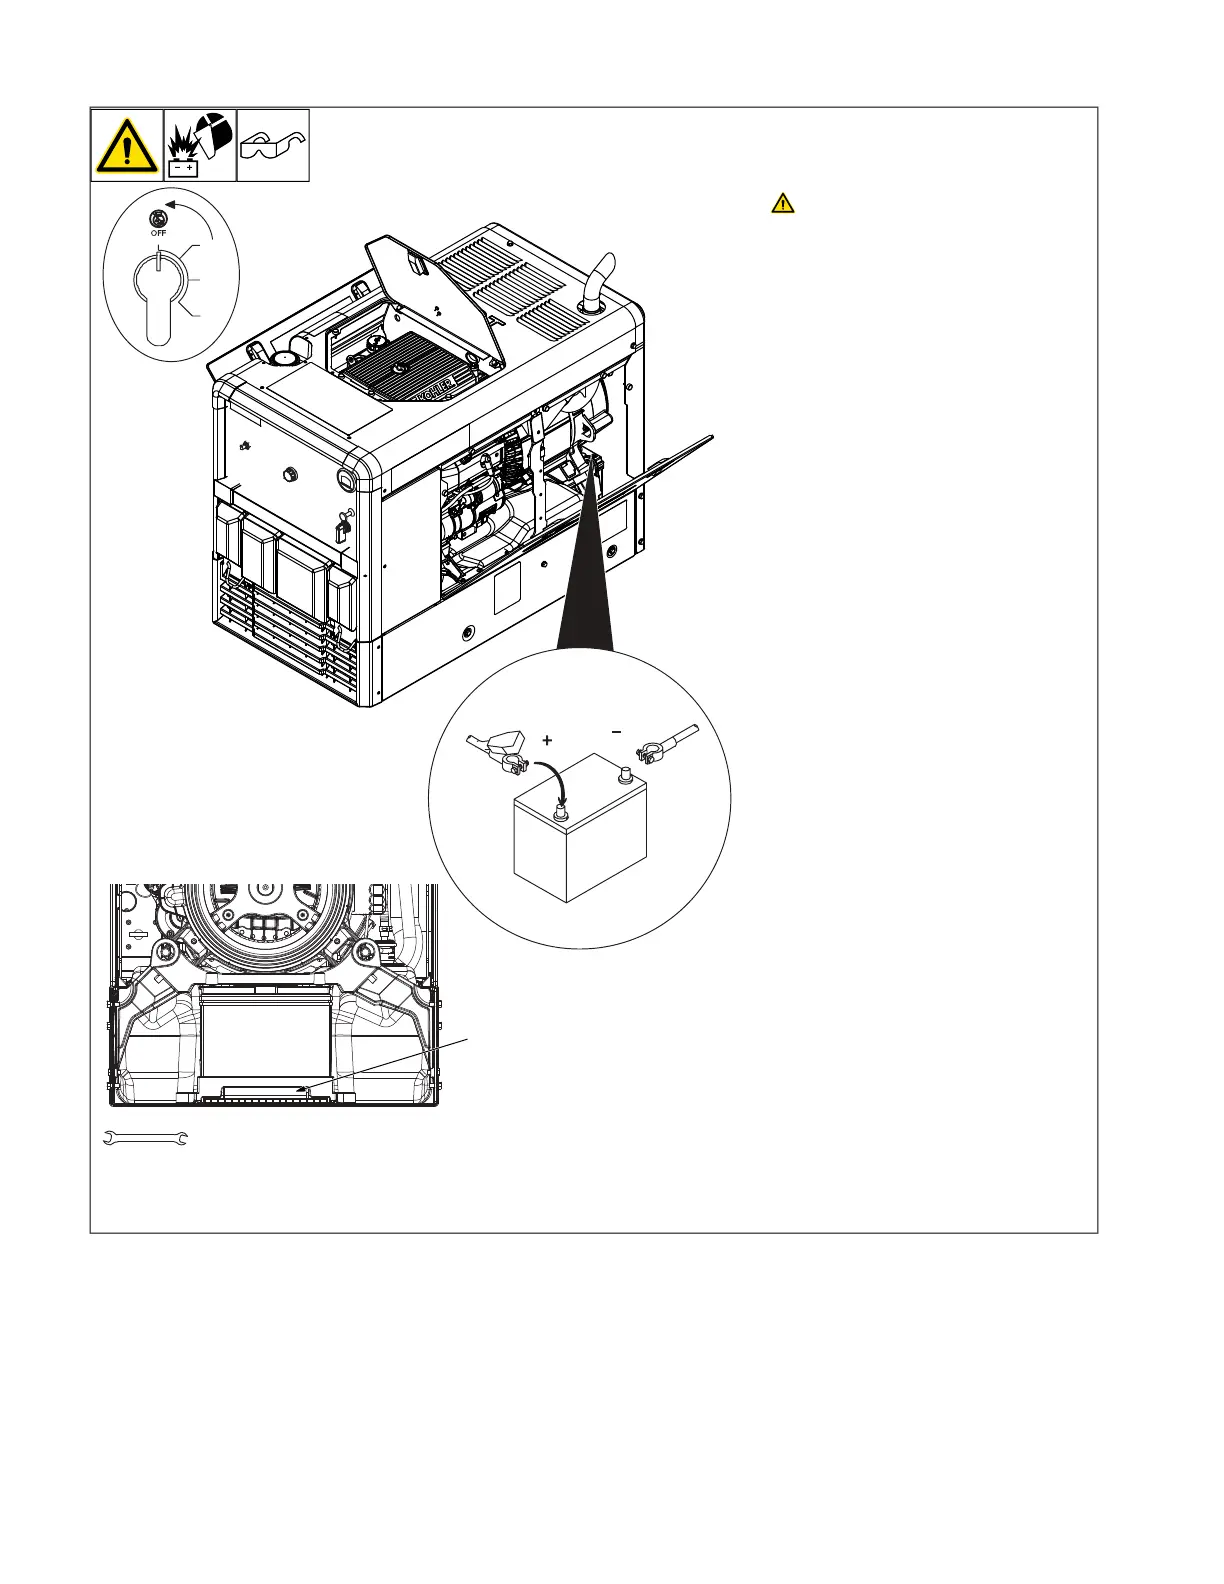
5-6. Connecting Or Replacing The Battery
OM-222 Page 1
allen_wrench
NGO’s
tools/
flathead philips head wrench
pliers
knife
heavy-duty workclamp light-duty workclamp wirecutter frontcutter
allen_set
needlenose
steelbrush nutdriver
chippinghammer
solderiron
stripcrimp
drill
torque wrench
socket wrench
hammer awl file
crimper
paintbrush
feelergauge flashlight ruler
toothbrush
greasegun
qtip (swab)
vicegrip
handream
punch
filterwrench
strapwrench
airgun
solvent pinextractor eprompuller pipewrench
torque screwdriver
crescent wrench
3/8, 1/2 in.
Connect negative (-) battery cable
last.
Battery is most easily accessed through the
side door. Connect battery, negative cable
last. Close access door.
l Do not allow the battery cables to touch
opposing terminals. When connecting
the battery cables attach the positive (+)
cable to the positive (+) battery terminal
first, followed by negative (-) cable to
negative (-) battery terminal.
l Never start the engine when the cables
are loose or poorly connected to the bat-
tery terminals.
l Never disconnect the battery while the
engine is running.
l Never use a quick battery charger to
start the engine.
l Do not charge battery with Engine Con-
trol switch On.
l Always disconnect the negative (-) bat-
tery cable before charging battery.
1 Battery Holddown
To change battery, remove rear panel and
battery holddown.
Be sure battery cables are not pinched when
installing battery and replacing rear panel.
 Loading...