OM-263 657 Page 24
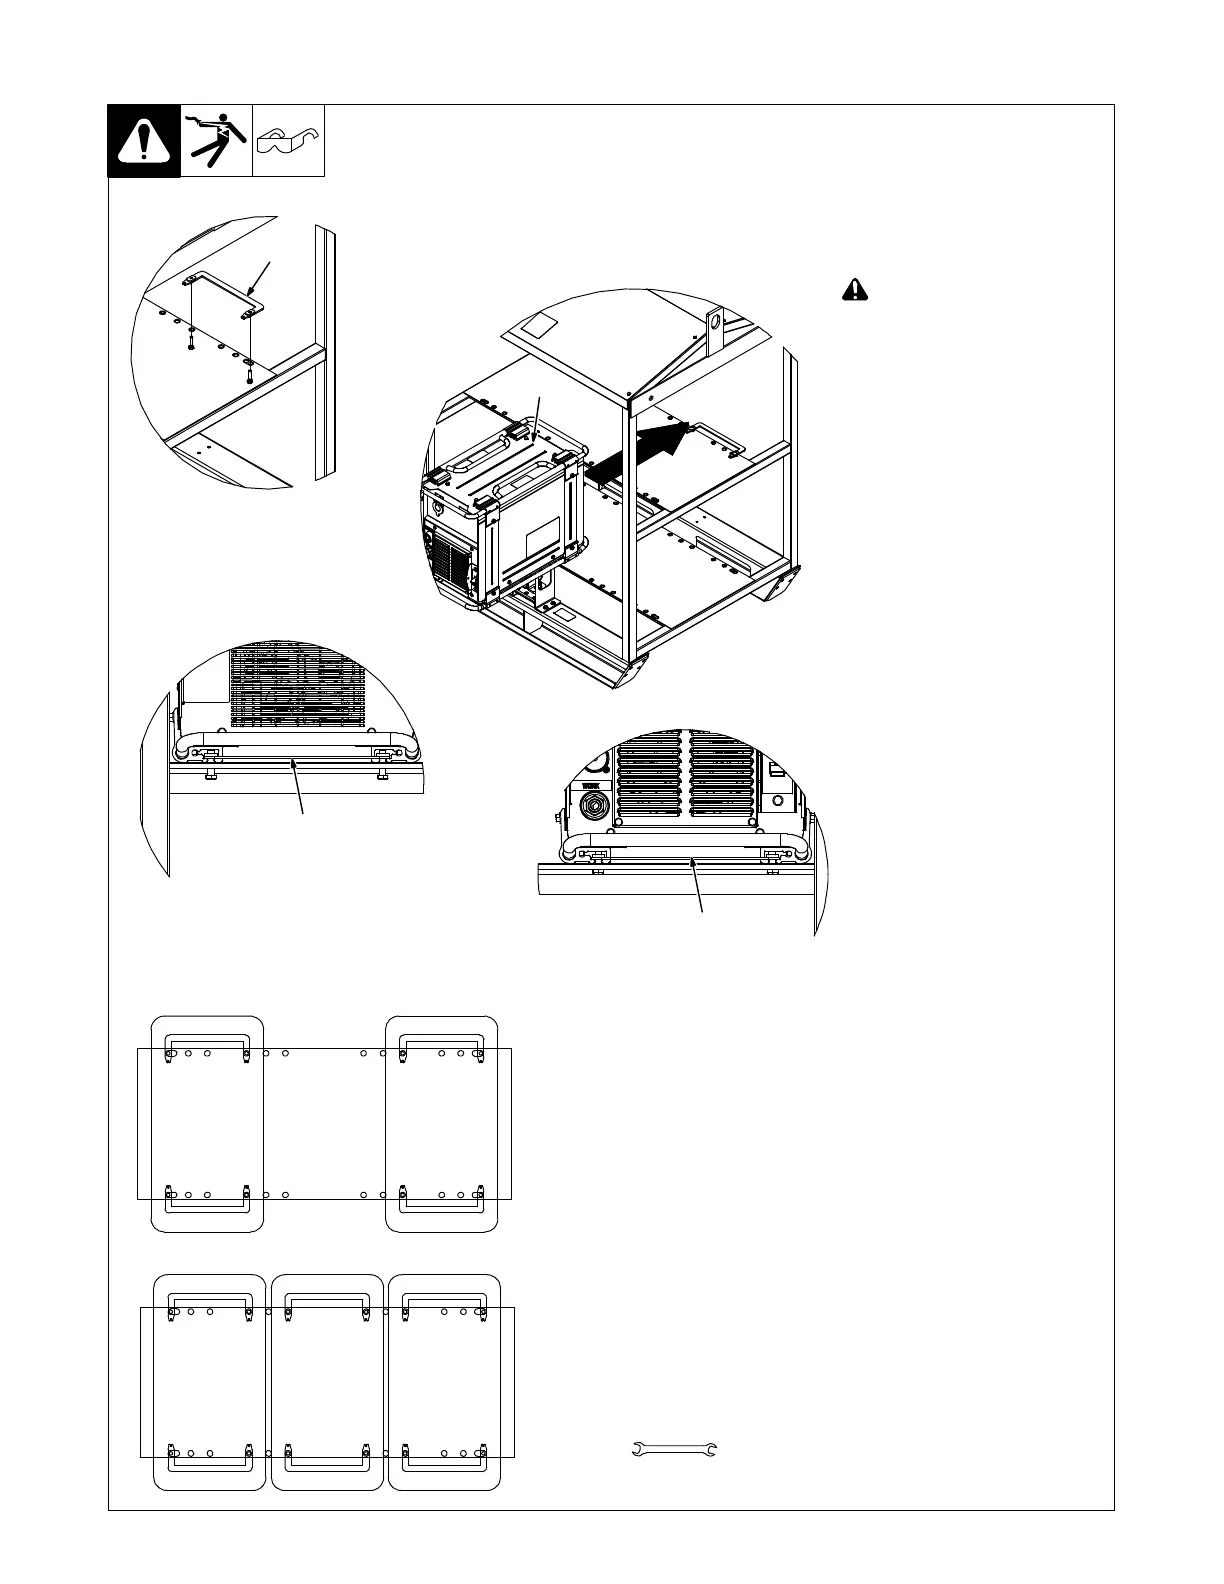
5-13. Installing Welding Power Source Onto Rack
Rack − 195466 Universal Inverter
Rack
Mounting Kit − 301100
One Kit Per Machine
(See OM-259 463 For rack
setup and operation)
Have only qualified persons make
this installation.
! Turn Off welding power
sources before inspecting or
installing rack.
1 Rear Rack Mounting Bracket
Loosely attach one rack mounting
bracket (with the weld nuts facing
up) on the back of the rack with 2
screws.
2 Welding Power Source
Slide power source onto rack in front
of the bracket.
Align the channels of the rear base
brackets with the rack mounting
bracket. Push the power source
back so the mounting bracket slides
into the channels.
3 Front Rack Mounting Bracket
Slide the second rack mounting
bracket (with the weld nuts facing
up) into the channels on the front
base brackets. Attach bracket to
rack using 2 screws. Tighten all 4
bracket screws to 10 ft lb (13.6 N⋅m).
259 422-A / 254 712-A
Hole Layout For 4-Pack Rack
Hole Layout For 6-Pack Rack
1
2
1
Rear Of Power Source And Rack
Front Of Power Source And Rack
3
Tools Needed:
1/2 in.