4
CALIBRATION
65
4.1.6 Calibration of the MACSPlex Filter Plate
1 Click on the Tools tab on the side pane of the Software and check the Calibrate uptake unit box. Red
closed circles indicate that the uptake components are not calibrated.
2 Click the Experiment tab on the sidebar of the MACSQuantify Software and select MACSPlex Filter
Plate from the Rack pull-down menu. If the MACSPlex Filter Plate is not selected, the MACSQuant®
Instrument will display a prompt screen.
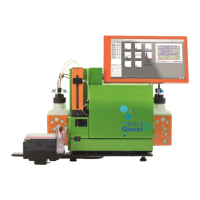
3 Place a Chill 96 Rack onto the MACS Orbital Shaker and load an empty MACSPlex Filter Plate.
4 Click Start calibration. The robotic needle arm will automatically move forward and insert the uptake needle
into the rack position H12 of the MACSPlex Filter Plate. The uptake needle should be positioned at the
center of the well (i.e. equidistant from the well edges) almost touching the well bottom (i.e. only a fraction
of a millimeter from the bottom of the well). To check the uptake needle position, gently wiggle the plate to
ensure that there is a small amount of movement.
5 If this is not the case, carefully adjust the robotic needle arm accordingly.
6 Click Save calibration. The closed green circle indicates that the calibration is completed. Click Test to
confirm that the correct coordinates are saved. The MACSQuant X will automatically test selected positions.
4.1.7 Calibration of custom 96 and custom 384 racks
If 96 and 384 plates of different format (e.g. deep well or round bottom) are used, they might have a different
distance from the bottom of the MACSQuant Orbital Shaker to the bottom of the well. In order to pick the
samples correctly, individual "custom" racks can be defined for each required rack format.
1 Click on the Tools tab on the side pane of the Software and check the Calibrate uptake unit box. Red
closed circles indicate that the uptake components are not calibrated.
2 Click the Experiment tab on the sidebar of the MACSQuantify Software and select Chill 96 rack from the
Rack pull-down menu. If the MACSQuant X 5 Rack is not selected, the MACSQuant Instrument will display a
prompt screen.
3 Proceed as described for standard 96 or 384 plates (see Calibration of the 96-well plate on the
previous page or Calibration of the 384-well plate on the previous page, respectively).
4.1.8 Calibration of Universal Reagent Rack
1 Click on the Tools tab on the sidebar of the Software and check the Calibrate uptake unit box. Red
closed circles indicate that the uptake components are not calibrated.
2 Place the Universal Reagent Rack onto the MACS Orbital Shaker.
3 Load an empty reagent vial in position 4 (front-most position) of the Universal Reagent Rack.
4 Click Start calibration. A dialog box will prompt you to ensure that the Universal Reagent Rack is installed
correctly and that the Single tube rack is removed.
5 Confirm the dialog box by clicking OK. The robotic needle arm will automatically move forward and insert
the uptake needle into the reagent vial position 4. If this is not the case, carefully adjust the robotic needle
arm accordingly.