© 2009 MIMAKI ENGINEERING CO.,LTD.
6.4.2 P.2
6.4.2 Y-axis Motor
1
2
3
4
5
6
7
8
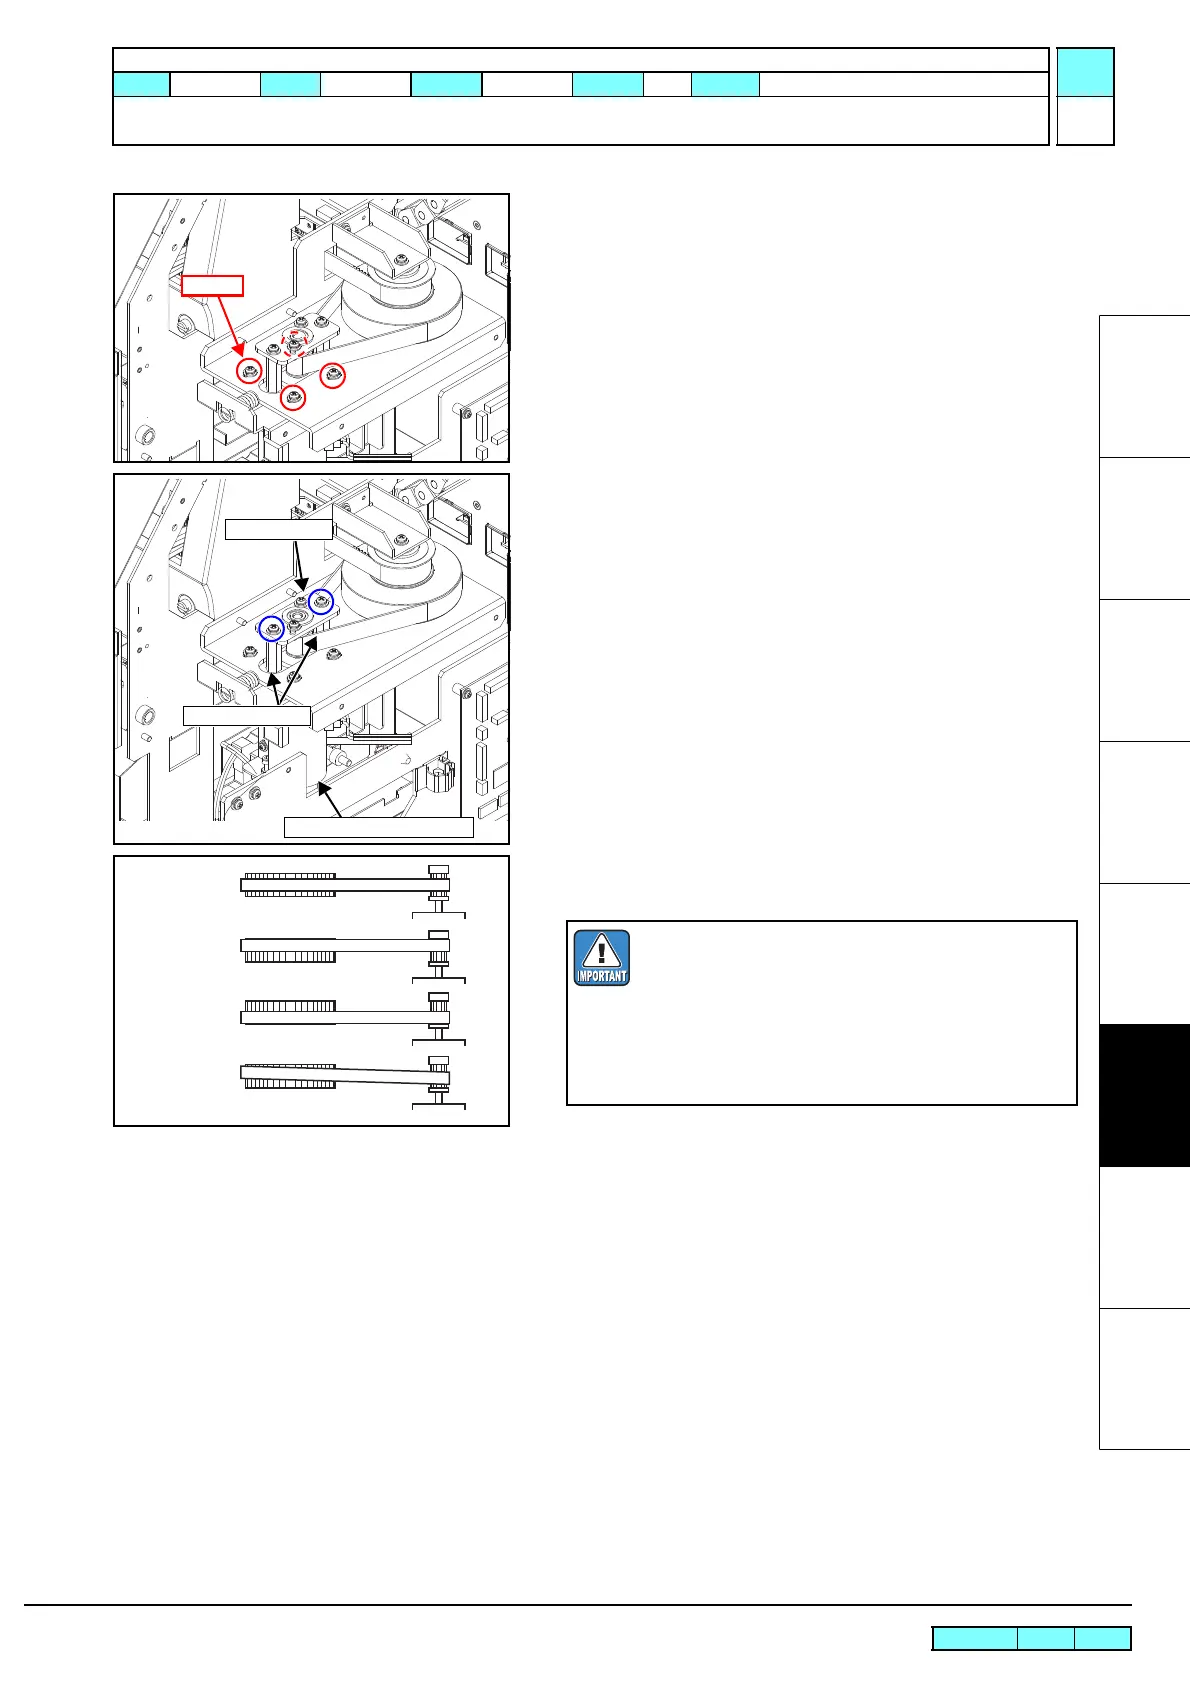
4. Loosen the screws that affix the Y-axis motor belt tension to
reduce the belt tension.
5. Remove the screws from the top of the Y-axis motor and then
remove the YM top plate.
6. Remove the YM stud 33.
7. Remove the Y-axis motor total assy 33 while taking care not to
drop it.
8. Release the clamps and the cable (directly connected to main
PCB assy).
9. Reverse the disassembly procedure for reassembly.
YM Top Plate
YM Stud 33
Y-axis motor total assy 33
Good
Example:
Bad
Example:
Slanting
Horizontal in the middle
Bad
Example:
Good
Example:
Shifted lower
Horizontal but upper
Mount the Y-axis motor so that the belt is
horizontal and centered on the Y drive pulley
(upper side is also acceptable).
After mounting the motor, if the hunting sound is
heard when the motor drives, make adjustments
making reference to the following:
• Adjusting the Y-axis motor current
R.1.0
Maintenance Manual > Disassembly and Reassembly > Drive System > Y-axis Motor
Model CJV30/TPC Issued 2008.08.04 Revised F/W ver. 1.00 Remark
1.0

 Loading...


