EasyManuals Logo

MIMAKI CJV30 Series User Manual

MIMAKI CJV30 Series
316 pages
To Next Page IconTo Next Page
To Previous Page IconTo Previous Page
Page #239 background imageLoading...
Page #239 background image
© 2009 MIMAKI ENGINEERING CO.,LTD.
6.5.12 P.2
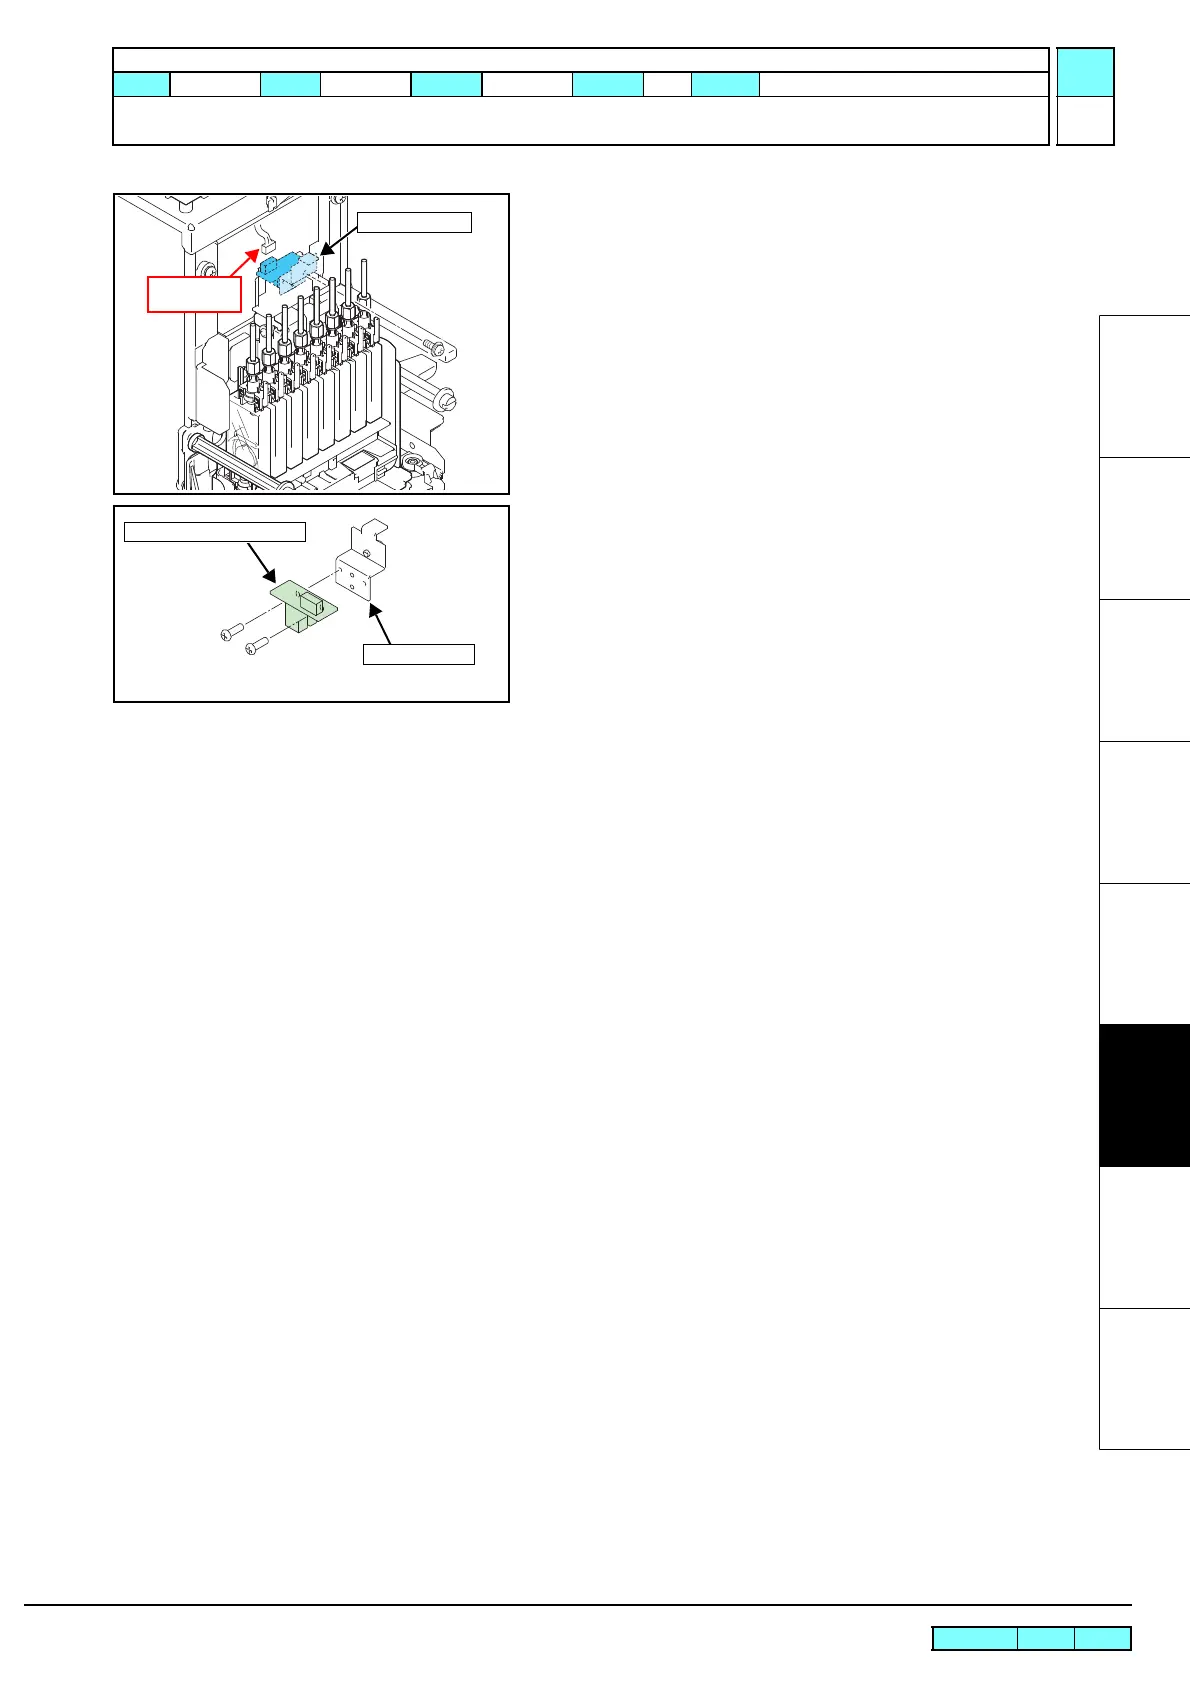
6.5.12 Encoder PCB Assy
1
2
3
4
5
6
7
8
4. Insert a driver through the gap of the damper to loosen the
screws, remove the encoder PCB assy together with L sensor
BKT, and then release the connector.
5. Remove the encoder PCB assy.
6. Reverse the disassembly procedure for reassembly.
L Sensor BKT
Releasing
connector
Encoder PCB Assy
L Sensor BKT
R.1.1
Maintenance Manual > Disassembly and Reassembly > Electrical Parts > Encoder PCB Assy
Model CJV30/TPC Issued 2008.08.04 Revised 2008.09.17 F/W ver. 1.20 Remark
1.1
Rev.

Questions and Answers:

Question and Answer IconNeed help?

Do you have a question about the MIMAKI CJV30 Series and is the answer not in the manual?

MIMAKI CJV30 Series Specifications

General IconGeneral
Cutting FunctionYes
InterfaceUSB 2.0, Ethernet
Power SupplyAC 100-240 V, 50/60 Hz
Print HeadPiezoelectric Inkjet
Resolution1440 dpi
Print ResolutionMaximum 1440 dpi
Printing TechnologySolvent Inkjet
Print SpeedUp to 17.5 m²/h
Ink TypeSolvent Ink
Ink ColorsCMYK, White
Maximum Print Width1610 mm (CJV30-160 model)
Media Width1372 mm (54 inches)
Media ThicknessMaximum 1.0 mm
Cutting Force500 g
Weight180 kg (CJV30-160 model)

Related product manuals