15 - 4 Operator’s Manual
15 DICOM/HL7
2. Click in the top-right part or [Send To].
3. Click to select “DICOM” in the Target box on the left side, then select the DICOM print server
on the right side, and click [OK].
To send images using a shortcut key
You can send single-frame images to a DICOM print server while saving to hard drive using a
shortcut key.
1. Define the short key.
2. Set a default printer server.
3. Press the shortcut key to send the image to the hard disk; the system also sends the single-
frame file to the printer server.
To send images to DICOM Print after an exam ends
Preset Sending/printing after End Exam, for details see “4.1.2 General”.
Start the scan and obtain the image. Each time [End] is tapped, the system will send the image to
the default DICOM print server for printing.
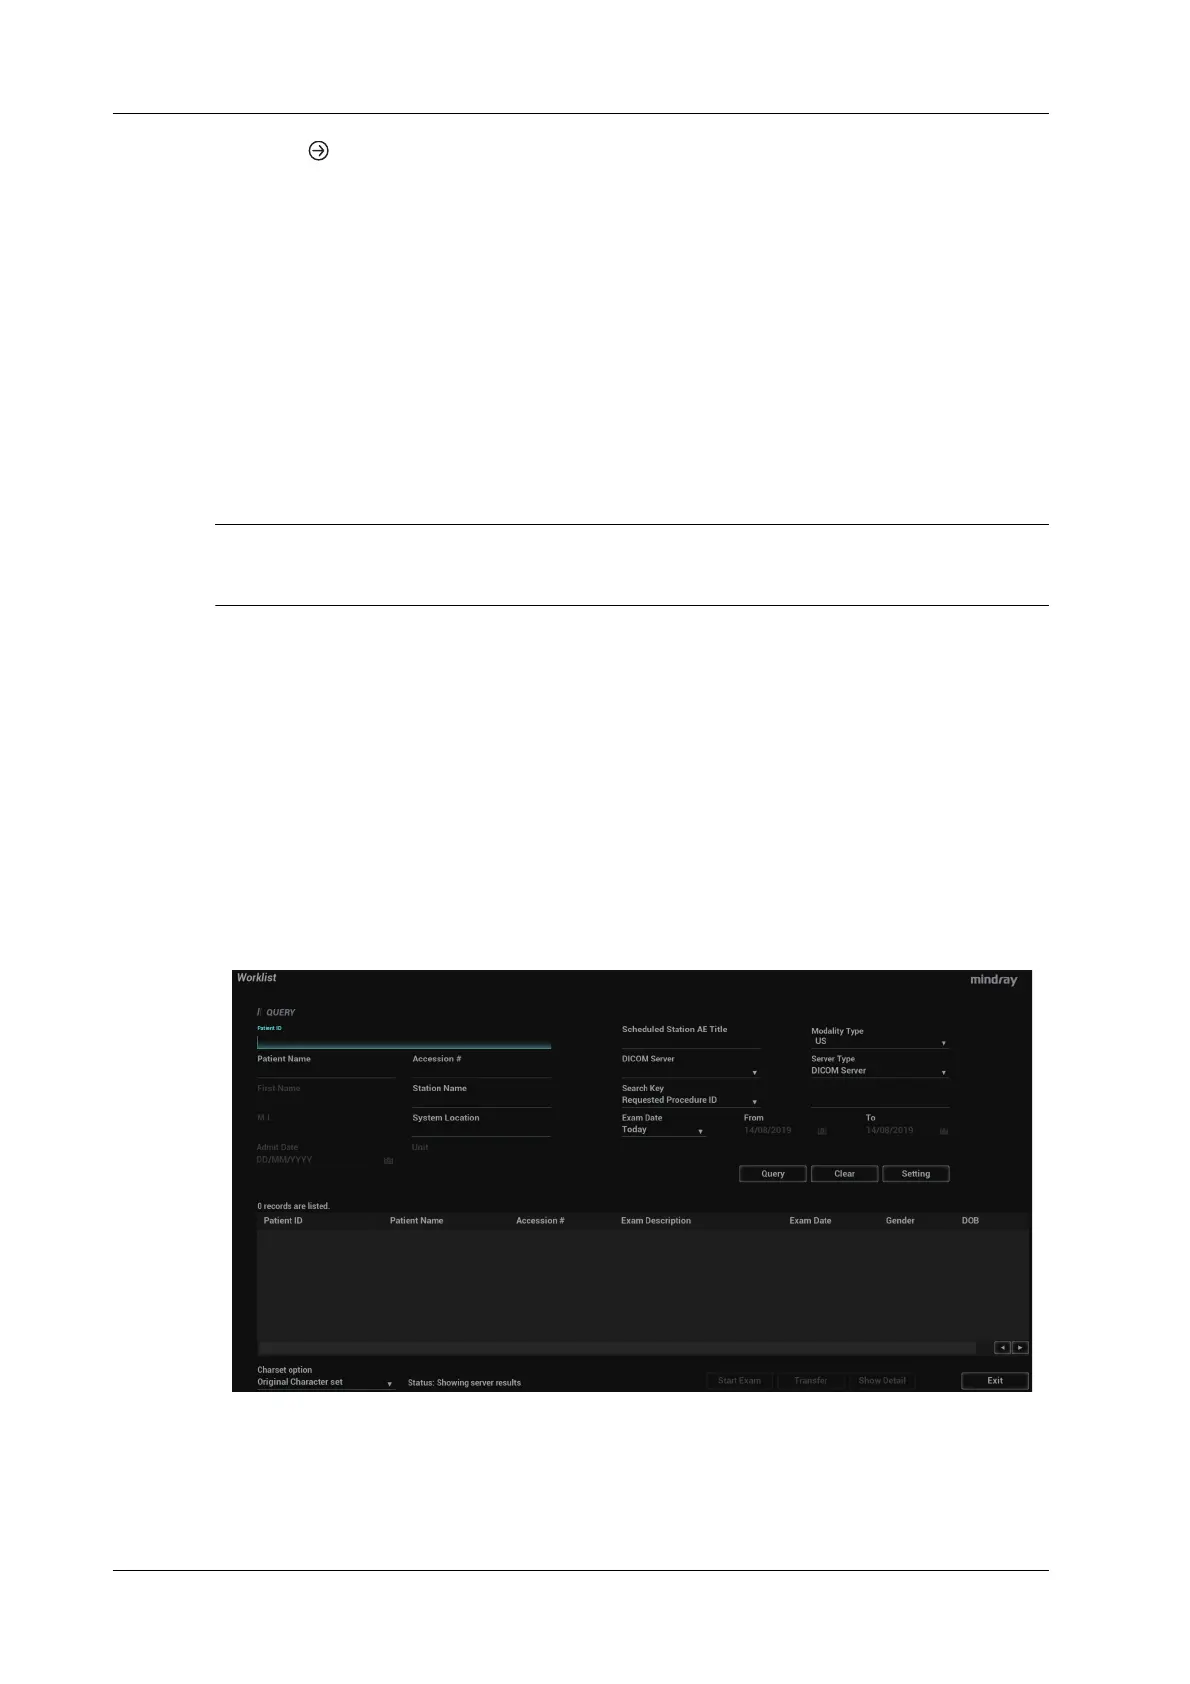
15.3 Worklist
When the DICOM basic package is configured and the Worklist server has been set, click
[Worklist] in the “Patient Info” screen to query or import the patient data.
The system supports: DICOM and HL7.
Perform the following procedure:
1. Tap [Info] on the touch screen to enter the patient information page.
2. Click [Worklist] to enter the Worklist page.
3. Guarantee the data source: after select the service type, select the worklist server from the
corresponding server.
4. Input the searching condition:

 Loading...


