13-26 Probes and Biopsy
2. Confirm that the needle-guided bracket is free of damage, deformation, stripping,
malfunction, loose or missing parts.
3. Confirm that the needle-guided bracket is securely mounted in the correct position.
Installing the Needle-guided Bracket
NGB-001
(1) Put on the sterile transducer sheath.
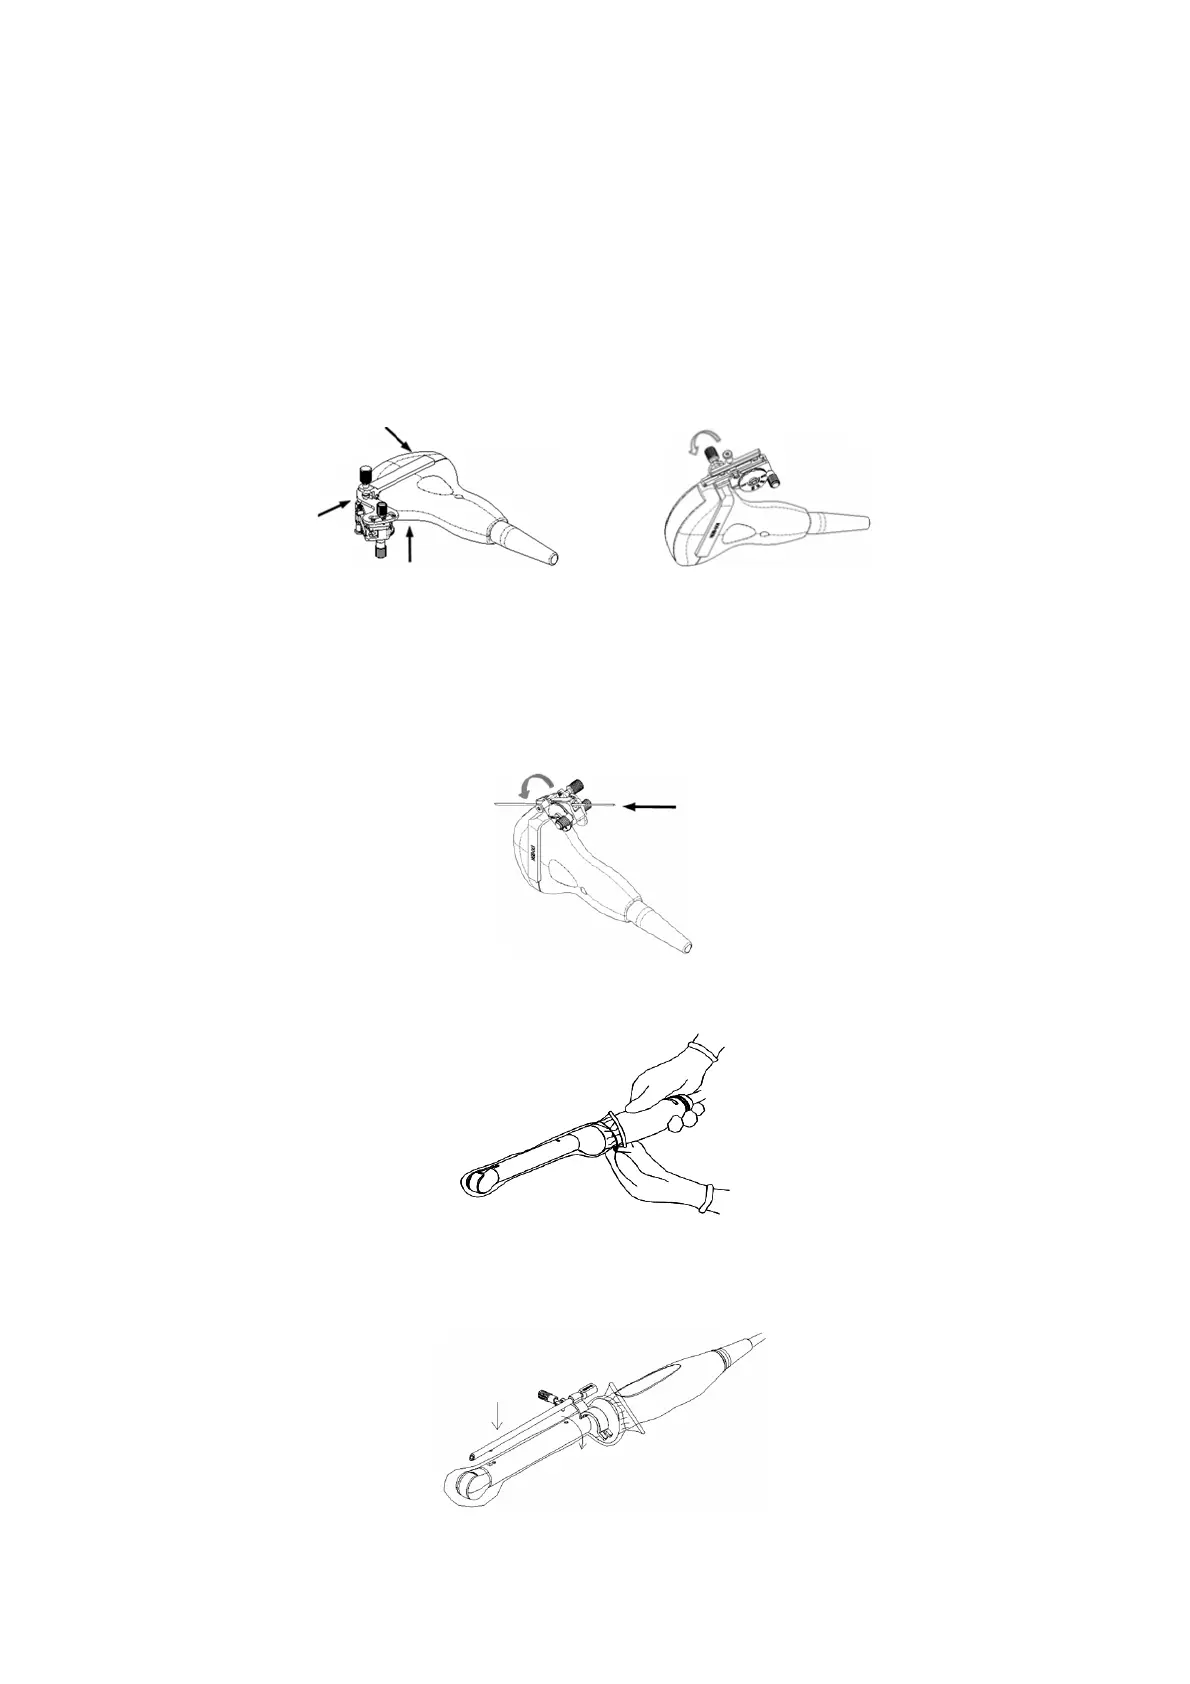
(2) Hold the transducer by one hand, select the proper needle-guided bracket, and hold
it with the other hand. Match the groove of the bracket with the tab of the transducer.
Amount the bracket onto the transducer.
(3) Screw the pinch nut of the needle-guided bracket to confirm that the needle-guided
bracket is properly installed on the transducer.
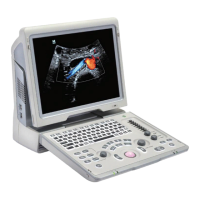
(4) Adjust the dial scale to the required needle type shift, and then screw the needle
fixing nut to lock the dial scale.(To adjust the dial scale you have to loose the needle
fixing nut first.)
(5) Pull the lock pin and close the V-shaped cover to fix the lock pin in the groove of the
needle type adjusting base, so as to install the needle into the guiding hole.
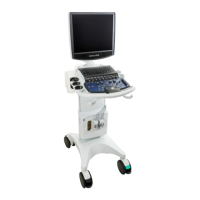
NGB-004
1. Put on the sterile probe sheath.
2. Open the retaining clamp, align the needle-guided bracket with the transducer to locate
the locating bulge on the needle guide to the locating grooves on the transducer, and
then turn the retaining clamp to match it with the transducer.