FX-2000 User Guide
16
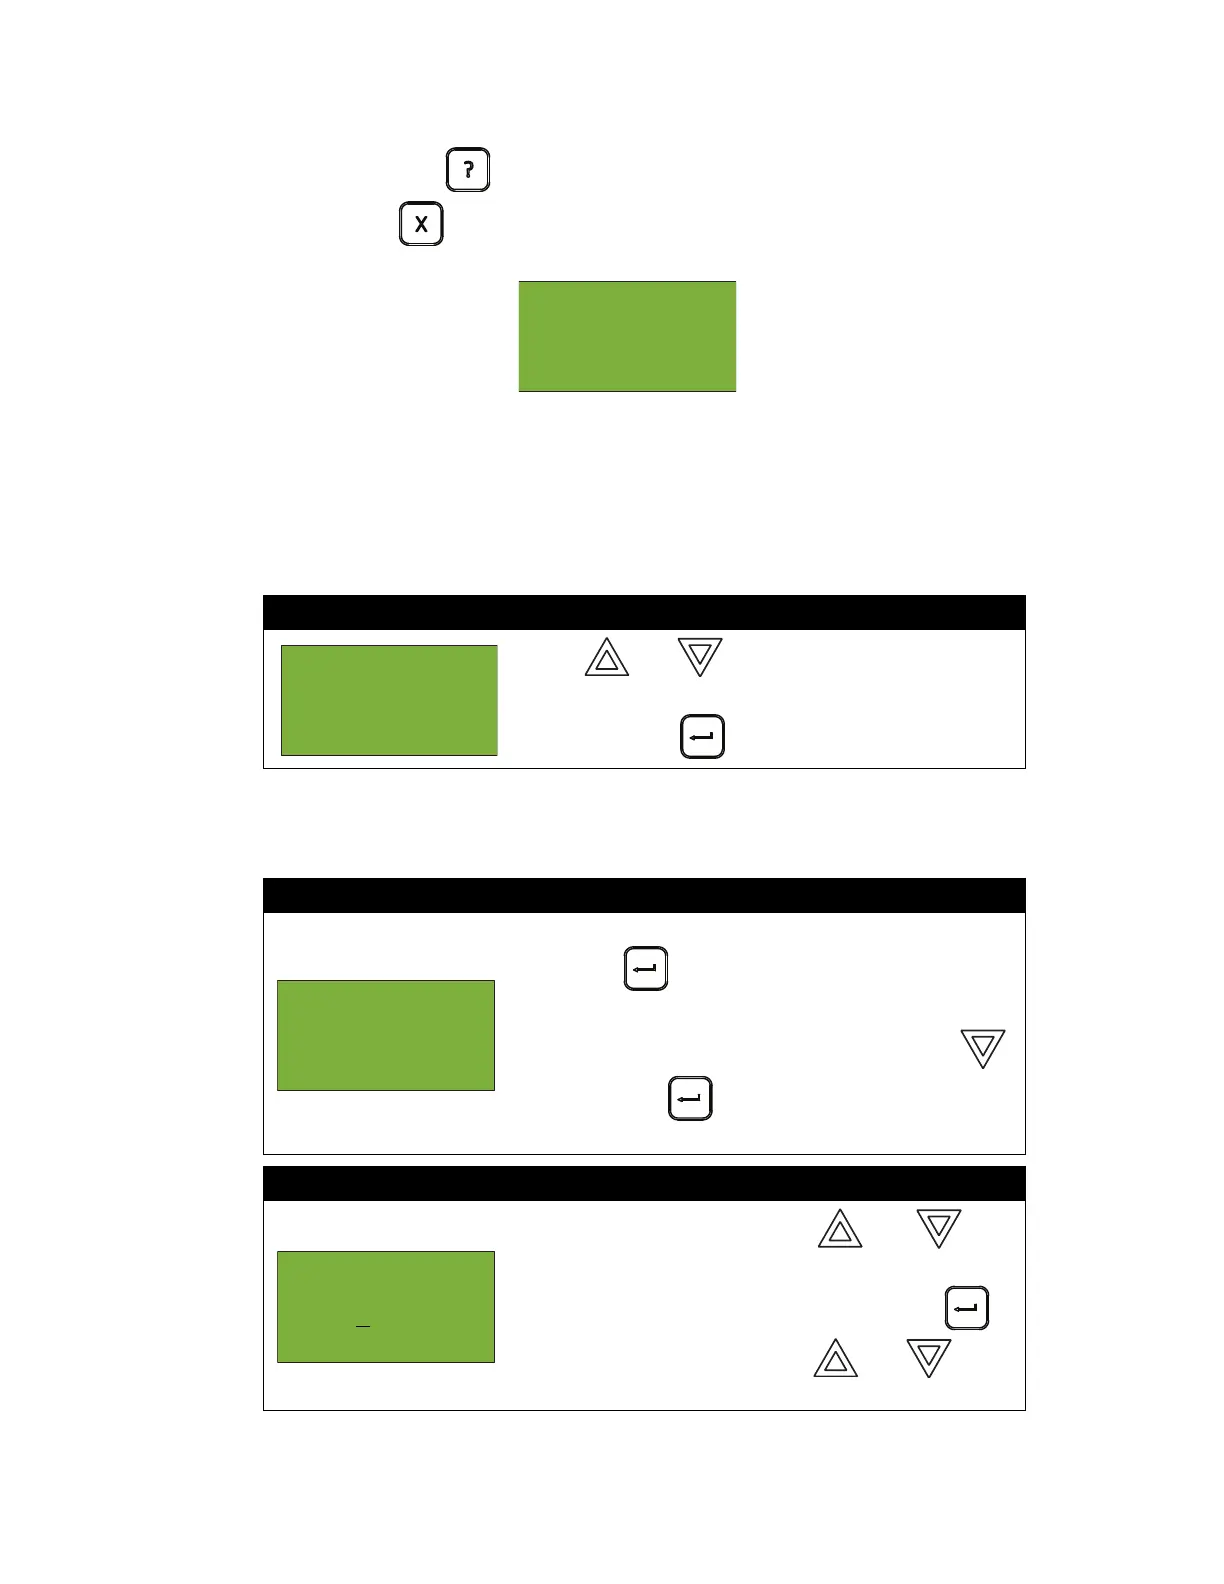
• Press and hold INFO ( ) for more information on the current level.
• Press CANCEL ( ) to exit to the Reports Menu.
For example, if you select loop two, the screen will appear as follows:
• The first and second lines pinpoint the exact device.
•The current level is a point of reference number that is helpful to our technicians.
•The percent alarm shows how close the device is to going into alarm: 0% is the least likely,
and 80% is the most likely.
Verified Counts
This option reports on any pre-alarmed devices that are set to verification mode. This report lists
each time a device pre-alarms. If no devices are set to verification mode, then no report will display.
At this point the display will vary, depending on whether or not you have a printer connected.
• If a printer is not connected to the panel, skip to step 3.
• If a printer is connected to the panel, follow steps 2 and 3, below.
Step 1: Select Verified Counts
1. Use and to scroll the cursor to “Verif
Counts”.
2. Press ENTER ( ) to continue.
Step 2: Print the Verified Counts
• To print the Verified Counts to the printer, press
ENTER ( ) when the cursor flashes beside
“Printer”.
•To print the Verified Counts to the screen, press
then ENTER ( ) when the cursor flashes beside
“Screen”.
Step 3: Select loop number
•Select a loop number by using and to
scroll through the numbers, or
•Select all loop numbers by pressing ENTER ()
and waiting five seconds. Use and to
scroll the cursor through the loops.
Loop 2 Address
001
Low Profile ION
Det
- Reports
Menu -
2 Event Log
3 Current
^
^
- Report to -
1 Printer
2 Screen
-Select Loop
Number -
Loop: A
L L

 Loading...