28 TX3 Touch Screen Installation Manual
Installation
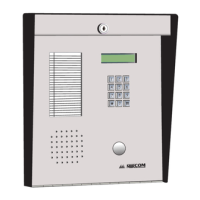
2.3 Installing TX3-TOUCH-F15-B/C/D
Warning: To prevent overheating, do not install any of the TX3 Touch
Screens in direct sunlight.
The flush mount enclosure mounts on the wall. Mount the enclosure right-side up
(the Mircom logo on the door is on the bottom).
You need:
• 4 fasteners appropriate for the wall that you are mounting the enclosure
on.
To flush mount the enclosure
1. Find a suitable location for the enclosure. You can mount the enclosure
using the keyholes on the back, or the knockouts on the side, or both.
2. Trace an opening in the wall for the enclosure with one side aligned with
a wall stud.
3. Cut an opening in the wall 3/32” (3 mm) larger than the tracing, ensuring
that one side is aligned with the wall stud or supporting structure.
4. Insert the enclosure into the wall cutout, and using the side of the
enclosure as a template mark the hole mounting locations (either keyholes
or knockouts or both).
5. If you are using the keyholes, remove the enclosure and place 2 fasteners
halfway into the wall into the two top keyhole locations.
6. Place the enclosure onto the top fasteners, then lower it so that the
fasteners fit in the narrow part of the keyholes.
7. Screw the other fasteners into the remaining holes.
8. Tighten all fasteners into place.
9. Proceed with the power supply installation described in section 2.11 on
page 67.
 Loading...