Installation Set up the robot arm
SD-/SQ series 3 - 17
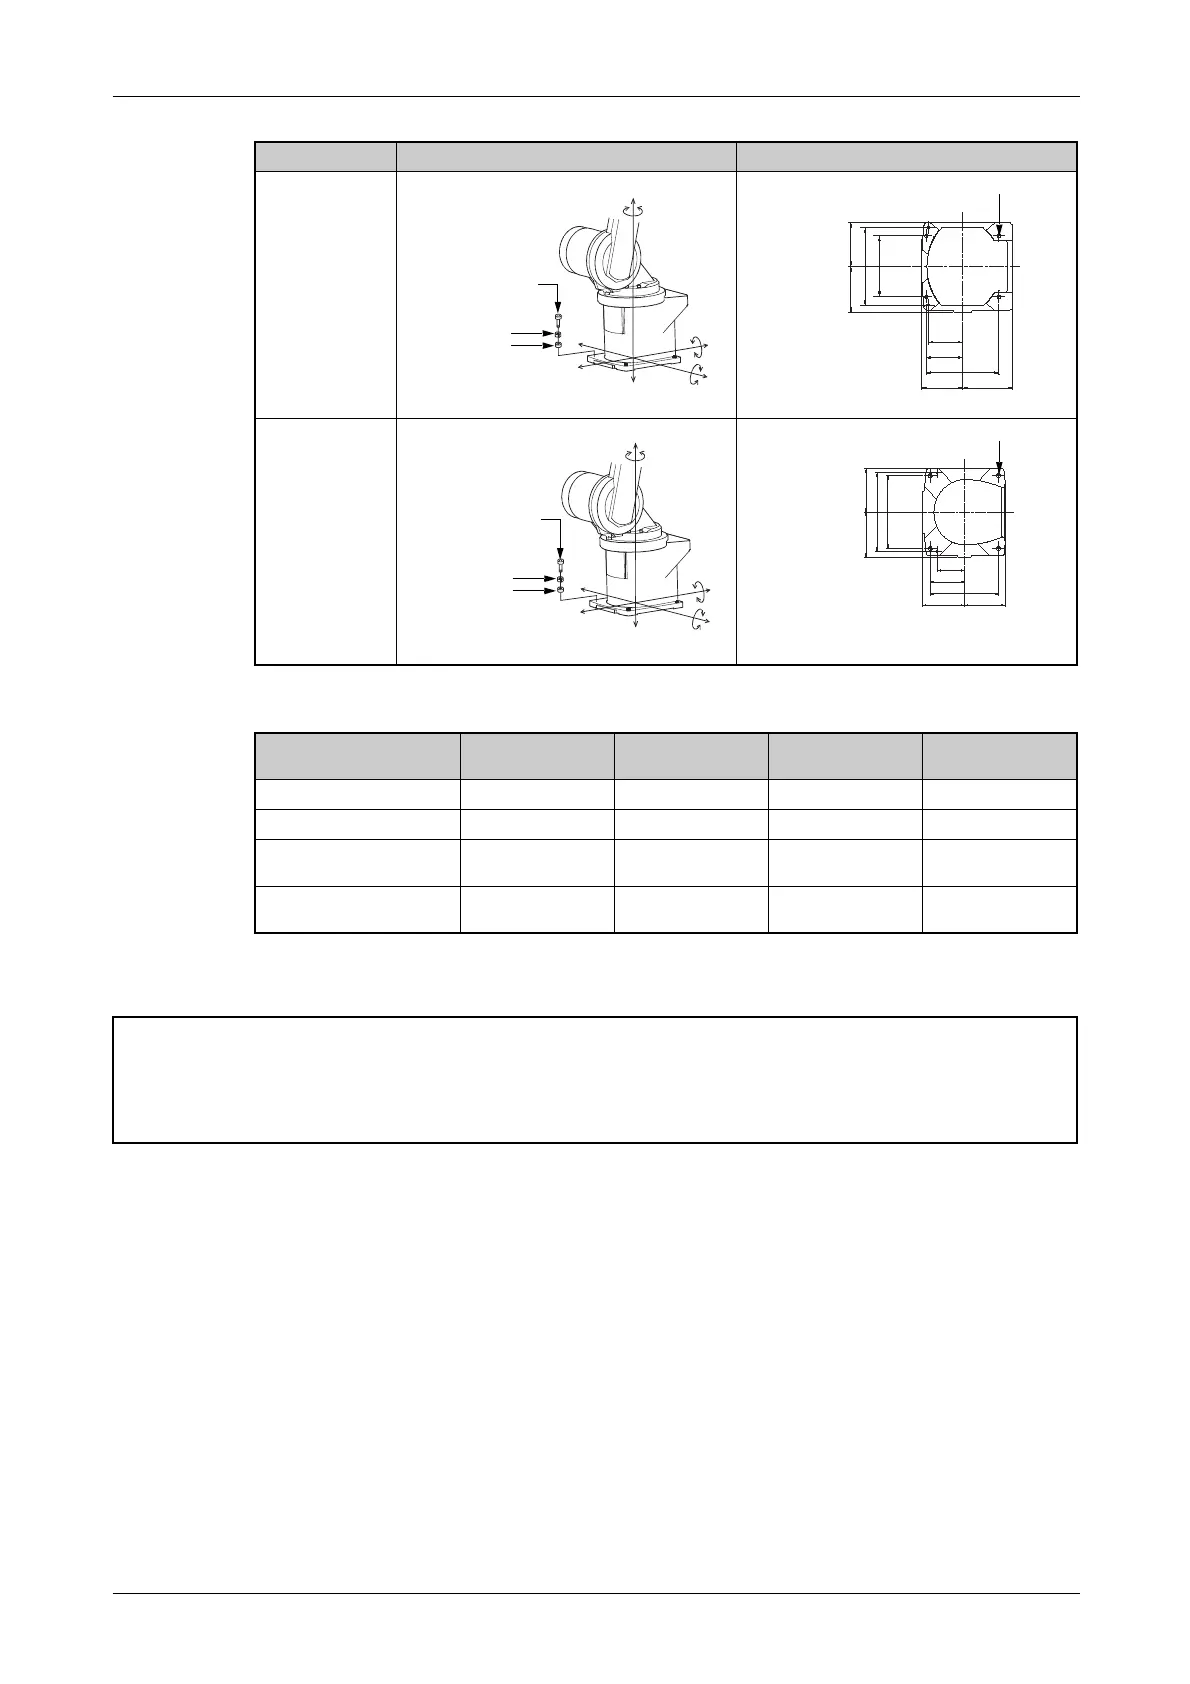
RV-6SD/6SDL,
RV-6SQ/6SQL
R001445E R001444E
RV-12SD/12SDL,
RV-12SQ/12SQL
R001445E R001446E
Load
RV-2SD,
RV-2SQ
RV-3SD/3SDJ,
RV-3SQ/3SQJ
RV-6SD/6SDL,
RV-6SQ/6SQL
RV-12SD/12SDL,
RV-12SQ/12SQL
Moment of tilt M
L
[Nm]
240 410 892 1530
Torsional moment M
T
[Nm]
150 400 892 1530
Translational forces on
horizontal plane F
H
[N]
700 1000 800 1300
Translational forces on
vertical plane F
V
[N]
820 1200 1400 2300
Tab. 3-3: Reaction forces on the base area of the robot
E
ATTENTION:
When installing the robot, make sure that there is enough space remaining at the rear of the
robot arm to connect the cable used and to replace the backup battery.
Robot arm Fixture View from below
Tab. 3-2: Set up the robot arm (2)
Fixing
screws (4)
M8 x 40 Allen screw
Snap ring
Washer
Installation
side
Installation side
Front side of the
robot arm
4-9 fixing boreholes
Fixing
screws (4)
M12 x 45 Allen screw
Snap ring
Washer
Installation
side
Installation side
Front side of the
robot arm
4-14 fixing boreholes
 Loading...


