
T
Timothy FlowersAug 14, 2025
Why won't my Mitsubishi HC4000 turn on?
- Jjames99Aug 14, 2025
If your Mitsubishi Projector isn't turning on, make sure the lamp cover is securely fitted. If that's not the issue, try resetting the lamp operating time.
Why won't my Mitsubishi HC4000 turn on?
If your Mitsubishi Projector isn't turning on, make sure the lamp cover is securely fitted. If that's not the issue, try resetting the lamp operating time.
Why does my Mitsubishi HC4000 show 'NO SIGNAL'?
If your Mitsubishi Projector displays 'NO SIGNAL', several factors could be at play. First, ensure the connected device is powered on and functioning correctly. Check if the external device is actually outputting signals, especially if it's a notebook computer. Verify the cable connecting the projector to the external device isn't defective and is plugged into the correct terminals. Also, confirm that the connected device is correctly selected as the input source. If you're using an extension cord, try replacing it with the supplied cable to see if that resolves the issue; if it does, consider using an RGB signal amplifier with the extension cord.
Why does my Mitsubishi Projector turn off by itself?
Your Mitsubishi Projector might be turning off due to a few reasons. The intake and/or exhaust vents could be blocked, which is indicated by the STATUS indicator blinking orange. If this is the case: 1. Wait for the fans to stop (until the STATUS indicator goes out). 2. Unplug the power cord. 3. Wait at least 10 minutes. 4. Plug the power cord back in. 5. Press the POWER button. If the STATUS indicator is steady red, the lamp needs replacing. Also, check if AUTO POWER OFF is set to OFF. A deteriorated lamp may also cause the projector to turn off after a short time.
Why are my Mitsubishi HC4000 Projector images blurred?
Blurred images on your Mitsubishi Projector can be due to several factors. Try adjusting the focus. Clean the lens. Press the t or u button on the remote to eliminate flicker. Adjust TRACKING and FINE SYNC in the SIGNAL menu, as well as BRIGHTNESS and CONTRAST in the IMAGE menu. Finally, ensure the projector and screen are perpendicular to each other.
How to improve dark projected images on Mitsubishi Projector?
If the projected images from your Mitsubishi Projector appear dark, you can try adjusting the BRIGHTNESS and CONTRAST settings in the IMAGE menu. If adjusting these settings doesn't resolve the issue, consider replacing the lamp.
What to do if the remote control for Mitsubishi Projector doesn’t function?
If the remote control for your Mitsubishi Projector isn’t working, first check that the batteries are correctly loaded and not weak. Ensure that the remote control sensor on the projector isn’t exposed to direct sunlight or fluorescent light. Use the remote control within its specified operation range and at least 10 cm away from the projector.
Why are my Mitsubishi Projector images wavy?
Wavy projected images on your Mitsubishi Projector can be caused by a few things. Ensure that the plugs of the cables are securely connected to the external devices. Keep the projector away from devices emitting interfering radio waves. If you've adjusted the keystone, the image may be distorted depending on the input signal; try to readjust the keystone so that the amount of keystone correction is as small as possible.
What to do if Mitsubishi Projector asks for a password?
If your Mitsubishi Projector is displaying a password screen, it means the PASSWORD FUNCTION in the FEATURE menu has been set to DISPLAY INPUT. You should enter the password or contact the person in charge of managing the projector.
How to fix a Mitsubishi HC4000 Projector when no image appears on the screen?
If no image appears on the screen of your Mitsubishi Projector, start by ensuring the lens cap is removed. It can take about a minute for the lamp to light up. If it still doesn't light, wait a few minutes and try again. If the projector was recently turned off before cooling down, wait for the fan to stop before pressing the POWER button. Also, check that the intake vent is clean and that SCART INPUT in the FEATURE menu is set to OFF. Inspect the cables connected to external devices for damage. If using an extension cable, test with the supplied cable; if it works, add an RGB signal amplifier to the extension cable. For HDMI connections, ensure your HDMI Signal Distributor or AV amplifier supports HDMI 1.3 Deep Color. Finally, consult the video device's manual for proper connection instru...
Essential safety instructions for operation and maintenance.
Guidelines for safe and optimal projector placement and environmental conditions.
Lists all items provided with the projector package.
Step-by-step guide for inserting batteries into the remote control.
Identifies external parts, control panel, and terminal connections on the projector.
Details the functions of buttons on the remote control for picture quality adjustments.
Specifies the effective distance, angles, and conditions for remote control operation.
Guidance on screen placement and determining projection distance for various screen sizes.
Tables detailing projection distances and black space for 4:3 and 2.35:1 aspect ratios.
Procedures for correcting skewed images and trapezoidal distortion using keystone adjustment.
Instructions for ceiling mounting, rear projection, and general placement safety.
General instructions and preparation for connecting video sources to the projector.
Details on connecting via RCA, S-Video, and Component Video terminals.
How to connect using HDMI for superior image quality, including HDCP support.
Proper procedure for plugging in the power cord and associated safety precautions.
Step-by-step guide on turning on the projector and displaying images from video sources.
Procedures for safely turning off the projector and allowing the lamp to cool.
How to adjust the image aspect ratio to match various video signal types.
Detailed steps on modifying aspect ratio via remote control or menu.
Instructions for connecting a computer for display output, including DDC standard.
Steps to display images from a computer, including source selection and focus adjustment.
Procedures for auto-positioning, handling notebook connections, and setting display resolution.
Overview of the IMAGE menu options for adjusting picture parameters.
Guide on how to navigate and adjust settings within the projector's menus.
Details on settings within the INSTALLATION menu, including keystone and lamp mode.
Configuration settings available in the FEATURE menu, such as aspect ratio and language.
Options for signal input adjustments and custom user settings.
Displaying projector status and saving image quality settings using AV memory.
How to fine-tune contrast, brightness, color intensity, tint, and sharpness.
Selecting preset color temperatures or customizing them for optimal white balance.
Advanced controls for color tone adjustment and brightness ratio (gamma) customization.
Troubleshooting and fine-tuning for computer-generated images, including LPF.
Setting up a password for security and restricting operation.
Information on when to replace the lamp and critical safety warnings during replacement.
Detailed steps for safely removing the old lamp and installing a new one.
How to reset the lamp timer after replacement to ensure accurate tracking.
Instructions for cleaning the projector exterior and optical lens safely.
Solutions for common problems like the projector not turning on or no image appearing.
Diagnosing and resolving issues with the projected image quality and signal reception.
Addressing various display anomalies and issues related to computer connections.
Solutions for audio, temperature warnings, remote control, and lamp replacement-related problems.
Explains the meaning of different indicator lights for normal and abnormal projector conditions.
Key technical specifications including model, display technology, resolution, and inputs.
Table detailing supported RGB signal modes, resolutions, and frequencies.
Information on connector pin configurations and available spare parts.
| Matrix size | 0.65 \ |
|---|---|
| Native aspect ratio | - |
| Projection distance | - m |
| Vertical scan range | 50 - 85 Hz |
| Horizontal scan range | 15 - 80 kHz |
| Projection technology | DLP |
| Supported aspect ratios | 4:3, 16:9 |
| Contrast ratio (typical) | 4000:1 |
| Screen size compatibility | 50 - 300 \ |
| Projector native resolution | 1080p (1920x1080) |
| Focus | Manual |
| Focal length range | - mm |
| Lamp power | 230 W |
| Light source type | Lamp |
| Lamp power (economic mode) | 190 W |
| Service life of light source | 3000 h |
| Service life of light source (economic mode) | 5000 h |
| Serial interface type | RS-232 |
| USB 2.0 ports quantity | USB 2.0 ports have a data transmission speed of 480 Mbps, and are backwards compatible with USB 1.1 ports. You can connect all kinds of peripheral devices to them. |
| Ethernet LAN | No |
| Full HD | Yes |
| Supported video modes | 1080i, 1080p, 480i, 480p, 576i, 576p, 720i, 720p |
| Analog signal format system | NTSC, NTSC 4.43, PAL, PAL 60, PAL M, PAL N, SECAM |
| Placement | Desktop |
| Product type | Standard throw projector |
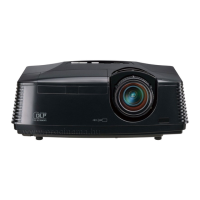
| Product color | Black |
| Power source | AC |
| AC input voltage | 100 - 240 V |
| AC input frequency | 50 - 60 Hz |
| Power consumption (standby) | - W |
| Power consumption (typical) | 340 W |
| Noise level | 31 dB |
| Noise level (economic mode) | 25 dB |
| Dot clock scanning frequency | 170 MHz |
| Weight | 3600 g |
|---|