No.5
INSPECTION RECORD SHEET
Measured
by
39.965 to 39.980
[1.5734 to 1.5740]
-0.70
[-0.0276]
0.028 to 0.071
[0.0011 to 0.0028]
0.150
[0.0059]
3
Remark
pproved
by
②
①
Checked
by
Clearance
②
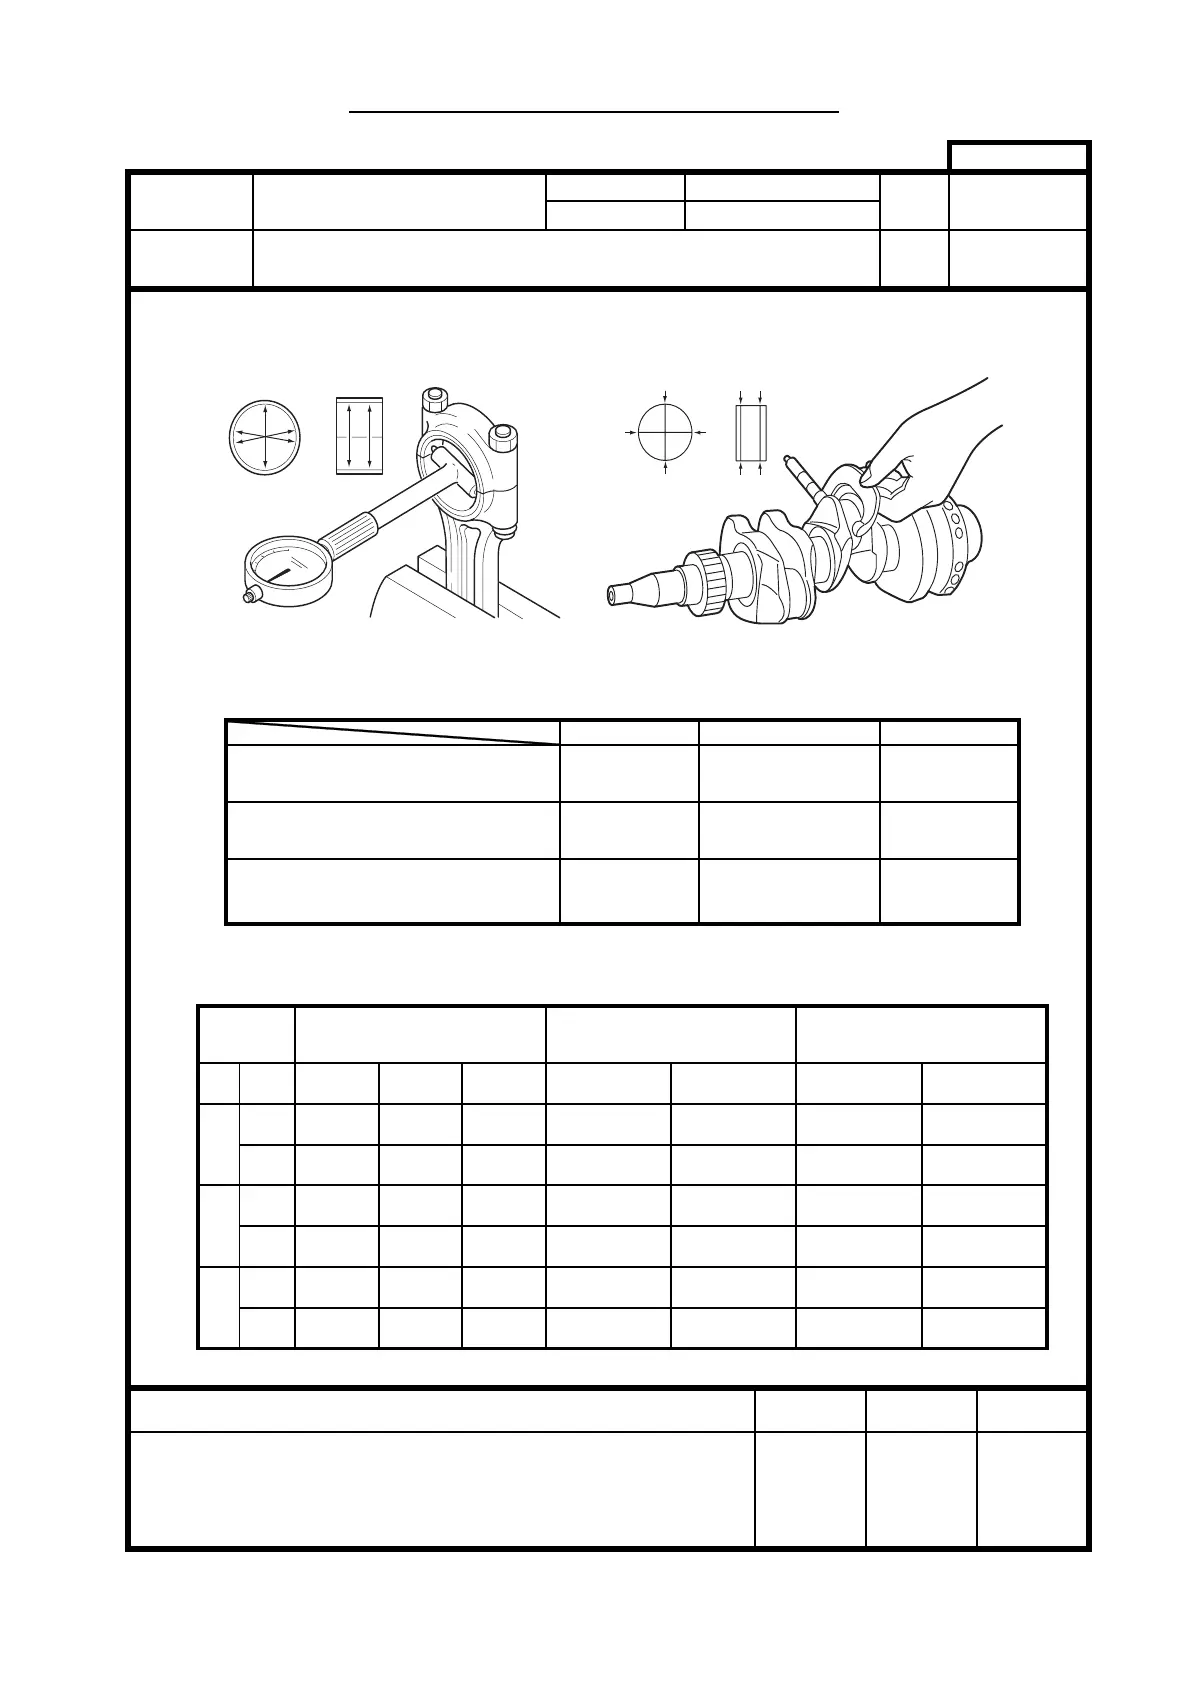
Crankshaft Pin Outside Diameter
φ40
[1.57]
Part Name
Connecting Rod Bearing
Inside Diameter
Crankshaft Pin Outside
Diameter
Measured Values
Clearance Between Connecting Rod
Bearing Inside Diameter and Crankshaft
Pin Outside Diameter
–
2
①
②
1
①
Min.No.
Position
X Y Z X Max.Y
Inspection
Point
Measurement of Clearance Between Connecting Rod
Bearing Inside Diameter and Crankshaft Pin Outside
Unit
LimitNominal Value Standard
Measuring Positions
Standard
mm [in.]
L
Company
Engine Model
Date
Serial No.
Connecting Rod Bearing Inside Diameter
φ40
[1.57]
40.008 to 40.036
[1.5751 to 1.5762]
–
Ԙ
Ԙ
ԙ
ԙ
Z
Y
Y
X
X
Supplement-6

 Loading...


