4 - 24
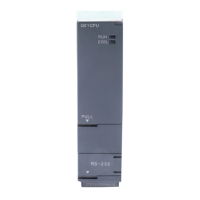
4.2 Basic Model QCPU
4.2.1 Part Names
4
HARDWARE SPECIFICATIONS OF THE CPU MODULE
Table4.7 Part Names
No. Name Application
1) Module fixing hook
Hook used to fix the module to the base unit.
(Single-motion installation)
2) RUN LED
Indicates the operating status of the CPU module.
ON : During operation with the RUN/STOP/RESET switch set to "RUN".
OFF : During stop with the RUN/STOP/RESET switch set to "STOP".
Flicker : When parameters/program is written during STOP and the RUN/STOP/
RESET switch is moved from "STOP" to "RUN".
To turn ON the RUN LED after writing the program, carry out the following
steps.
•Move the RUN/STOP/RESET switch from "RUN" to "STOP" to "RUN".
•Perform reset with the RUN/STOP/RESET switch.( Section 4.2.3)
•Power ON the programmable controller again
•To turn ON the RUN LED after writing the parameters, carry out the
following steps.
•Perform reset with the RUN/STOP/RESET switch.
•Power ON the programmable controller again.
(If the RUN/STOP/RESET switch is moved from "STOP" to "RUN" to
"STOP" to "RUN" after changing the parameter values, the new values are
not reflected on the parameters related to the intelligent function module,
such as the network parameters.)
3) ERR. LED
ON : When the self-diagnostic error that will not stop operation is detected.
•When continuation of operation at error detection is set in the parameter.
•When the annunciator (F) is turned ON by the SET/OUT instruction.
•When battery low occurs.
OFF : Normal
Flicker : When the error whose occurrence stops operation is detected.
When reset operation is performed with the RUN/STOP/RESET switch.
4) Serial number display Displays the serial number described on the rating plate.
5) Battery
Backup battery for use of the program memory, standard RAM, timer function and
power failure compensation function.
6) Battery fixing hook Hook for holding the battery.
7) Battery connector pin
For connection of the battery lead wires.
(When shipped from the factory, the lead wires are disconnected from the connector
to prevent the battery from consuming.)
8)
RUN/STOP/RESET switch
*2
RUN
STOP
RESET
: Executes sequence program operation.
: Stops sequence program operation.
: Performs hardware reset, operation error reset, operation initialization or
like. ( Section 4.2.3)
9)
RS-232 connector
*1
Connector for RS-232 connection
Can be connected by the RS-232 connection cable (QC30R2).
10) Module fixing screw hole
Hole for the screw used to fix to the base unit. (M3 12 screw)
11) Module fixing projection Projection used to fix the module to the base unit.
12) Module mounting lever Lever used to mount the module to the base unit.

 Loading...


