OPI-PulseNGKit-en-141106
Version: 2.01
Page 13 of 31
021,725,1*62/87,216
Operating Manual
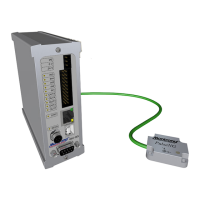
PulseNG Kit
Mounting
Since the PulseNG sensor can be mounted to many different types of machines and
machining devices, specic mounting instructions and locations cannot be provided.
The following notes are only recommendations for choosing a mounting location and
procedure.
The PulseNG sensor should be mounted in the immediate vicinity of the location
where the effect to be monitored appears to be strongest.
Mount to the headstock if possible.
Take special care to mount the sensor in such
manner that damages to the sensor, its cable or
the extension cable will be avoided.The PulseNG
Sensor must be rmly connected to the machine in
order to guarantee awless transmission of
acceleration signals to the sensor. Considering the
dimensions of the sensor, select a planar,
uncoated surface.
Four M4 threaded holes and screws are required
to attach the sensor.
Alternatively, you can use four magnets.
Optionally available from Montronix as part# 720038:
Four magnets with screws.
Montronix recommends a proportion of 1.5 : 1 for drill depth to diameter. Attach the
sensor with four M4 cylinder head screws (thread length 7-16 mm) and tighten them to
the torque value provided as follows.
Torque values
Material Recommended Maximum
Steel 2.5 Nm 3.4 Nm
Aluminum 2.5 Nm 3.4 Nm
Table 6: Torque values