76
ROUTINE MAINTENANCE
GRINDING BABBITTED KNIFE
When grinding the knives, extreme care must be taken to ensure that excessive heat isn’t
put into the knife edge. Excessive heat (indicated by discoloration of the knife edge) will lead
to microscopic cracks that can cause the knife to break when it is put back into service. DO
NOT attempt to use knives that have been exposed to excessive heat from
sharpening! Once the discoloration appears, the knife can not be made serviceable again by
simply removing the discoloration.
There are three sharpening methods that will provide a good cutting edge while reducing the
possibility of excessive heat buildup in the knife edge.
• Hand le
• Power belt sander with ne paper
• Conventional knife grinder with coolant system
The time between knife sharpening will vary with the type of wood and operating conditions.
Sharp knives are essential to good chip quality and nothing is gained by running the
chipper with dull knives. Indications of dull knives are poor chips, excessive oversize, nes,
and poor feed characteristics of chipper. The chipper knife is factory sharpened to a 29°
bevel.
The most suitable angle for any particular condition can only be determined by the
trial and error method right on the job.
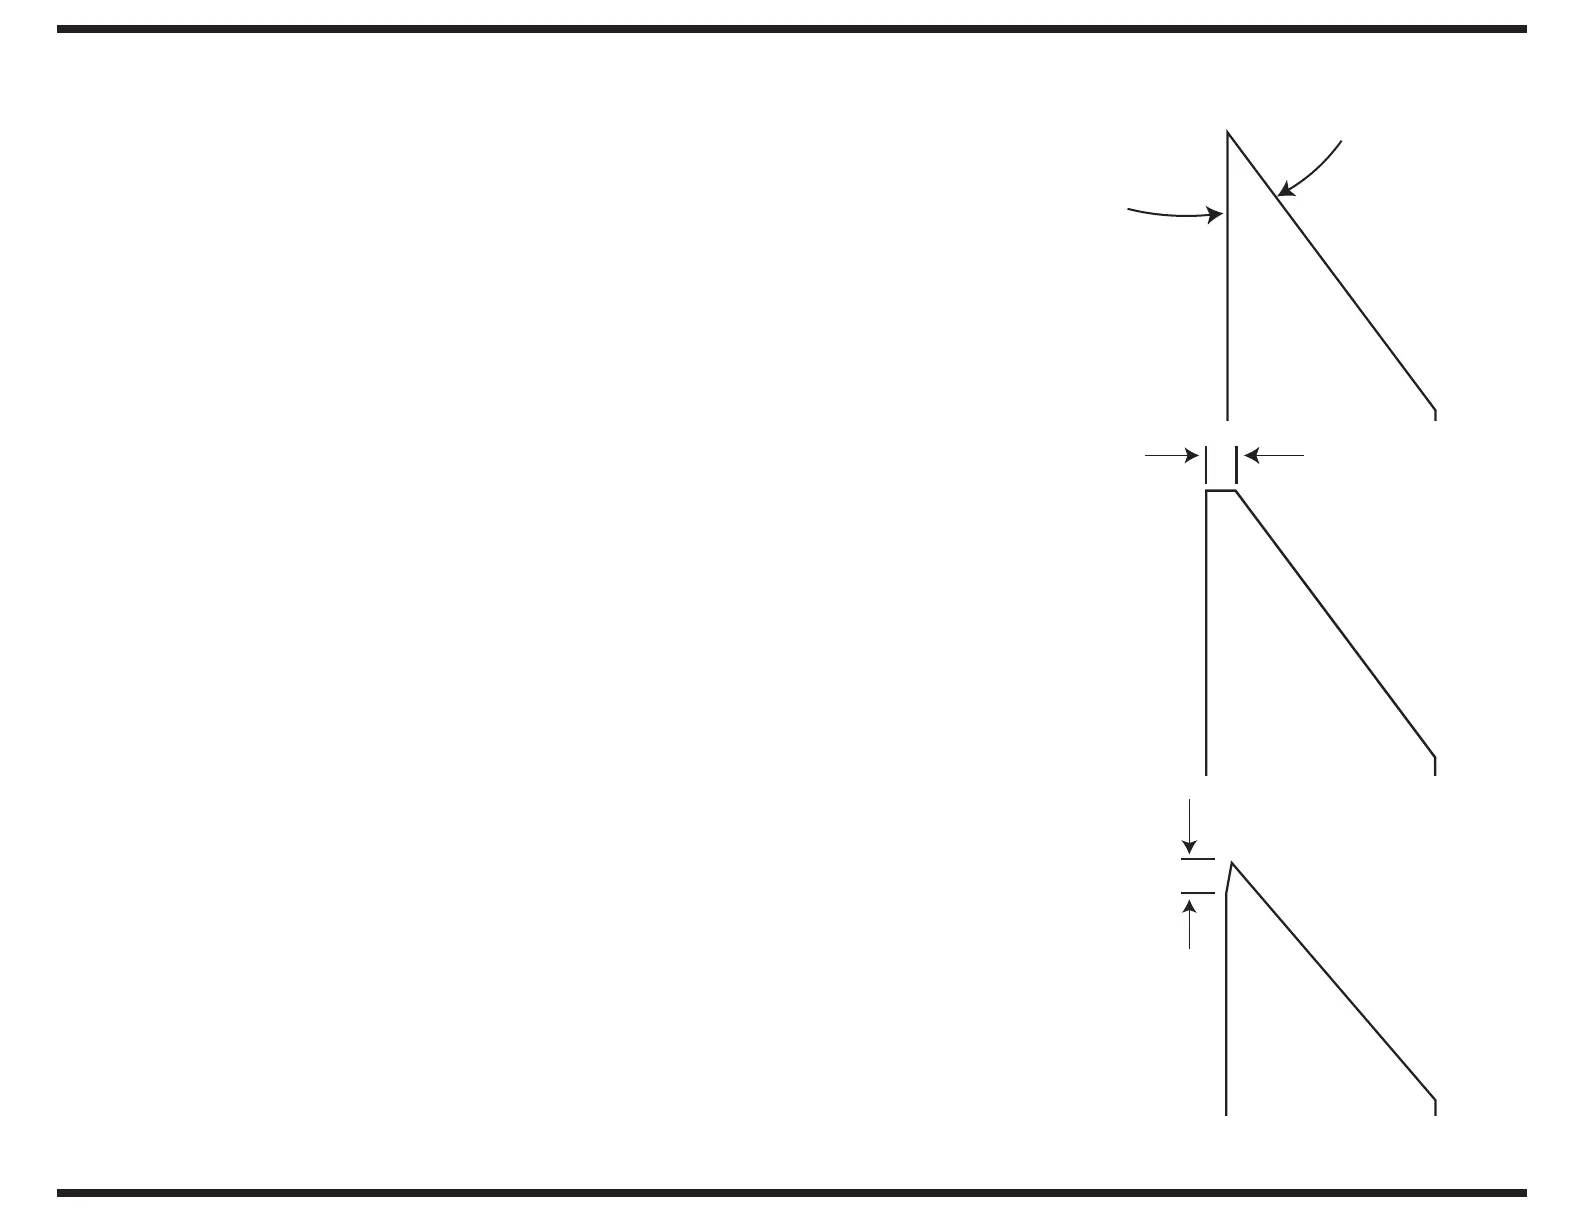
To achieve longer knife life, follow these steps.
1� Begin with a knife sharpened to 29°.
2� With a le or stone, atten the knife edge about .008” or the width of a pencil line.
3� Back bevel the knife 1/32” - 1/16” to create a new edge.
1
3
2
1/32” - 1/16”
29°
.008”