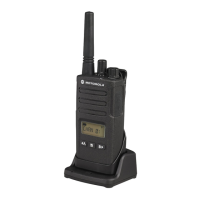
1 Perform step 3 of "Charging Radio with the Drop-in Tray
SUC on page 26".
2 Insert the battery into the tray, with the inside surface of
the battery facing the front of the Drop-in Tray SUC.
3 Align the slots in the battery with the alignment ribs in
the Drop-in Tray SUC.
Table 4: Motorola Solutions Authorized Batteries
Part Number Description
PMNN4434_R Standard Li-Ion Battery
PMNN4453_R High Capacity Li-Ion Battery
2.9
Drop-in Tray Charger LED Indicators
The following table explains the difference of each status
and LED indicator:
Table 5: Charger LED Indicator
Status LED Indicator Comments
Power On
Green for approxi-
mately 1 second
-
Table continued…
Status LED Indicator Comments
Charging Steady Red -
Charging
Complete
Steady Green -
Battery Faulty Red Fast Blink
Normally, re-po-
sitioning the
battery pack will
correct this is-
sue.
Waiting to
Charge
Amber Slow Blink
Battery temper-
ature is too
warm or too
cold or wrong
power voltage is
being used.
Battery Level
Status
N/A Battery empty
Blink Red one
time
Battery low
Blink Amber two
times
Battery medium
Blink Green three
times
Battery high
English
28 Send Feedback
 Loading...
