221 HP/LHP
30
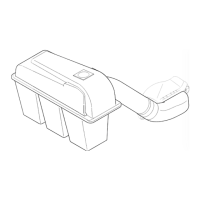
Lower discharge chute
To remove/replace the lower discharge chute:
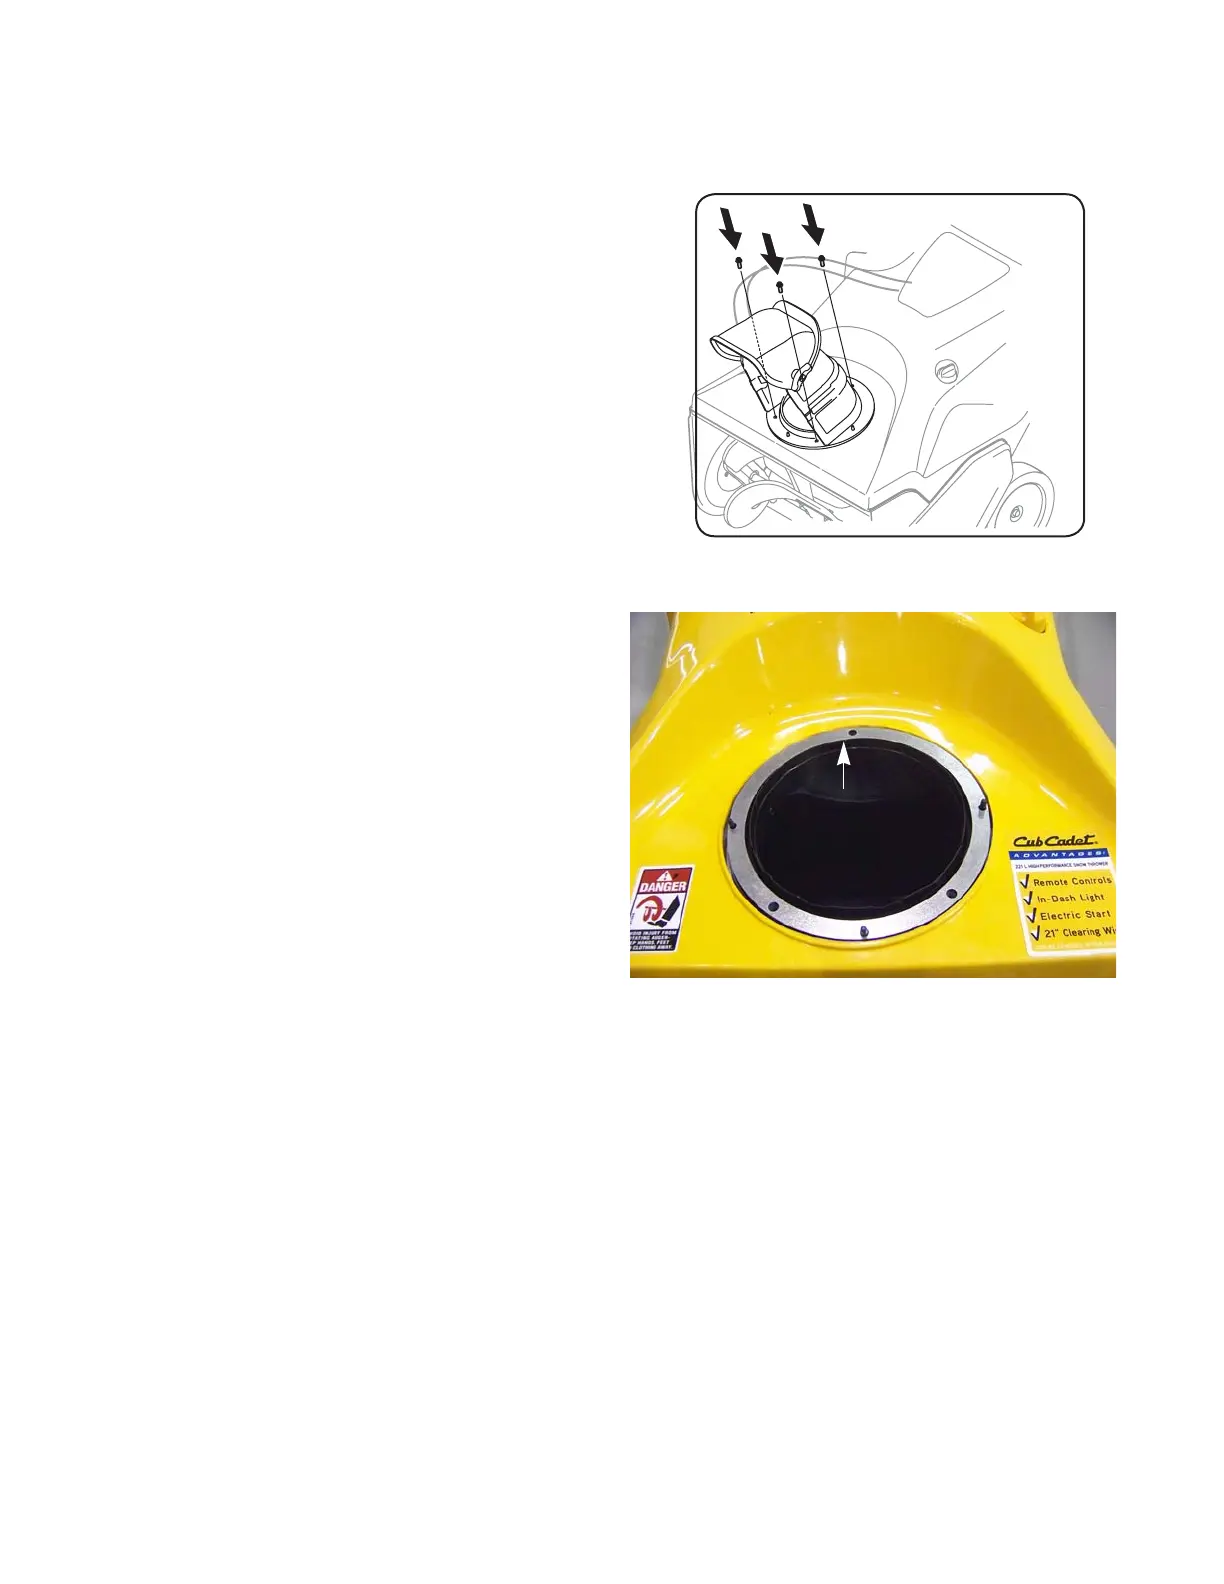
1. Remove the three screws that secure the lower dis-
charge chute to the chute ring gear using a 5/16”
wrench.
See Figure 4.9.
2. Lift the chute off of the snow thrower.
NOTE: If the chute is being removed to gain access
to another part, stop here.
3. Remove the upper discharge chute by following the
procedures described in the section of this chapter
that applies to the type of chute the snow thrower is
equipped with.
4. Install the lower chute by following the previous
steps in reverse order.
NOTE: On 2010 model year units equipped with
remote rotation, make sure the spacer ring
(indicated by the arrow in
Figure 4.10.) is
installed between the ring gear and the
lower chute.
NOTE: For the 2011 model year the spacer ring is
removed.
NOTE: Tighten the three chute screws to a torque
of 65 - 85 in lbs (7 - 9.5 Nm).
Figure 4.9
Figure 4.10
 Loading...