2-8 | ni.com
Chapter 2 Installation and Configuration
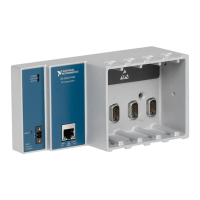
Installing a PXI Express System Controller
This section contains general installation instructions for installing a PXI Express system
controller in a PXIe-1095 chassis. Refer to your PXI Express system controller user manual for
specific instructions and warnings. To install a system controller, complete the following steps:
1. Connect the AC power source to the PXI Express chassis before installing the system
controller. The AC power cord grounds the chassis and protects it from electrical damage
while you install the system controller.
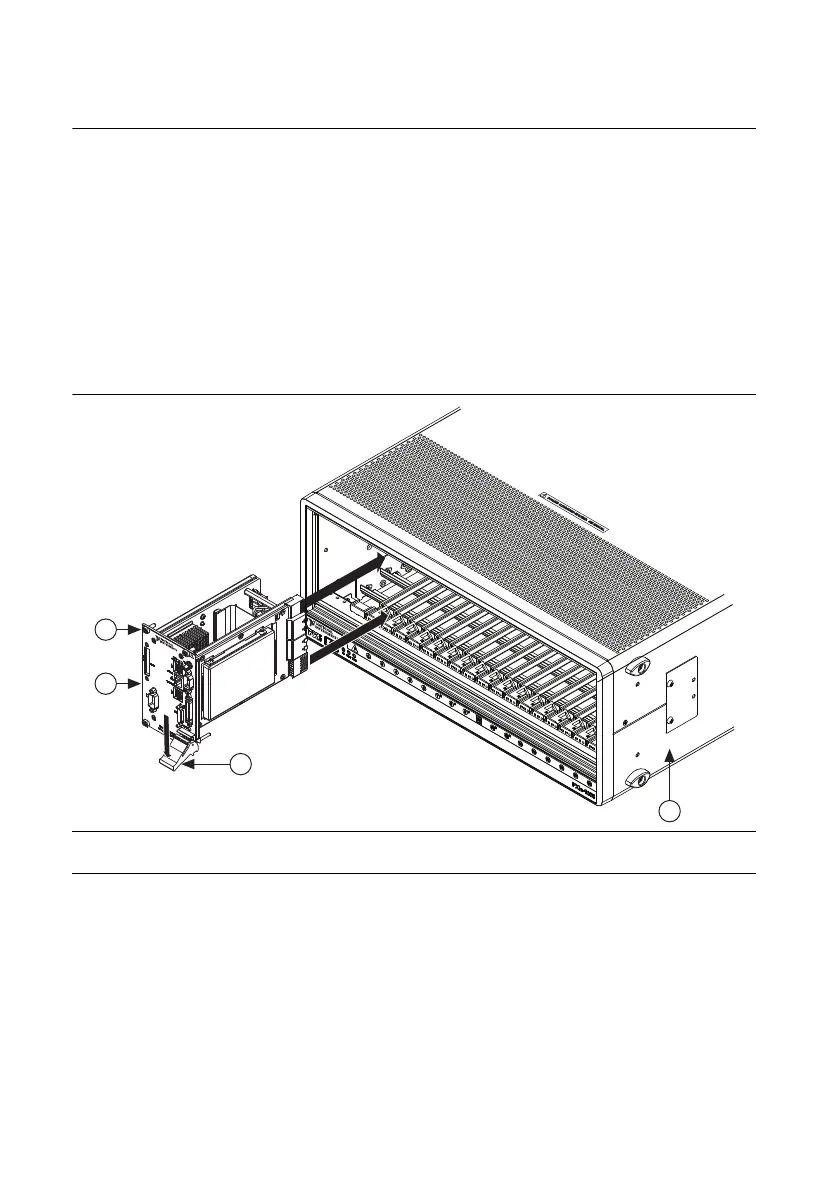
2. Install the system controller into the system controller slot (slot 1, indicated by the red card
guides) by first placing the system controller PCB into the front of the card guides (top
and bottom). Slide the system controller to the rear of the chassis, making sure that the
injector/ejector handle is pushed down as shown in Figure 2-4.
Figure 2-4. Installing a PXI Express System Controller
3. When you begin to feel resistance, pull up on the injector/ejector handle to seat the system
controller fully into the chassis frame. Secure the system controller front panel to the
chassis using the system controller front-panel mounting screws.
4. Connect the keyboard, mouse, and monitor to the appropriate connectors. Connect devices
to ports as required by your system configuration.
5. Power on the chassis. Verify that the system controller boots. If the system controller does
not boot, refer to your system controller user manual.
You can place CompactPCI, CompactPCI Express, PXI, or PXI Express modules in other slots
depending on the slot type.
1 System Controller Front Panel Mounting Screws (4x)
2 PXI Express System Controller
3 Injector/Ejector Handle
4 PXIe Chassis
4
3
2
1

 Loading...