© National Instruments | 3-3
PXIe-1095 User Manual
Removal
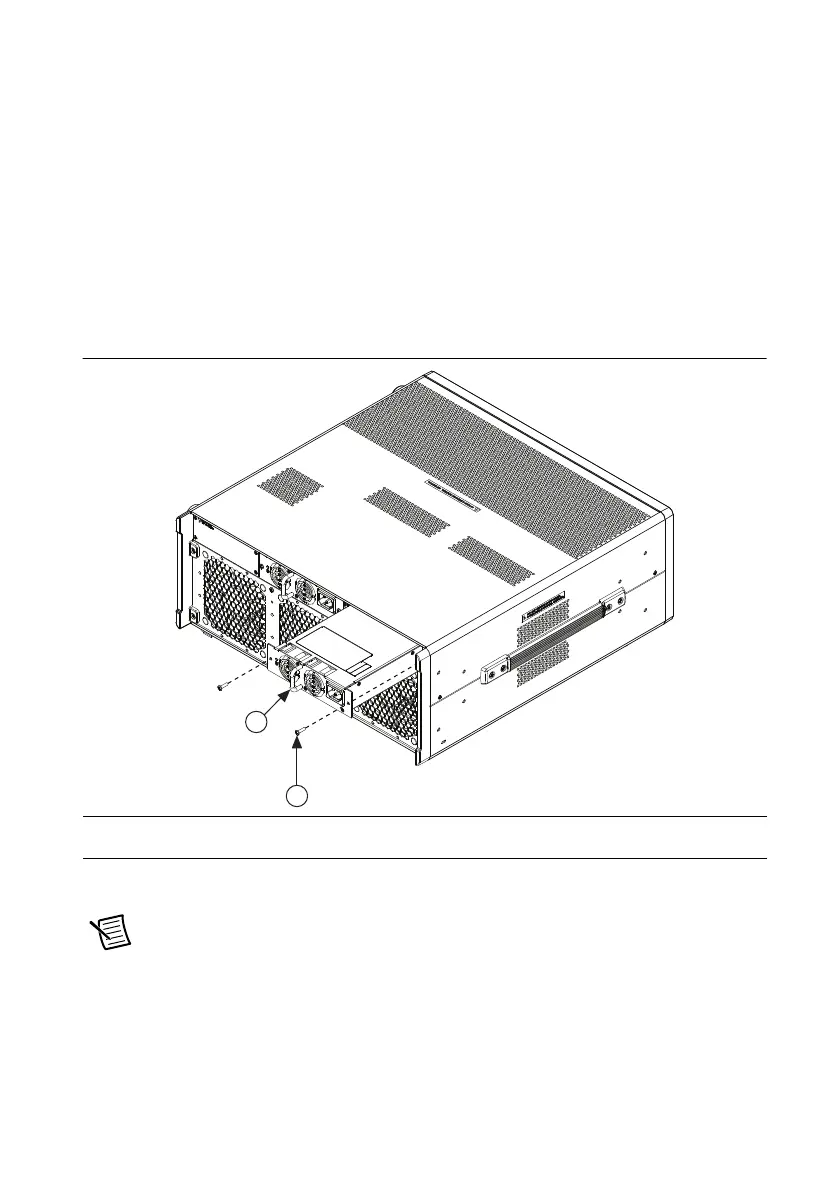
The PXIe-1095 power supply is a replacement part for the PXIe-1095 chassis. Before attempting
to replace the power supply, verify that there is adequate clearance behind the chassis.
Disconnect the power cables from the power supplies on the back of the chassis, or, if operating
in redundant mode and you wish to replace a single supply, only disconnect the power cable to
the supply being replaced. If operating in redundant power mode, wait at least 30 seconds for the
supply's internal power to dissipate. Identify the two #6-32 mounting screws that attach the
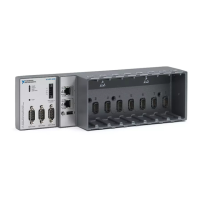
power supply to the chassis. Refer to Figure 3-1, Removing PXIe-1095 Power Supply, for the
screw locations. Using a Phillips screwdriver, remove the screws. Pull on the rear handle of the
power supply to remove it from the back of the chassis, as shown in Figure 3-1.
Figure 3-1. Removing PXIe-1095 Power Supply
Installation
Note The power supply should be disconnected from AC power for at least
30 seconds before it is installed in the chassis.
Ensure that there is no visible damage to the new power supply. Verify that the housing and
connector on the new power supply have no foreign material inside. Install the new power
supply into the chassis in the reverse order of removal. Replace and tighten two #6-32 screws
with a Phillips screwdriver. Connect the AC inlet power cable.
1 Power Supply
2 Power Supply Screws (2x)
3 PXIe-1095 Chassis

 Loading...