2-12 | ni.com
Chapter 2 Installation and Configuration
Inhibit Mode
The PXIe-1095 chassis supports operation in two inhibit modes. Default mode is used when
normal power inhibit button functionality is desired. In Default mode, when a system controller is
installed in Slot 1 of the chassis, the user can press the power inhibit button to power on the chassis.
Note In Default mode, you can also power on the chassis without a system
controller installed in slot 1. To power on the chassis from standby, press and hold the
power inhibit button for 4 seconds. To power off the chassis, again press and hold the
power inhibit button for 4 seconds.
Manual mode is used when you would like to manually control the inhibit state of the chassis.
In Manual mode, driving the Remote Inhibit signal high or floating it will cause the chassis to
be powered on. Driving the Remote Inhibit signal low or shorting it to ground will cause main
power to be inhibited.
Note The Timing and Synchronization upgrade is required for access to the Remote
Inhibit signal. Without this upgrade, a chassis in Manual mode will always be
powered on when AC power is connected.
Inhibit Mode Selection
The chassis Inhibit Mode on the PXIe-1095 chassis is selected using a DIP switch on the
backplane. Refer to the DIP Switches section for more information about the DIP switch.
Refer to Figure 1-1, Front View of the PXIe-1095 Chassis for the location of this switch.
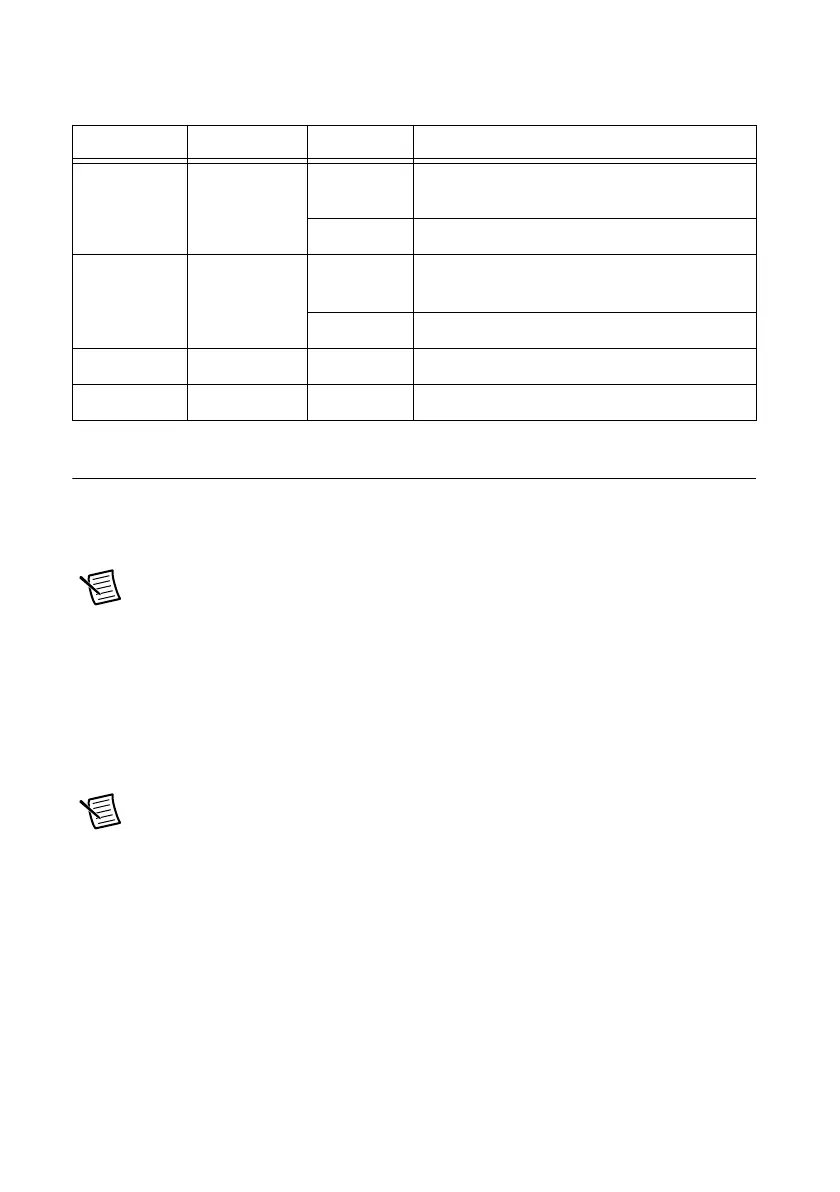
Table 2-3. DIP Switch States
Location Switch State Description
1 FAN Off (Right) Set chassis fan mode to Auto. Refer to the
Fan Mode section for information.
On (Left) Set chassis fan mode to High.
2 PWR Off (Right) Set chassis inhibit mode to Default. Refer to
the Inhibit Mode section for information.
On (Left) Set chassis inhibit mode to Manual.
3 NC — —
4 NC — —

 Loading...