Items List of Contents QTY Note
IP4WW-000E-B1 000E-B1 PCB (with PKG Spacer) 1
Nylon Spacers 2
Metal Spacers 2
Screws (with circular washer) 2
IP4WW-2BRIDB-C1 2BRIDB-C1 PCB 1
Nylon Spacers 2
2BRI Label 1
Metal Spacers 1
Screws (with circular washer) 2
IP4WW-1PRIU-C1 1PRIU-C1 PCB (with PKG Spacer) 1
Nylon Spacers 2
Metal Spacers 2
Screws (with circular washer) 2
3.3 Mounting the Expansion Interface Card
DO NOT POWER ON until all installation has been completed.
Fit the optional 4COIDB-B1/2BRIDB-C1 daughter boards before installing the 084M-B1/080E-B1/008E-
B1/000E-B1 PCBs.
Set the switches on the 2BRIDB-C1 board before mounting it onto the 084M-B1/080E-B1/008E-B1/000E-
B1 PCB.
3.3.1 Mounting the 080E-B1/008E-B1/000E-B1/1PRIU-C1 PCBs
The procedure for mounting the expansion interface cards is as follows;
• Do Not Power on until all installation have been completed.
1. Turn off the system power and disconnect the AC cord from KSU.
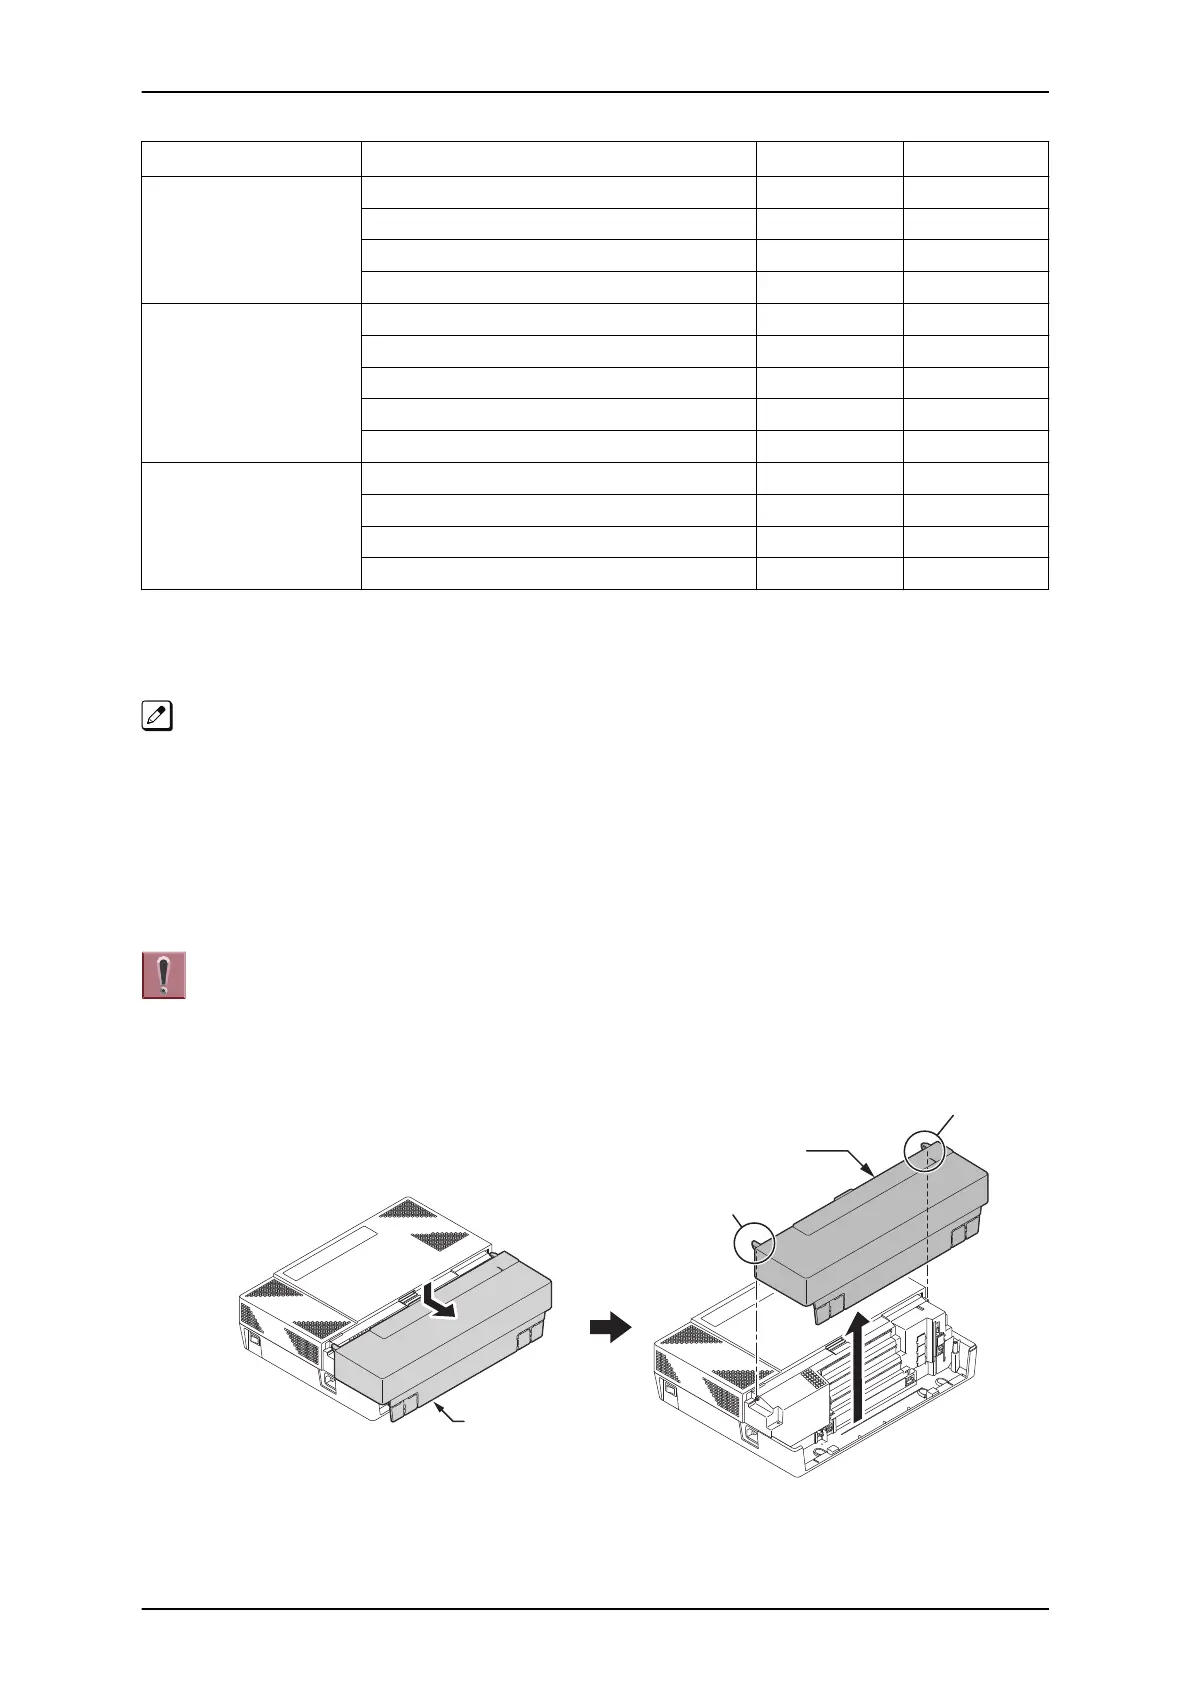
2. Open and remove the Sub-Cover.
Figure 2-53 Removing the Sub-Cover
SL1100
ISSUE 4.1 (R5.1)
2-36 Installation
 Loading...