6. Using the VIEWER
96
6-2. Projecting the pictures on a USB memory (basic operation)
This section explains the basic operations of the [VIEWER]. This is the operating procedure when the
option menu (→ page 103) of the [VIEWER] is in the default state when shipped from the factory.
① Start the [VIEWER]
1. Turn on the projector.
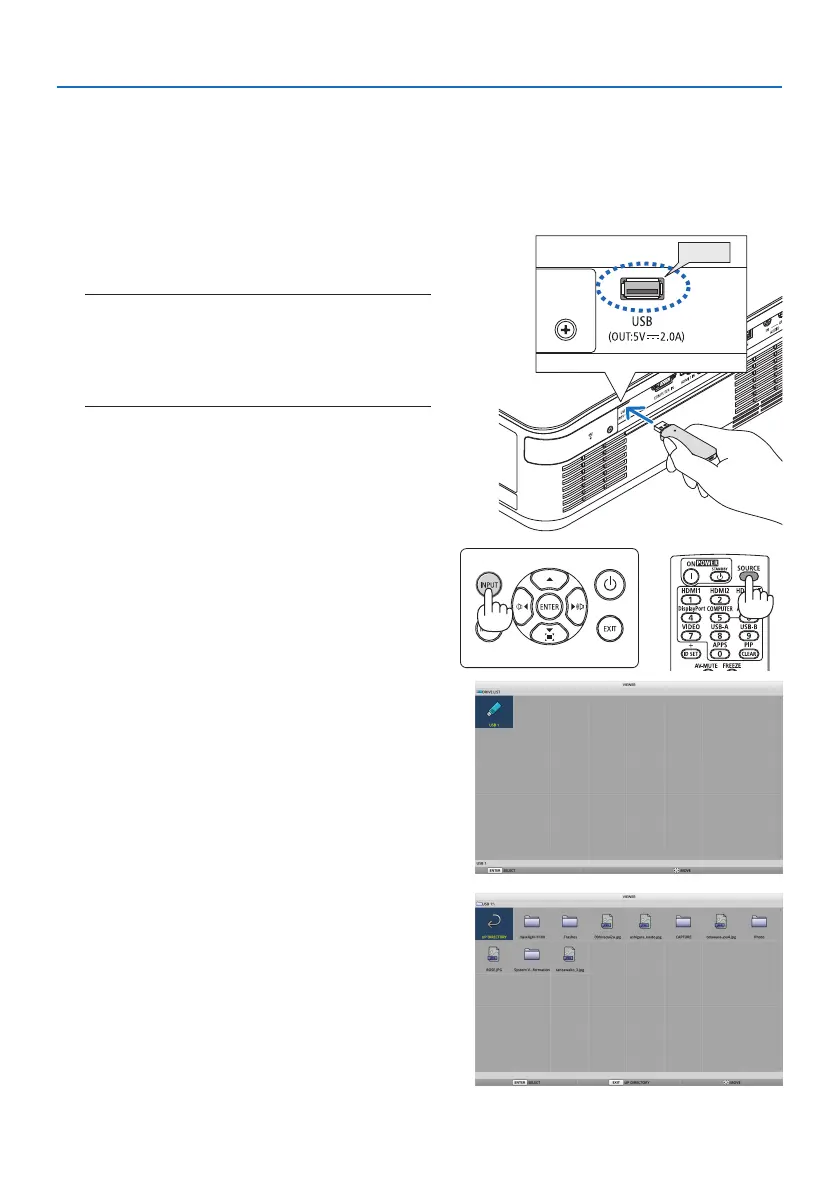
USB
2. InsertaUSBmemoryintotheUSB-Aportof
the projector.
NOTE:
• ToremoveaUSBmemoryfromtheprojector,pressthe
MENUbuttoninthelelistscreenor[DRIVELIST]screenand
select[REMOVEUSBDEVICE].(→Page98“RemovetheUSB
memory”)
3. PresstheINPUTbutton.
The [INPUT] screen is displayed.
• PresstheSOURCEbuttonwhenusingthe
remote control.
4. PresstheINPUTbuttonafewtimesandmove
thecursorto[USB-A].
• EverytimetheINPUTbuttonispressed
briey, the cursor moves to the next input
terminal.
• Movethecursor to [USB-A]and wait for
a while for the [VIEWER] to start and the
[DRIVE LIST] screen on the USB memory to
be projected.
5. Checkthatthecursorismovedto[USB1]and
press the ENTER button.
The le list screen will be displayed.