7. Connecting to a Network
109
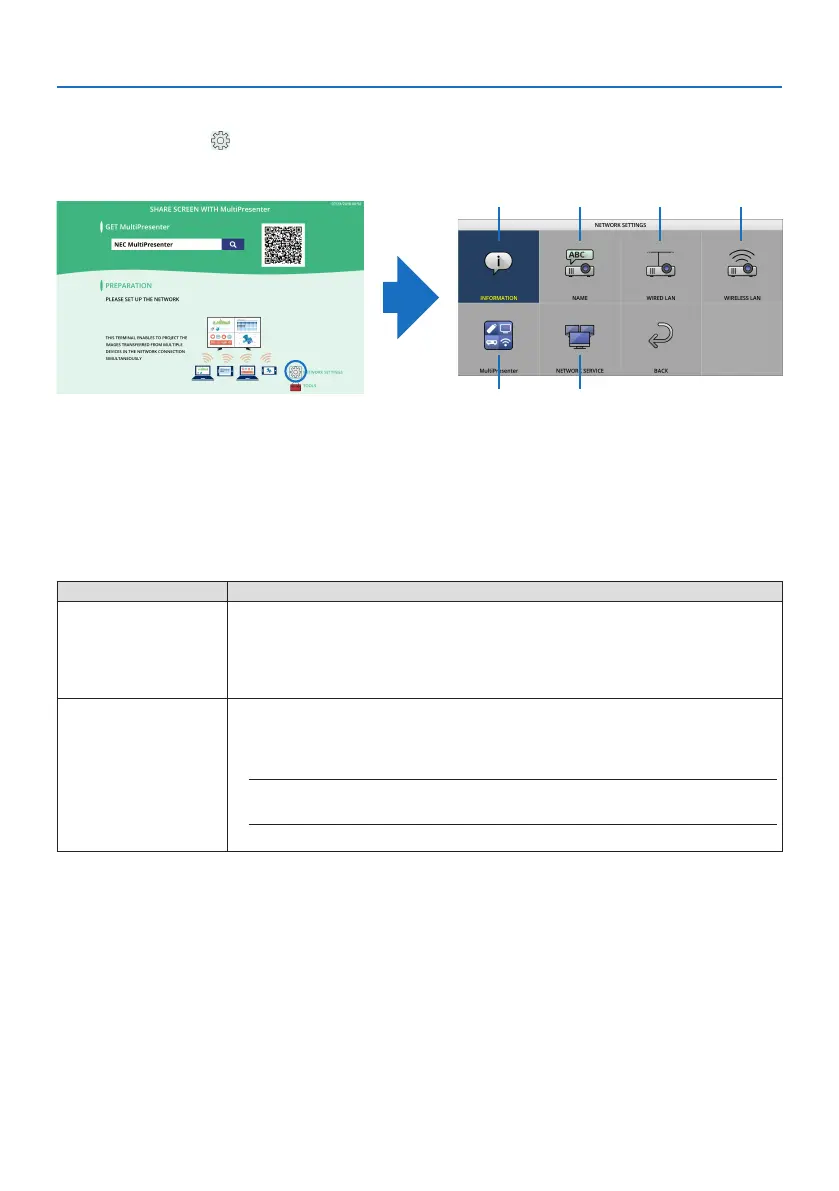
7-3. NETWORK SETTINGS
Move the cursor to [ NETWORK SETTINGS] at the bottom right of the start-up screen and press
the ENTER button to display the [NETWORK SETTINGS] screen.
⑤ ⑥
① ② ③ ④
① INFORMATION
Displays information regarding the wired LAN and wireless LAN of the projector.
• Toreturntothe[NETWORKSETTINGS]screen,presstheEXITbutton.
② NAME
Sets the [PROJECTOR NAME] and [HOST NAME].
Item name Description
PROJECTOR NAME Set the [PROJECTOR NAME].
• Initialvalue:“PJ-XXXXXXXXXX”
The initial value “PJ-XXXXXXXXXX” represents the “PJ-” + “Serial Number”.
• Allowablecharacters:Alphanumericsymbols(includingspace)
• Numberofcharacters:1–16characters
HOST NAME Set the [HOST NAME].
• Initialvalue:“pj-XXXXXXXXXX”
The initial value “pj-XXXXXXXXXX” represents the “pj-” + “Serial Number”.
• Allowablecharacters:Alphanumeric,“-”
NOTE:
• Youcannotenter“-”atthebeginningorendofthe[HOSTNAME].
• Numberofcharacters:1–16characters
③ WIRED LAN
Congure the prole of the wired LAN, DHCP, IP address, subnet mask, gateway, DNS and so on.
• WhenusingawiredLAN,settheproleto[ENABLE]andcongurethenecessarysettings.
• IfyouarenotusingawiredLAN,settheproleto[DISABLE].
• Onceyouhaveconguredthesettings,movethecursorto[OK]andpresstheENTERbutton.