Site Selection
Installation and operation in moderate temperatures increase reliability and product life. See
“Environmental Conditions” on page3.
Follow these guidelines when selecting a location to install the E-CODER)R900i:
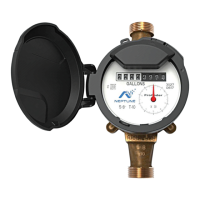
l Install the unit in a vertical and upright position.
l Clear all obstructions from the installation location.
Always follow your company's safety practices and installation guidelines when installing an
E-CODER. Never install a unit during a lightning storm or under excessively wet conditions.
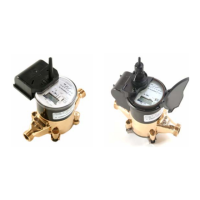
Installing the E-CODER
®
)R900i™
Follow the steps in this section for a new or retrofit installation.
New Meter Installation
Follow these steps to perform a new meter installation.
1. Flush the service line prior to installation to remove debris in the line.
2. Place an electrical grounding strap on the service line, connecting the inlet and outlet
service lines on either side of the meter setting.
You must install inlet and outlet meter valves and couplings / setters if they are not already
present. Allow appropriate space in the line for the meter laying length and two coupling
gaskets. Align the pipe ends so that the coupling and meter threads can engage without
binding or cross-threading.
3. Before installing the meter, remove the thread protectors and spud caps. Be sure that no
debris enters the meter during installation.
Use caution; the meter threads are sharp.
4. Place the coupling gaskets inside the coupling nuts and set the meter in the line. Position
The meter horizontally with the register dial facing up. The direction of flow marked on
the meter must agree with the direction of water flow.
5. Start the coupling nuts by hand then use a wrench and tighten sufficiently to prevent
leakage. Be careful not to cross-thread the connections.
6
E-CODER
®
)R900
i
™ Installation and Maintenance Guide
Chapter 3: Installing the E-CODER
®
)R900i™