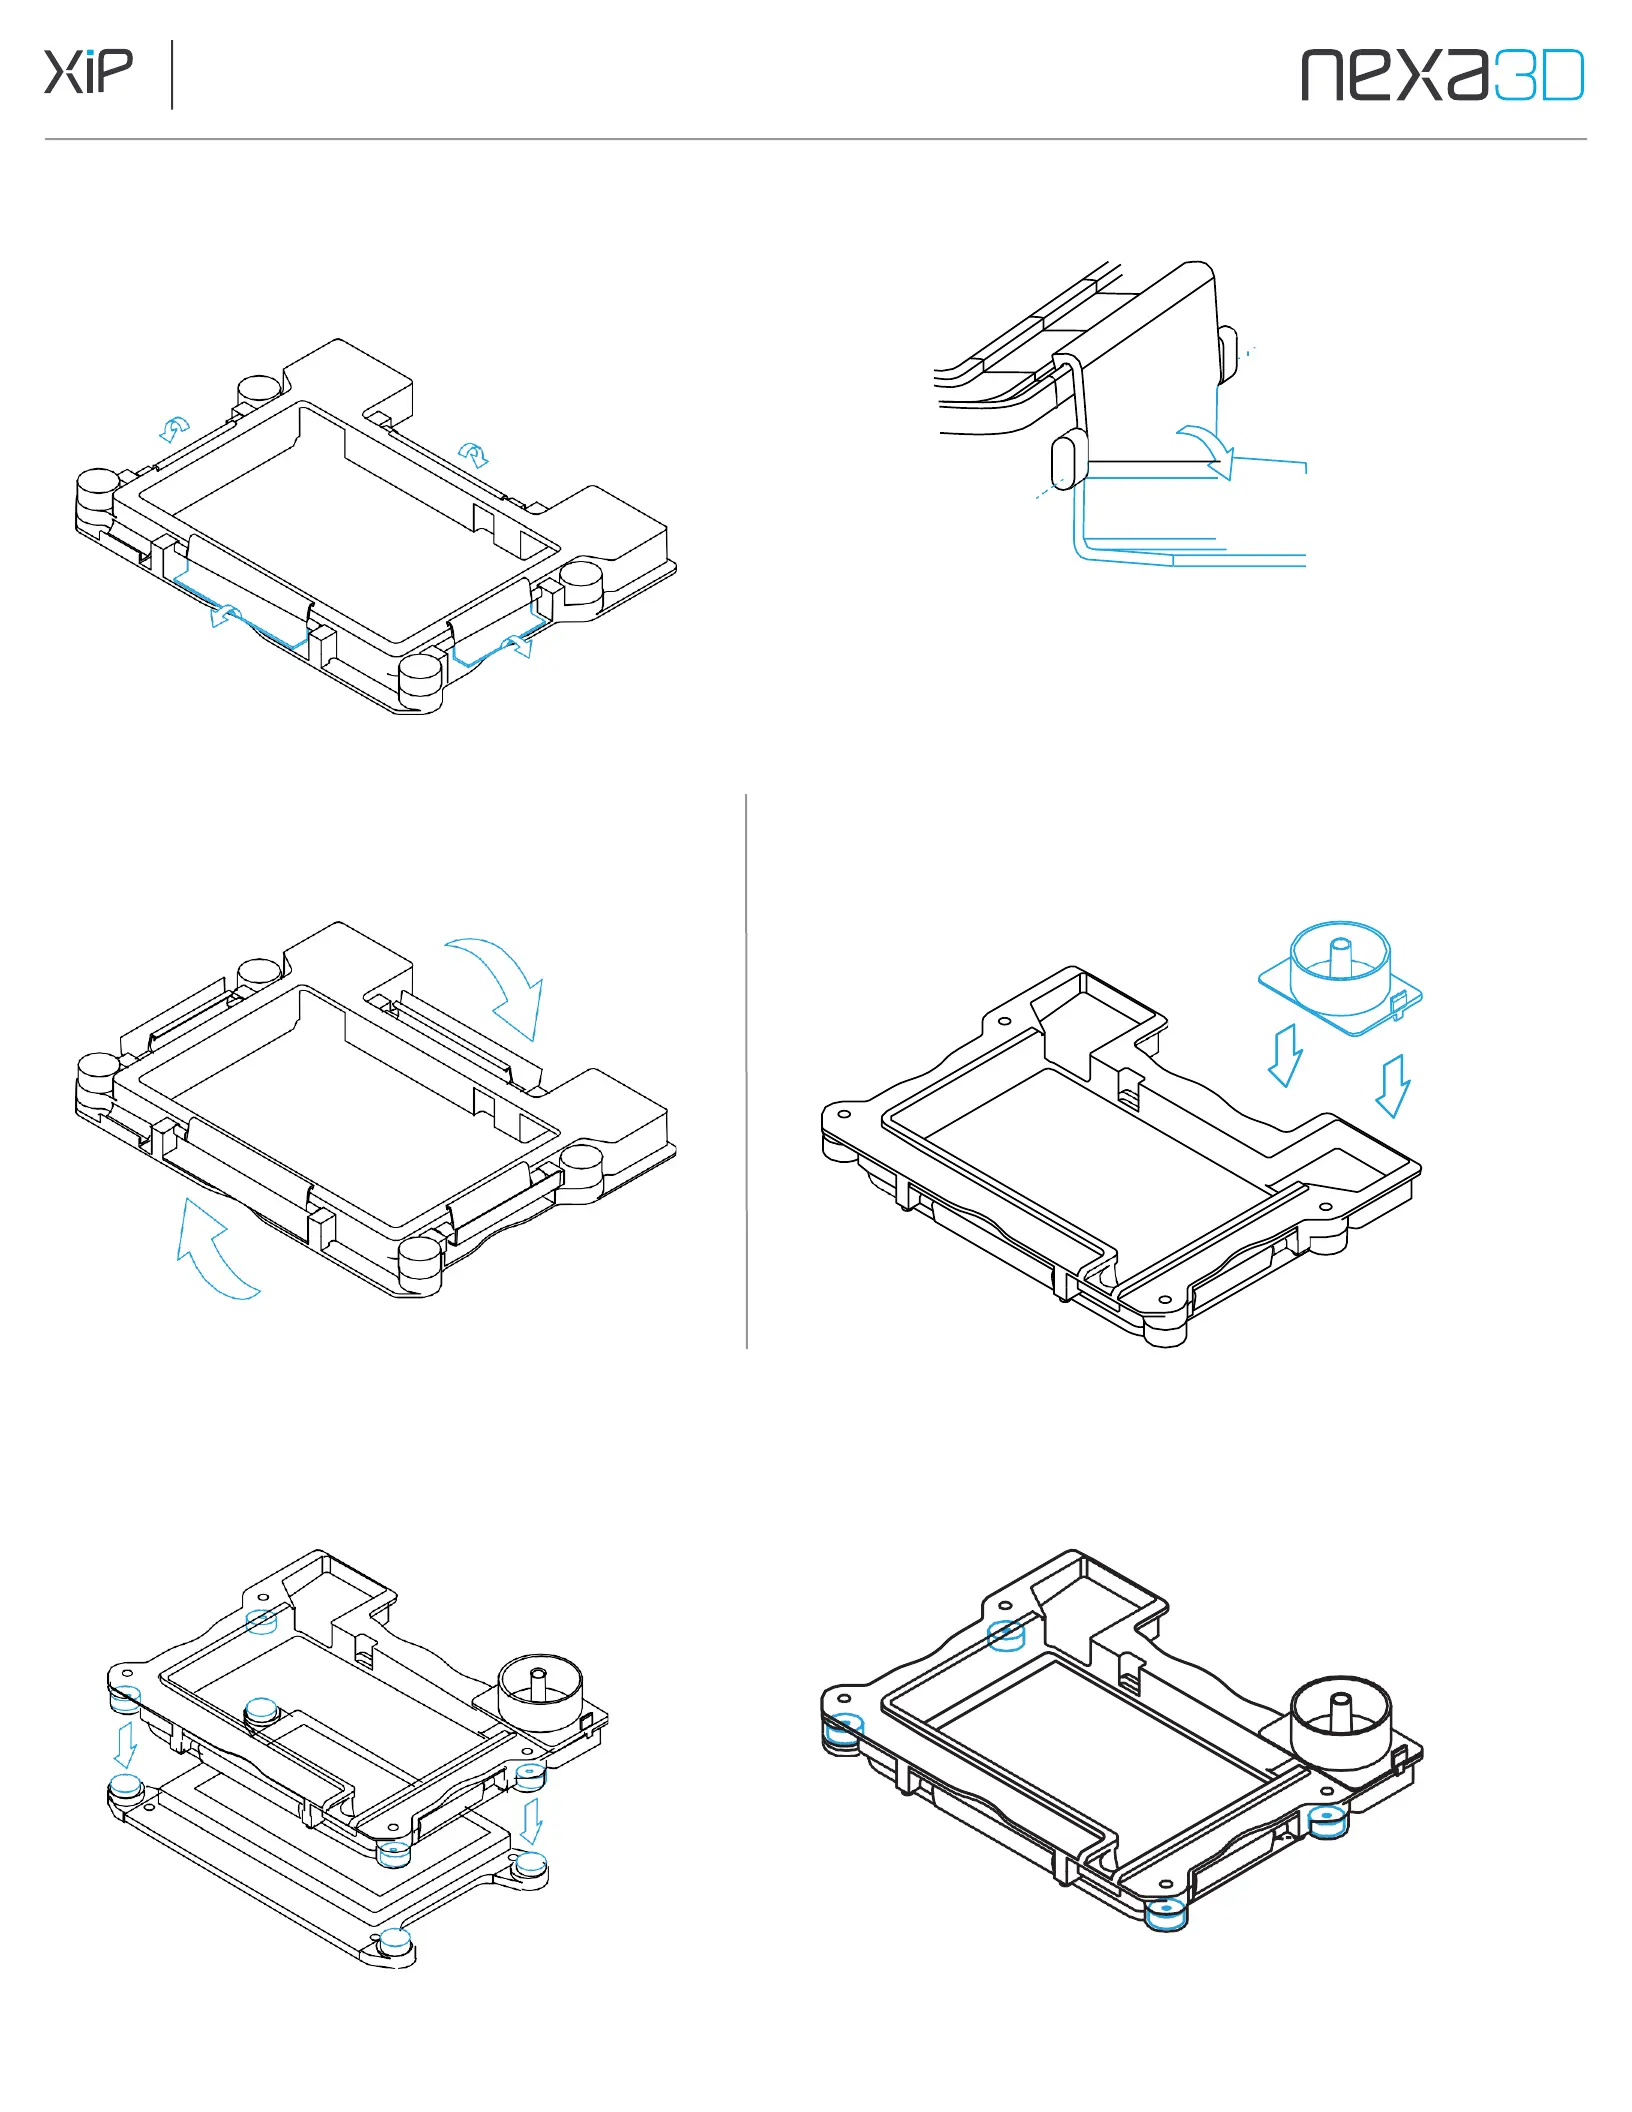
4.
Carefully pull all four outer clamps
downward, ensuring that the inner clamps
continue to rest within the gasket groove.
5.
Flip vat right-side up.
Push outer clamps all the way down to
secure the membrane to the vat frame.
6.
Place the Resin Spout on the back right hand corner
of the vat and press down to snap on and attach.
7.
Lower the Resin Vat Assembly onto the LCD. Magnetic clamps lock it in place automatically.
The printer will confirm that the vat is locked.