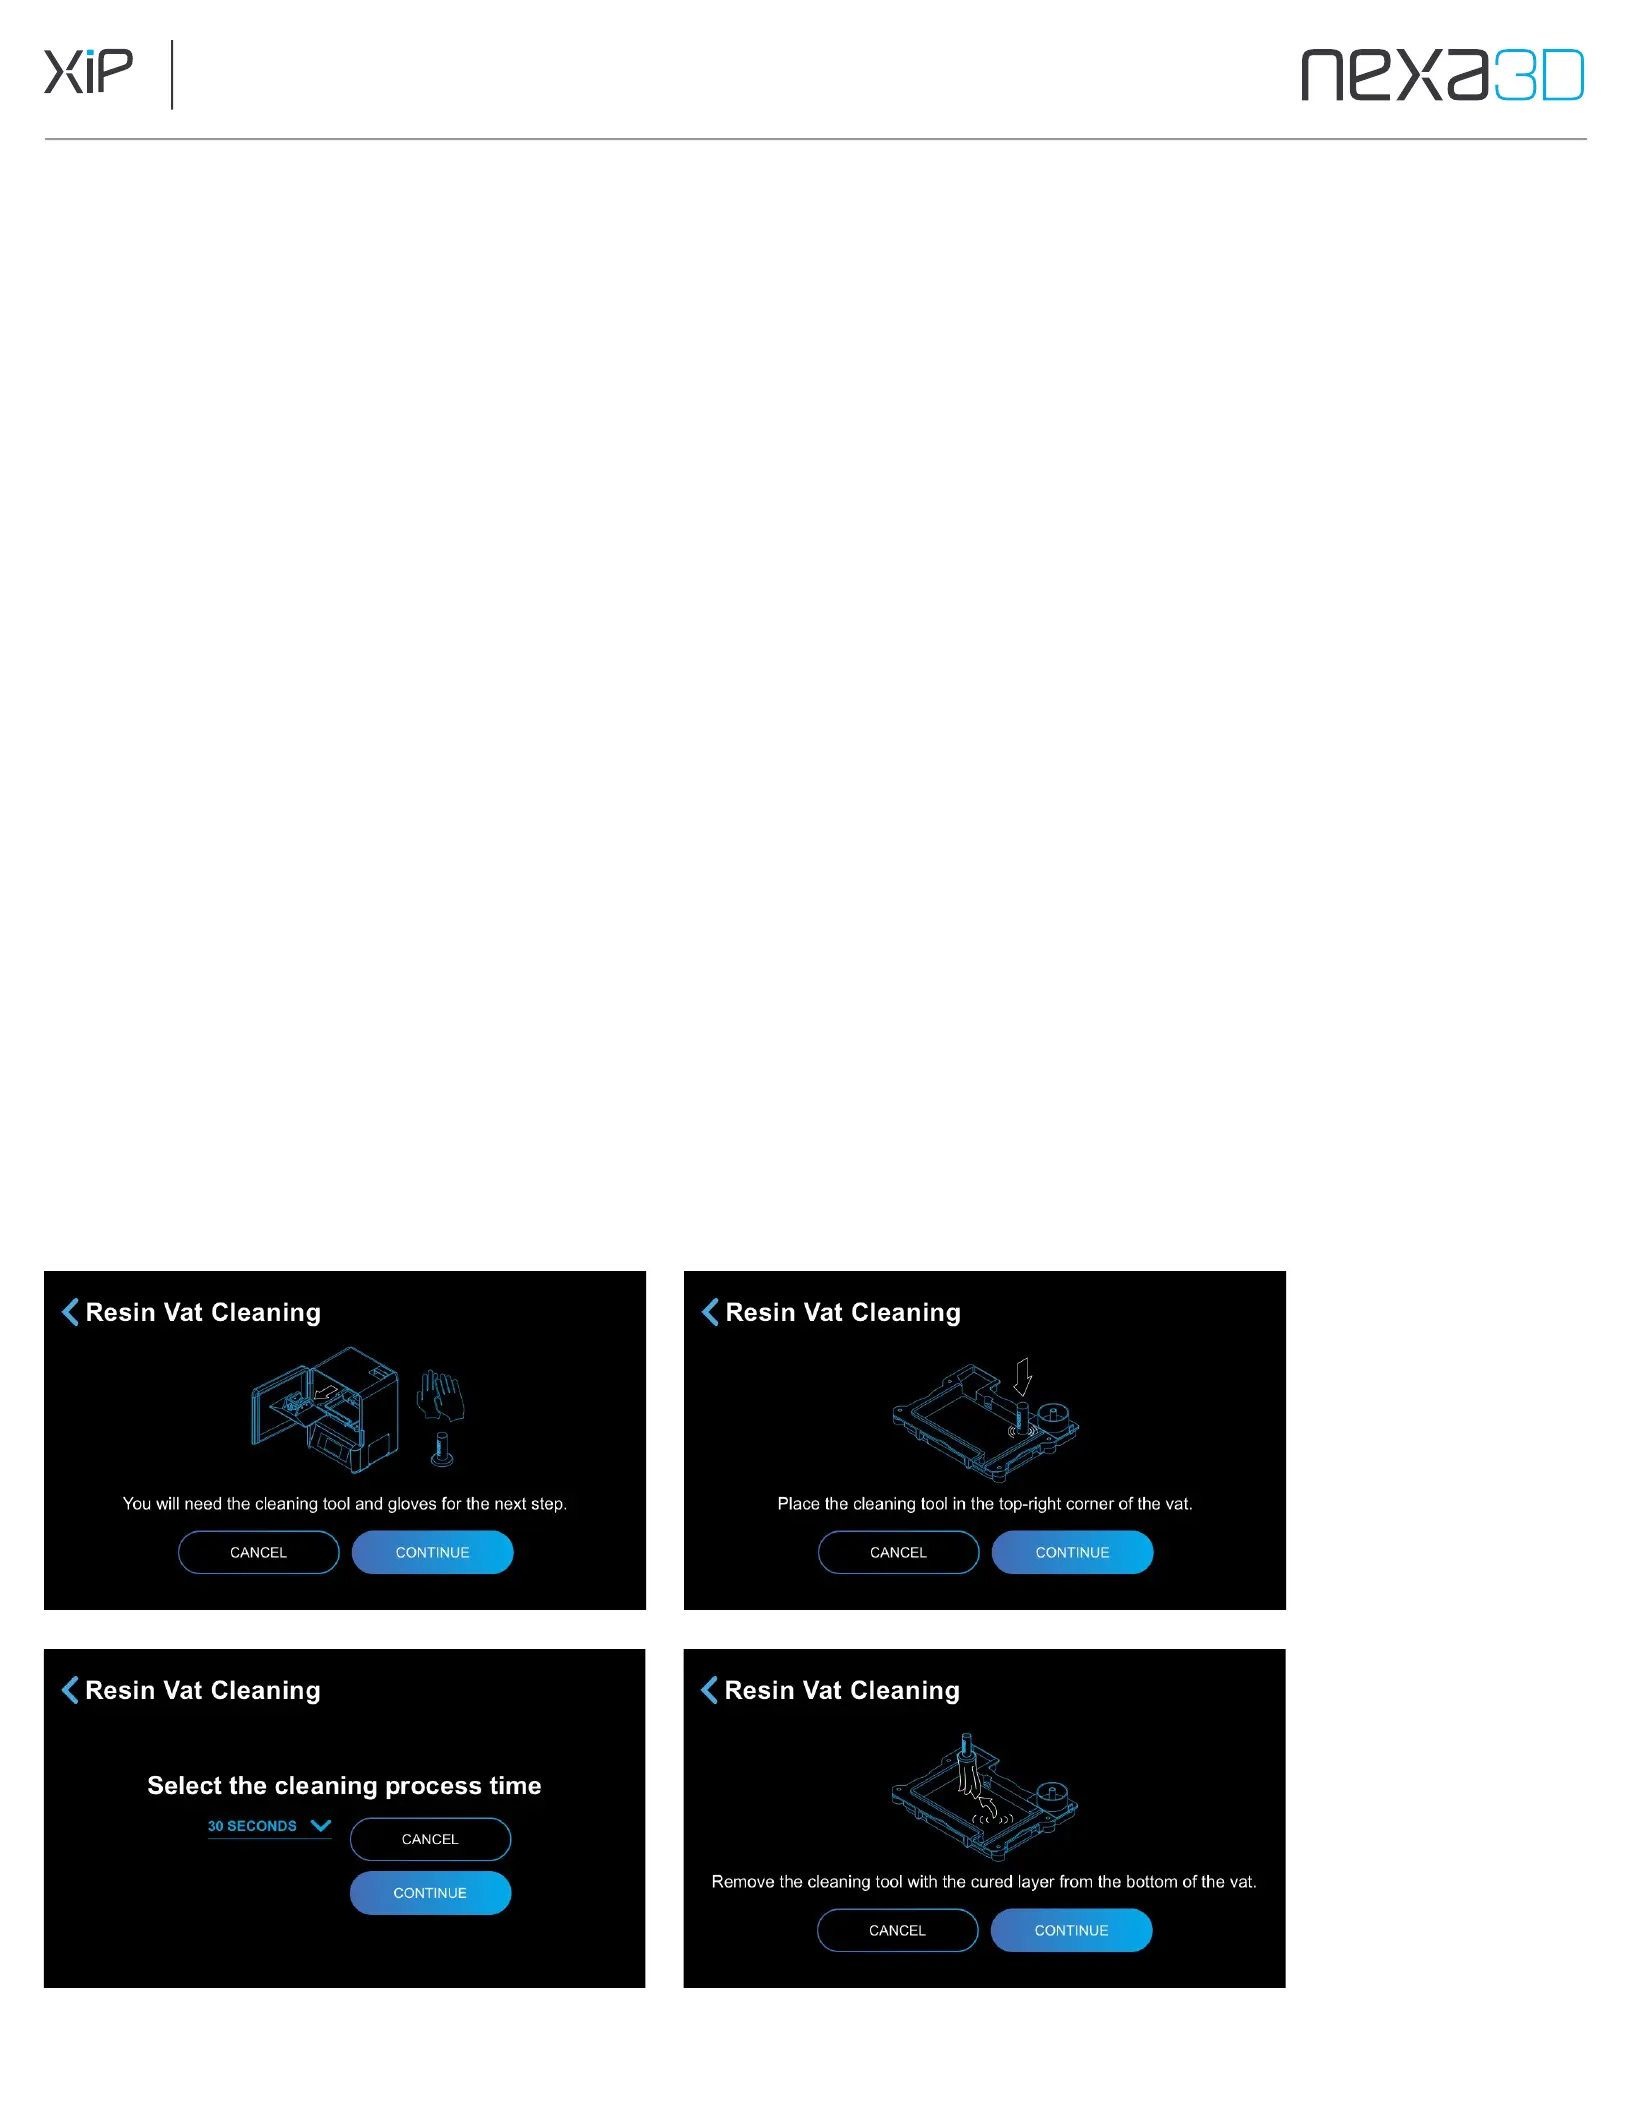
6.7 Clean the Resin Vat After a Failed Print
If there is a failed print or loose partially cured pieces of resin have settled in the Resin Vat, you can
use the XiP cleaning process. The process cures a thin layer of material on the membrane at the
bottom of the Resin Vat to capture settled debris. The layer can then be peeled away using the
cleaning tool.
1.
Open the printer door and place the cleaning tool in any corner of the Resin Vat with the
flat side submerged in the liquid resin and the handle standing above the surface.
Note: Always wear protective gloves when handling uncured resin.
2.
On
the
printer
touchscreen
tap
Settings
>
Maintenance
>
Resin
Vat
Cleaning
.
3.
Tap Continue to proceed with cleaning.
4.
Make sure the printer door is closed and tap Confirm.
5.
Select the cleaning process time via the drop down menu (a longer cleaning time generally
provides a more thorough cleaning) and click Continue. Optionally, you can tap Cancel to
cancel the process.
6.
Tap Confirm when the cleaning process is complete.
7.
Wear protective gloves to protect your hands from the liquid resin. Open the printer
door, firmly grasp the handle of the cleaning tool, and carefully peel the cured film of
resin away from the Membrane.
8.
Optionally, use the plastic scraper tool from your finishing kit to scrape around the
remaining liquid resin to visually check the condition of the membrane. If you find any
punctures, scratches, or gouges, the Membrane will need to be replaced.