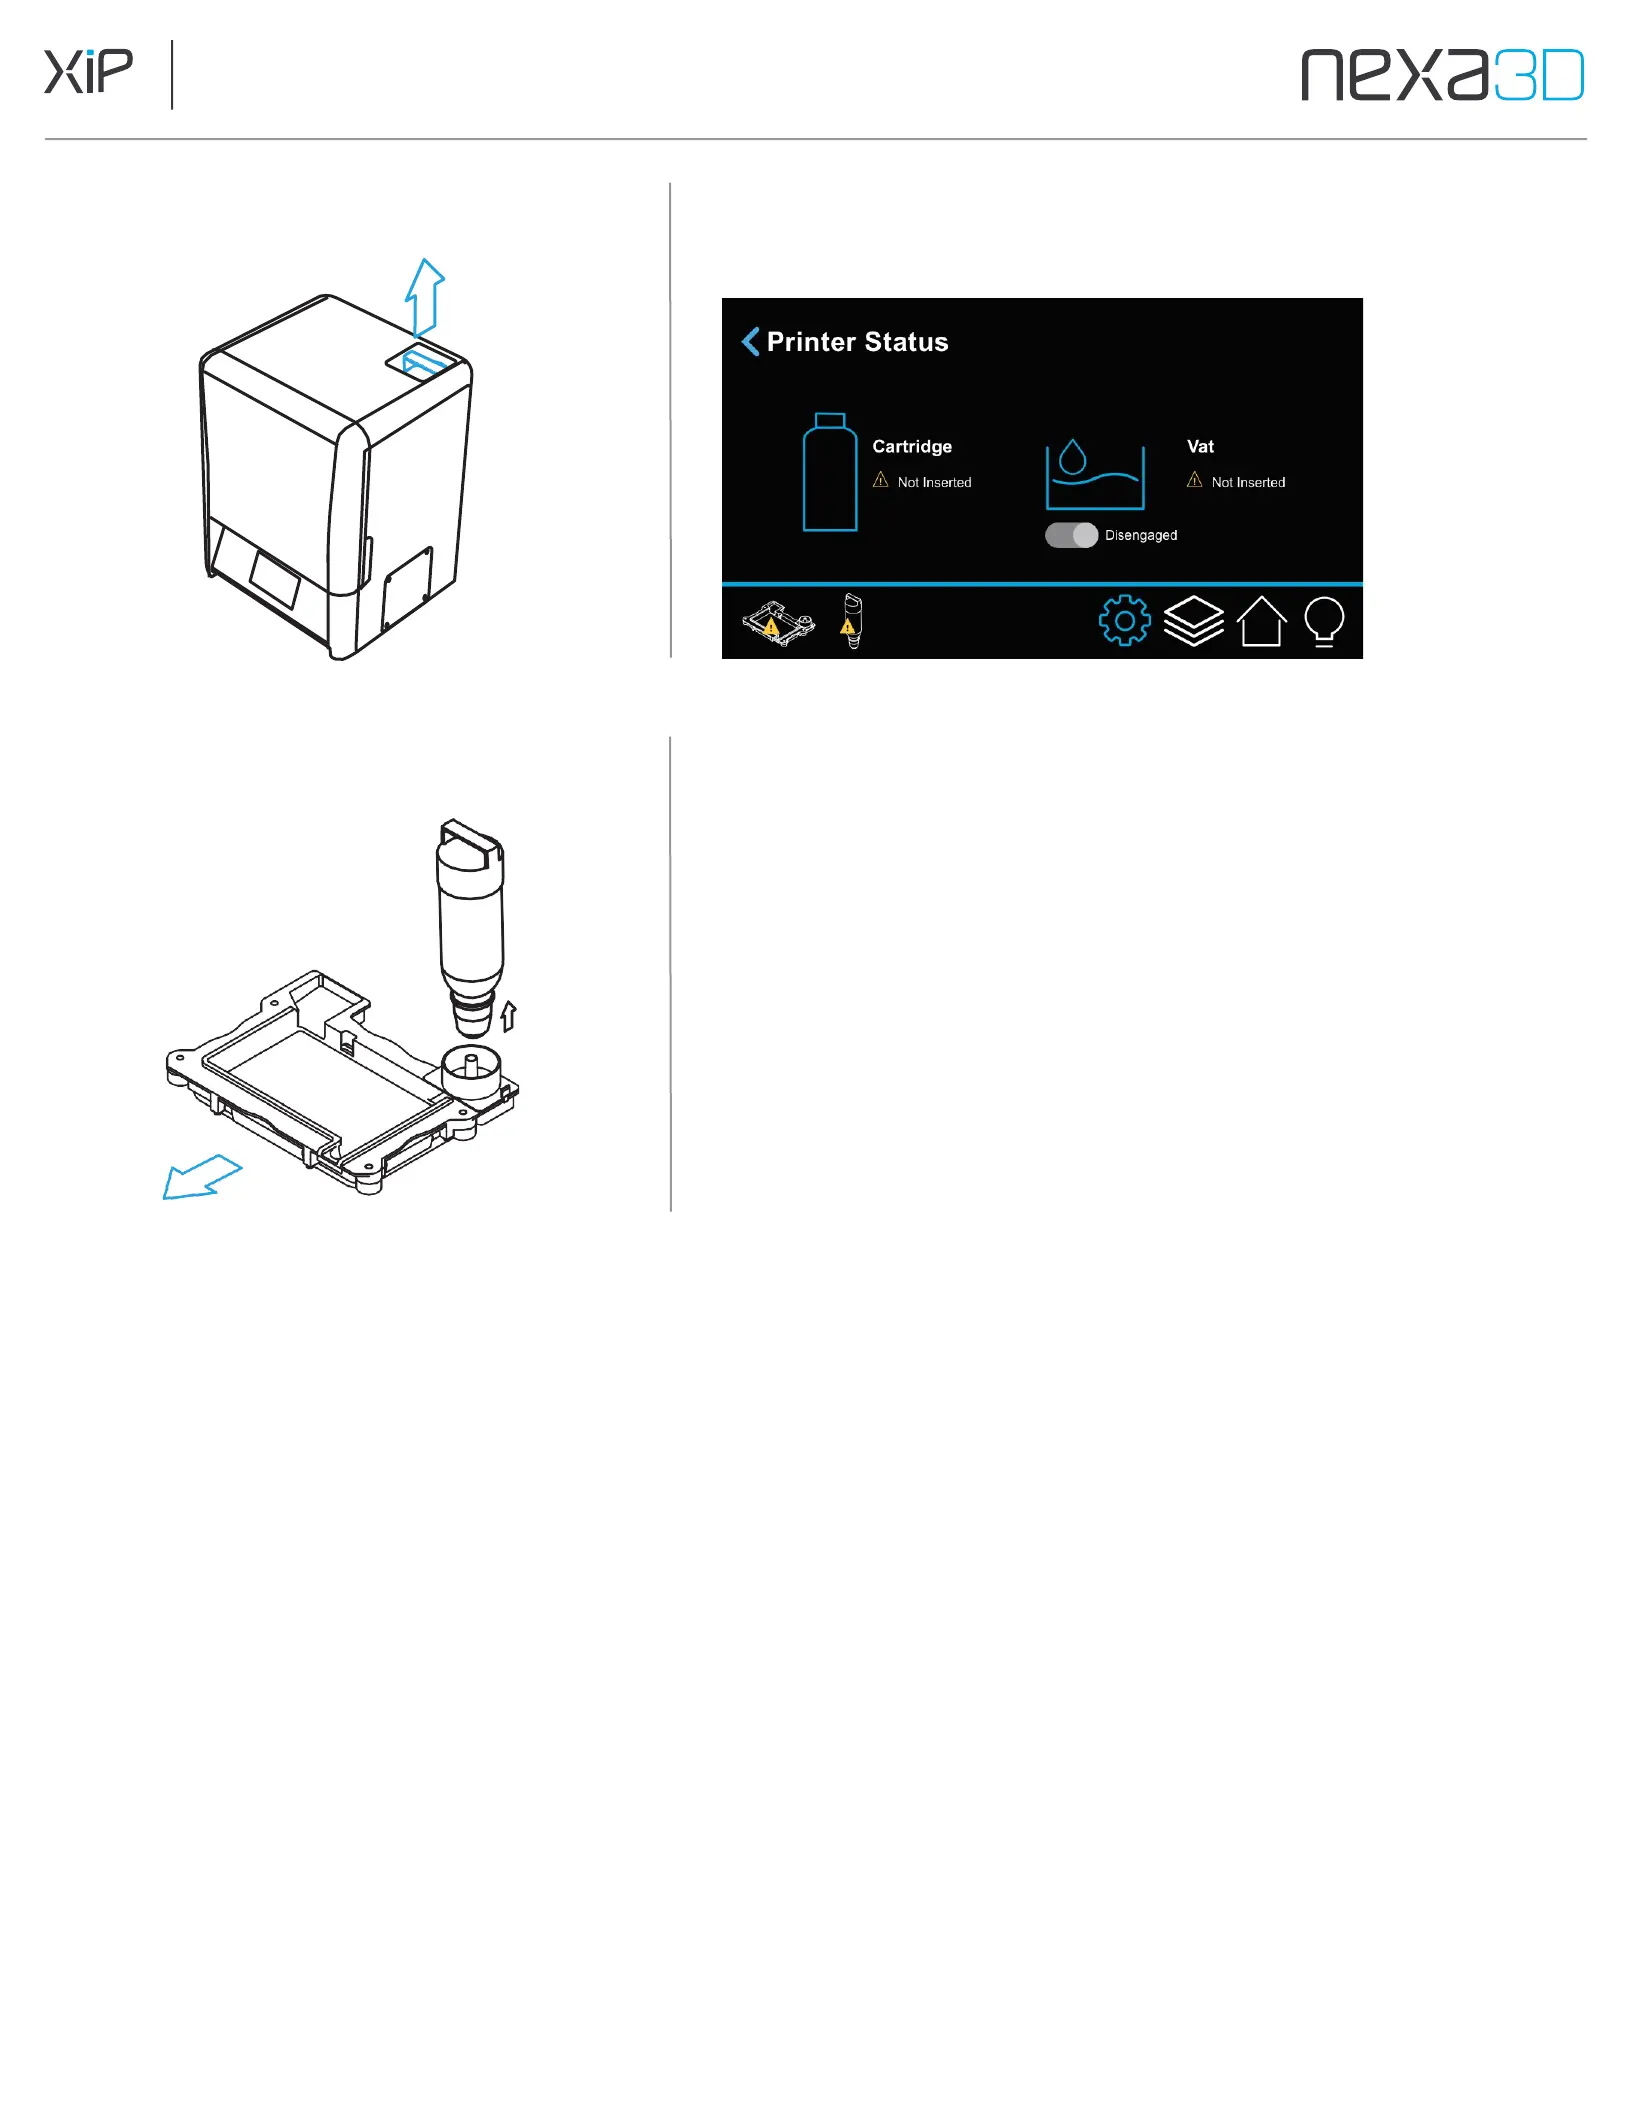
1. Lift the resin cartridge out of the printer.
3. Lift the resin vat up and off of the LCD.
2. Unlock the vat by going to Printer Status on the
touchscreen and toggling the vat to
Disengaged
.
4.
Fit the funnel and filter from the finish kit into the
spout of the Resin Cartridge and pour excess resin
from Resin Vat back into the cartridge to save for
future prints. Use the plastic scraper from the finish
kit to scrape resin away from the membrane entirely.
5.
Replace seal cap to store cartridge. Dispose if the
cartridge is depleted entirely.
6.
Remove the membrane from the vat assembly. If the
used membrane is not expired, store in an opaque
container for future use with the same material.
7.
Clean the vat frame thoroughly with IPA or xClean followed by rinse with water.
8.
Install new membrane onto vat frame for use with the new material (refer to section 5.3).
Install vat into the printer
9.
Shake the new cartridge for 30 seconds to ensure it is thoroughly mixed.
10.
Remove the seal cap of the new cartridge.
11.
Invert and insert into the printer until the top of the handle is level with the top of
the printer.The cartridge can remain in the hanging position for vat clearance.
12.
Insert completely by rotating the cartridge until it drops into place and sits flush with
the top of the printer.