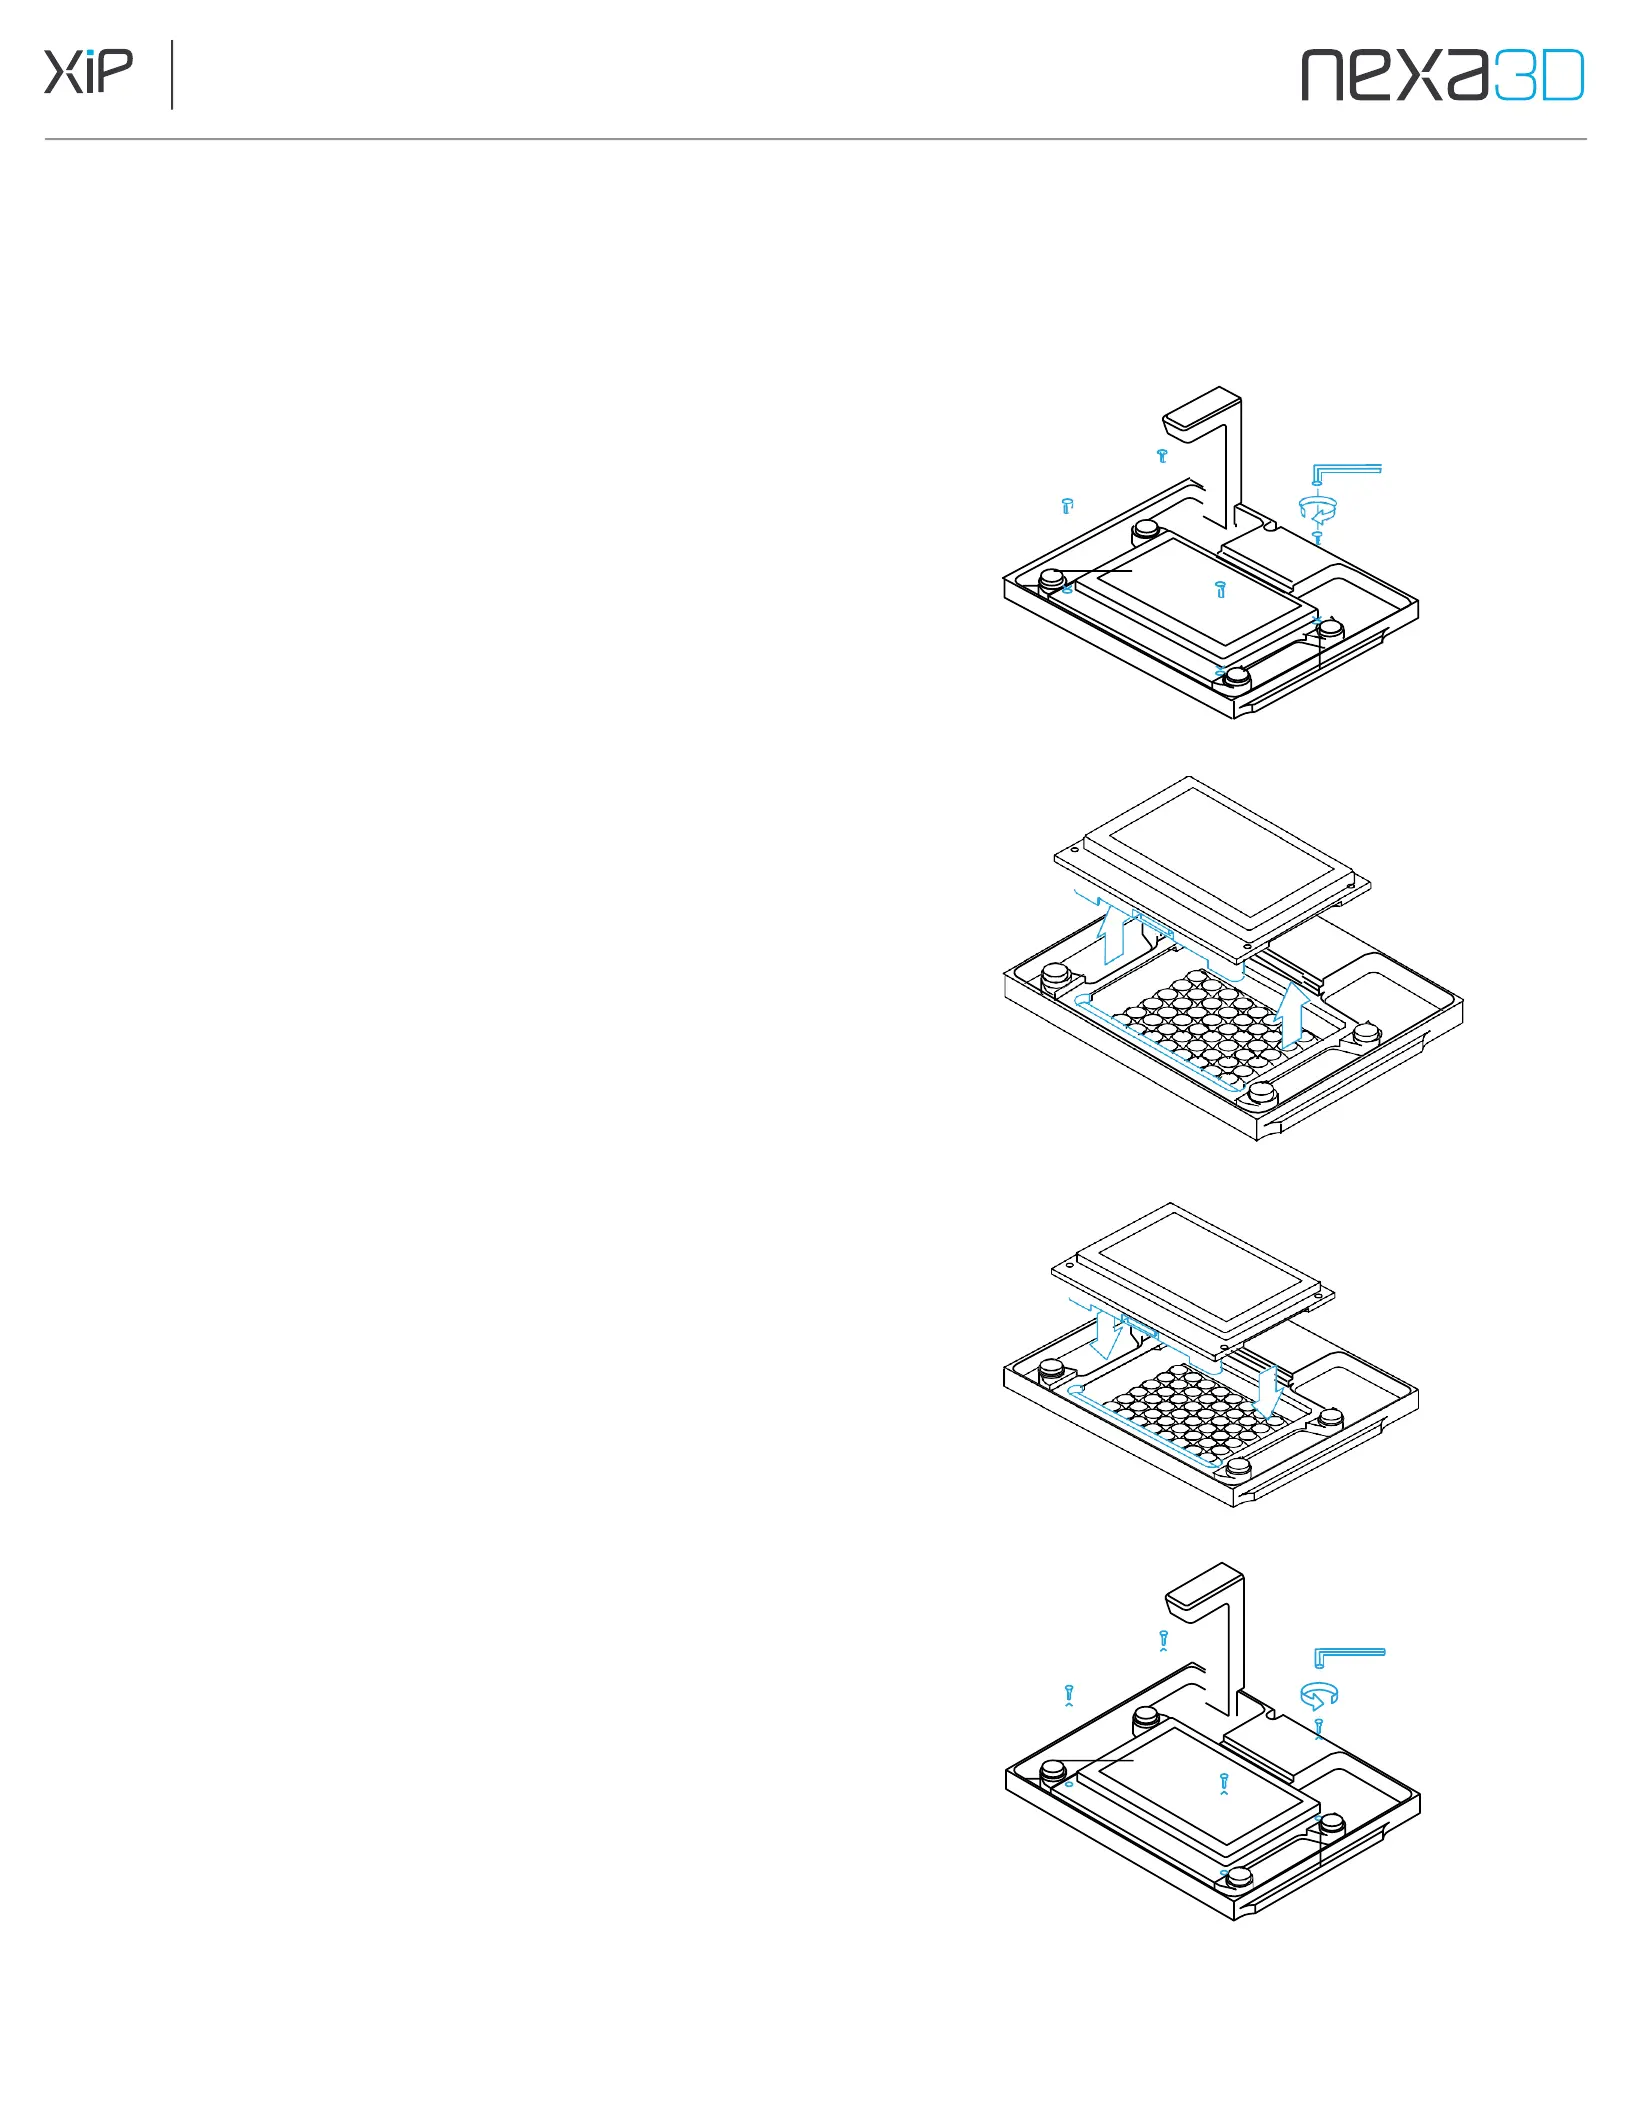
7.2.4 Replace the LCD Assembly
The LCD screen is essential in resin 3D printing. An image of each layer is generated on
the LCD while an array of LED chips project light through the LCD. The LCD is a
consumable part and may need to be replaced when wear affects print quality.
Remove the old LCD
1.
Turn off the 3D printer and unplug the power cable
before changing the LCD.
2.
Open the printer door and make sure the build plate is
lifted completely on the Z-axis. Remove the Resin
Cartridge, Build Plate, and the Resin Vat.
3.
Use a 3 mm hex (Allen) wrench provided with the
printer to remove the four screws that attach the
LCD to the printer. (Fig. A)
4.
Note: If any resin has cured on the screw heads,
carefully remove it before trying to remove the screws.
5.
Lift the screen straight up and off the printer. (Fig. B)
Install the new LCD
1.
Make sure the new screen is oriented with the PCB
connector (located on the underside of the LCD)
at the front.
2.
Place the new LCD Screen into the printer and make
sure it seats securely with the PCB connector. (Fig. C)
3.
Replace the four screws and tighten with a 3 mm hex
(Allen) wrench until hand tight. (Fig. D)
Fig.
A
Fig.
B
After LCD installation, run the Build Plate Leveling
Procedure on the UI to calibrate the new LCD to your Build
Plate. Failure to do so may result in damage to the LCD. To
perform the procedure, install the Build Plate and choose
Maintenance > Build Plate Leveling
from the touch screen.
Follow the on-screen steps to complete the procedure.
Fig.
C
Fig.
D