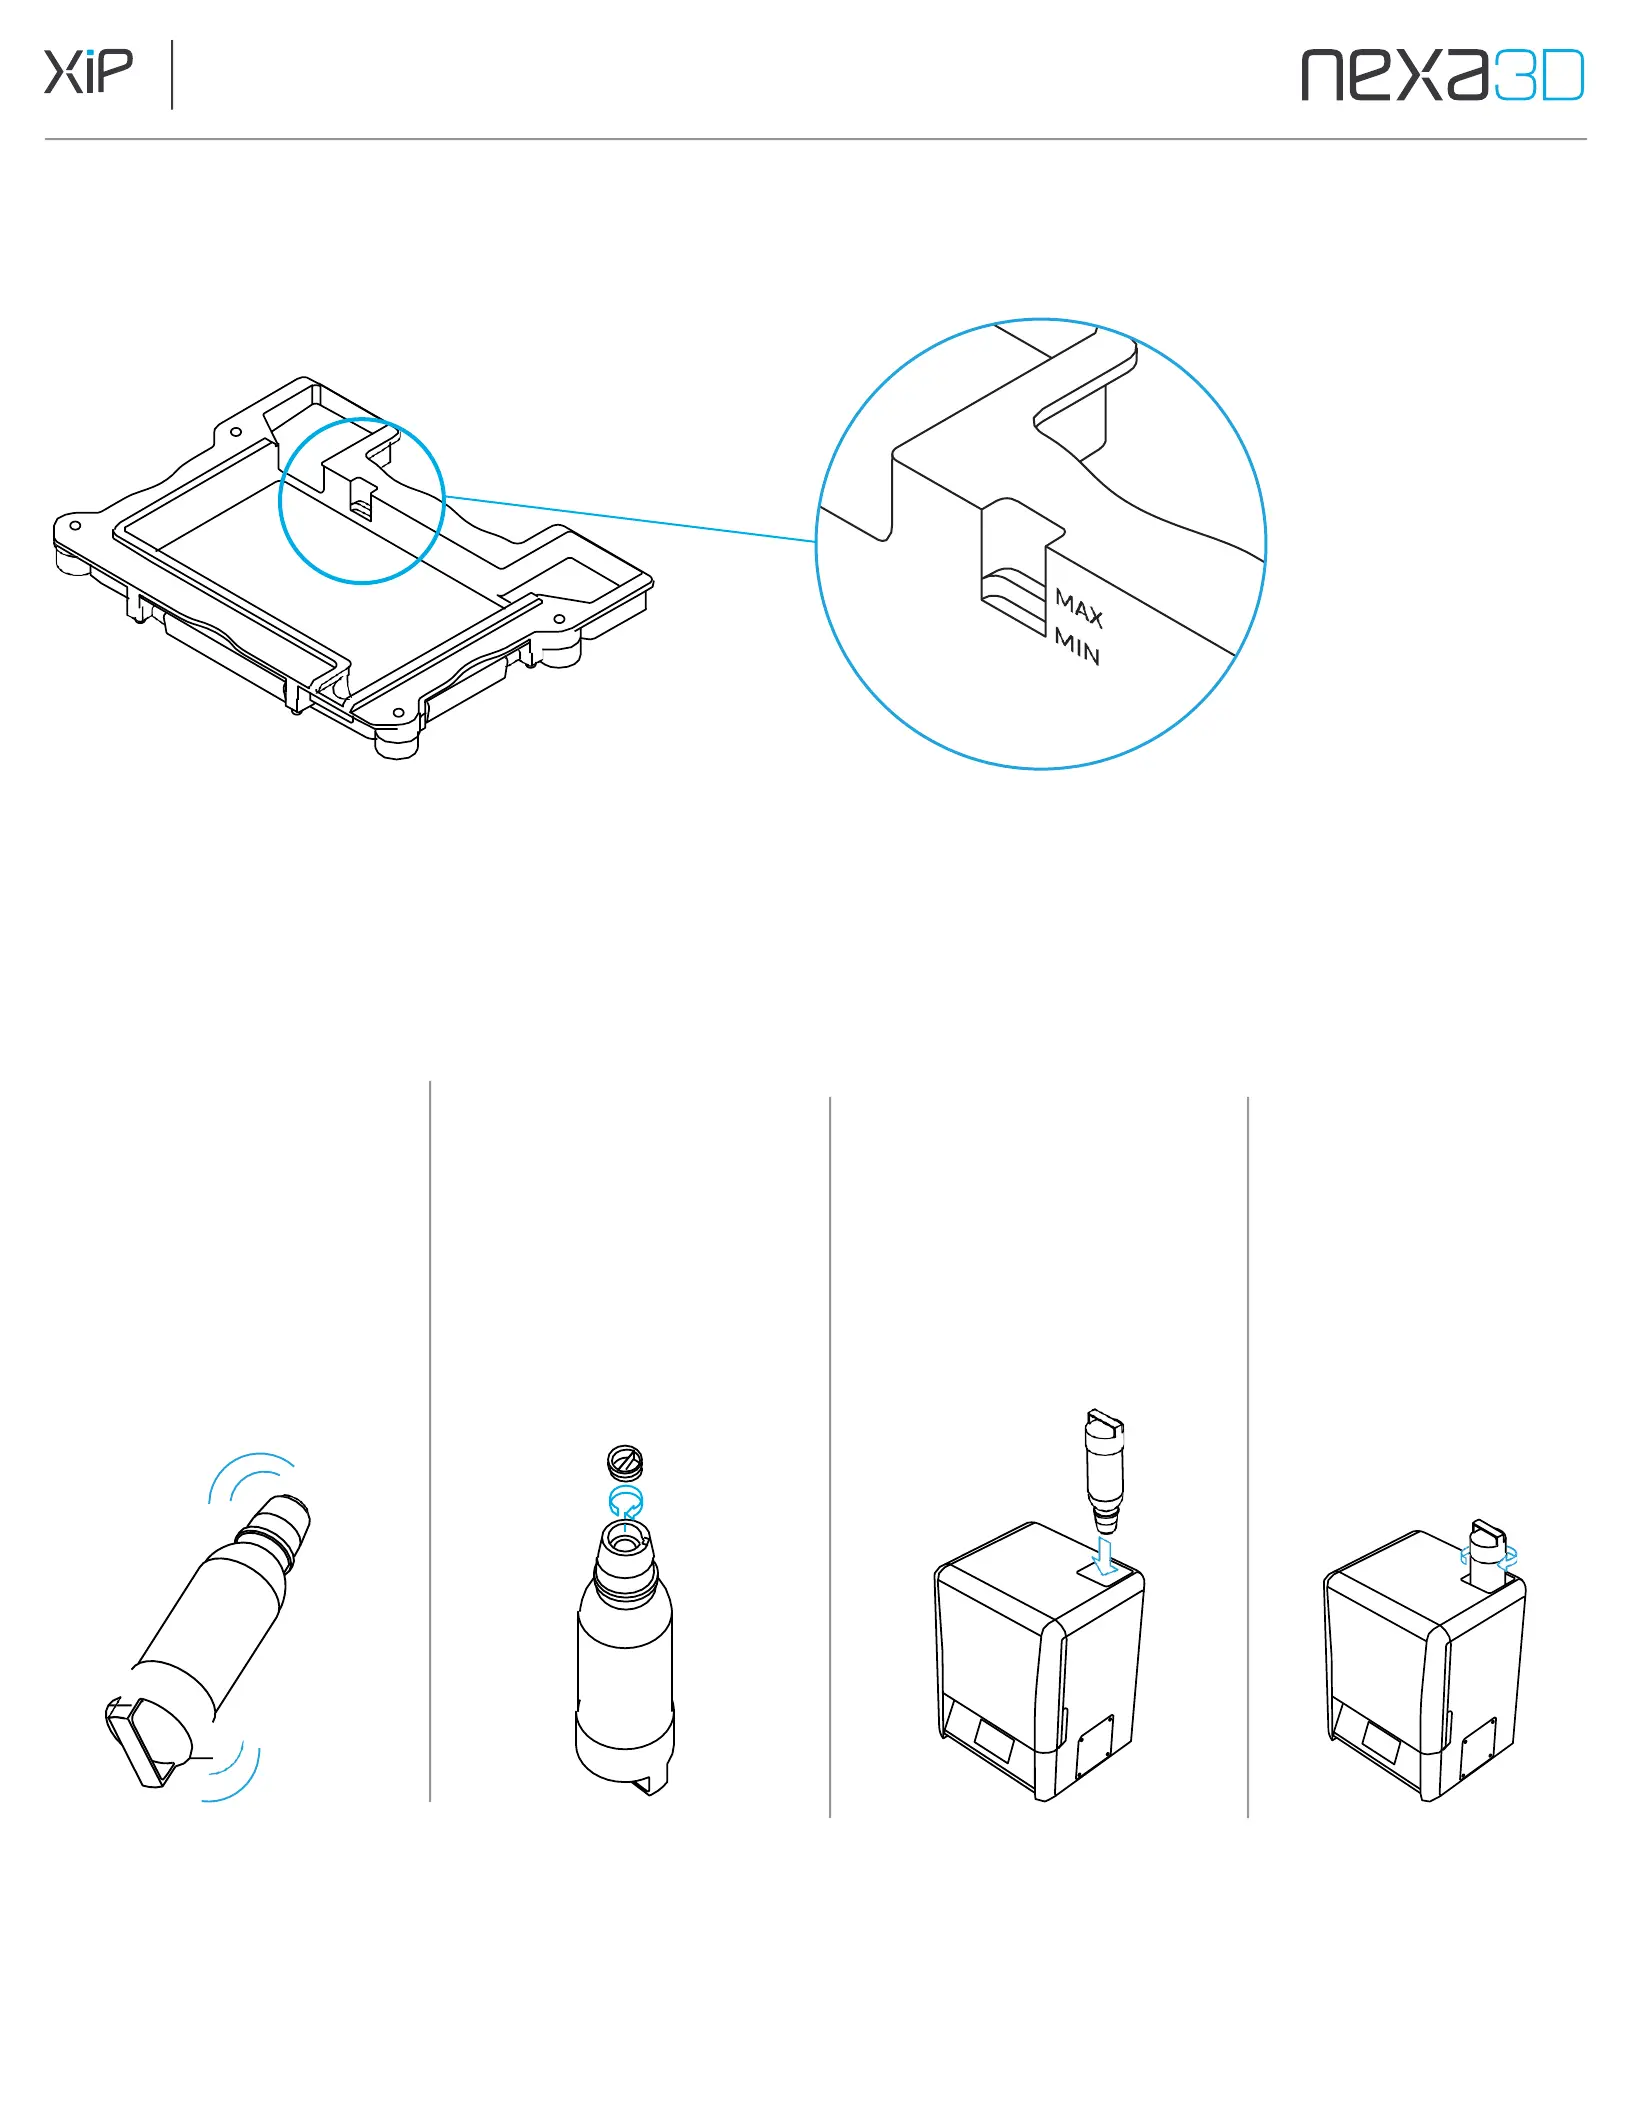
If using a material that cannot use the automatic resin dispense system, be
aware of the fill level notches in the back left hand corner of the resin vat.
The max fill line is the second notch from the bottom.
Make sure not to fill over the second notch,
otherwise there is a risk for resin spill.
5.5 Install the Resin Cartridge
1.
Shake the Resin
cartridge for 30
seconds to mix, then
tap
Continue
on the
touch screen.
2.
Remove the seal cap
of the resin cartridge
by unscrewing
the top.
3.
Invert the cartridge and
fully insert for dispense,
rotate cartridge until it
drops in place and sits
flush with printer top.
4.
The cartridge can
rest in the hanging
position to allow
for vat clearance
during removal
and replacement.