6. Click Save to enable the settings or click Restore to use the default
settings.
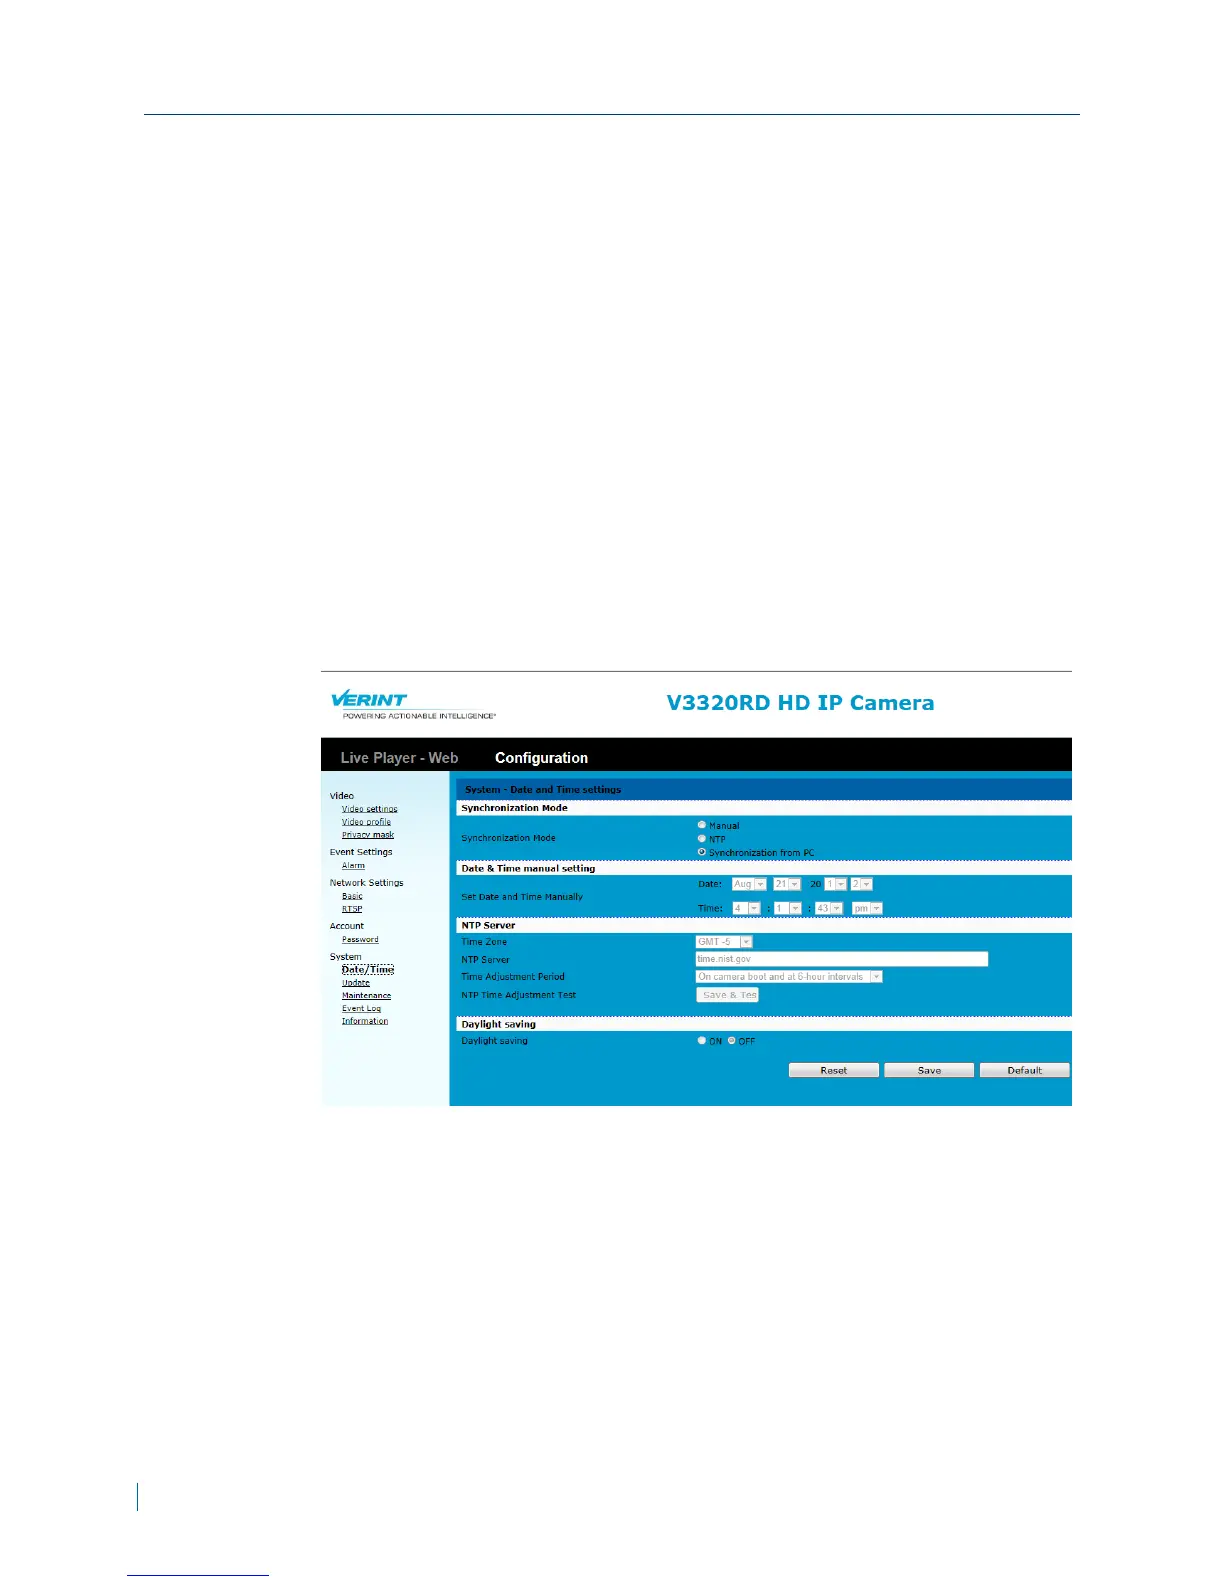
Configuring the Date and Time
Setting the date and time ensures that the video and data recordings on the
IPcamera accurately reflect the date and time the video or data was taken. If
you enabled the Daylight Savings option when adding IPcamera, the clock is
adjusted forward one hour near the start of spring and are adjusted backward
in autumn.
► To configure the date and time
1. In a web browser, type the IP address of the Nextiva IP camera in the
Address bar, and then press ENTER.
2. Type the username and password.
3. Click Configuration >System >Date/Time.
Configuring the Date and Time
39 © 2013 Verint Video Systems Inc.