Safety information Product information Mechanical installation Electrical installation Multi axis system design Technical data
Digitax HD M75X Series Installation and Technical Guide 33
Issue Number: 5
The Digitax HD M75X series has been designed with an optional space-saving side mounted braking resistor. The resistor must be installed together
with an SI Option Module Mounting kit. When the compact braking resistor is used, an external thermal protection device is not required as the
resistor is designed such that it will fail safely under any fault conditions. The in-built software overload protection is set-up at default to protect the
resistor.
Table 3-2 Digitax HD M75X series compact braking resistor kit part number
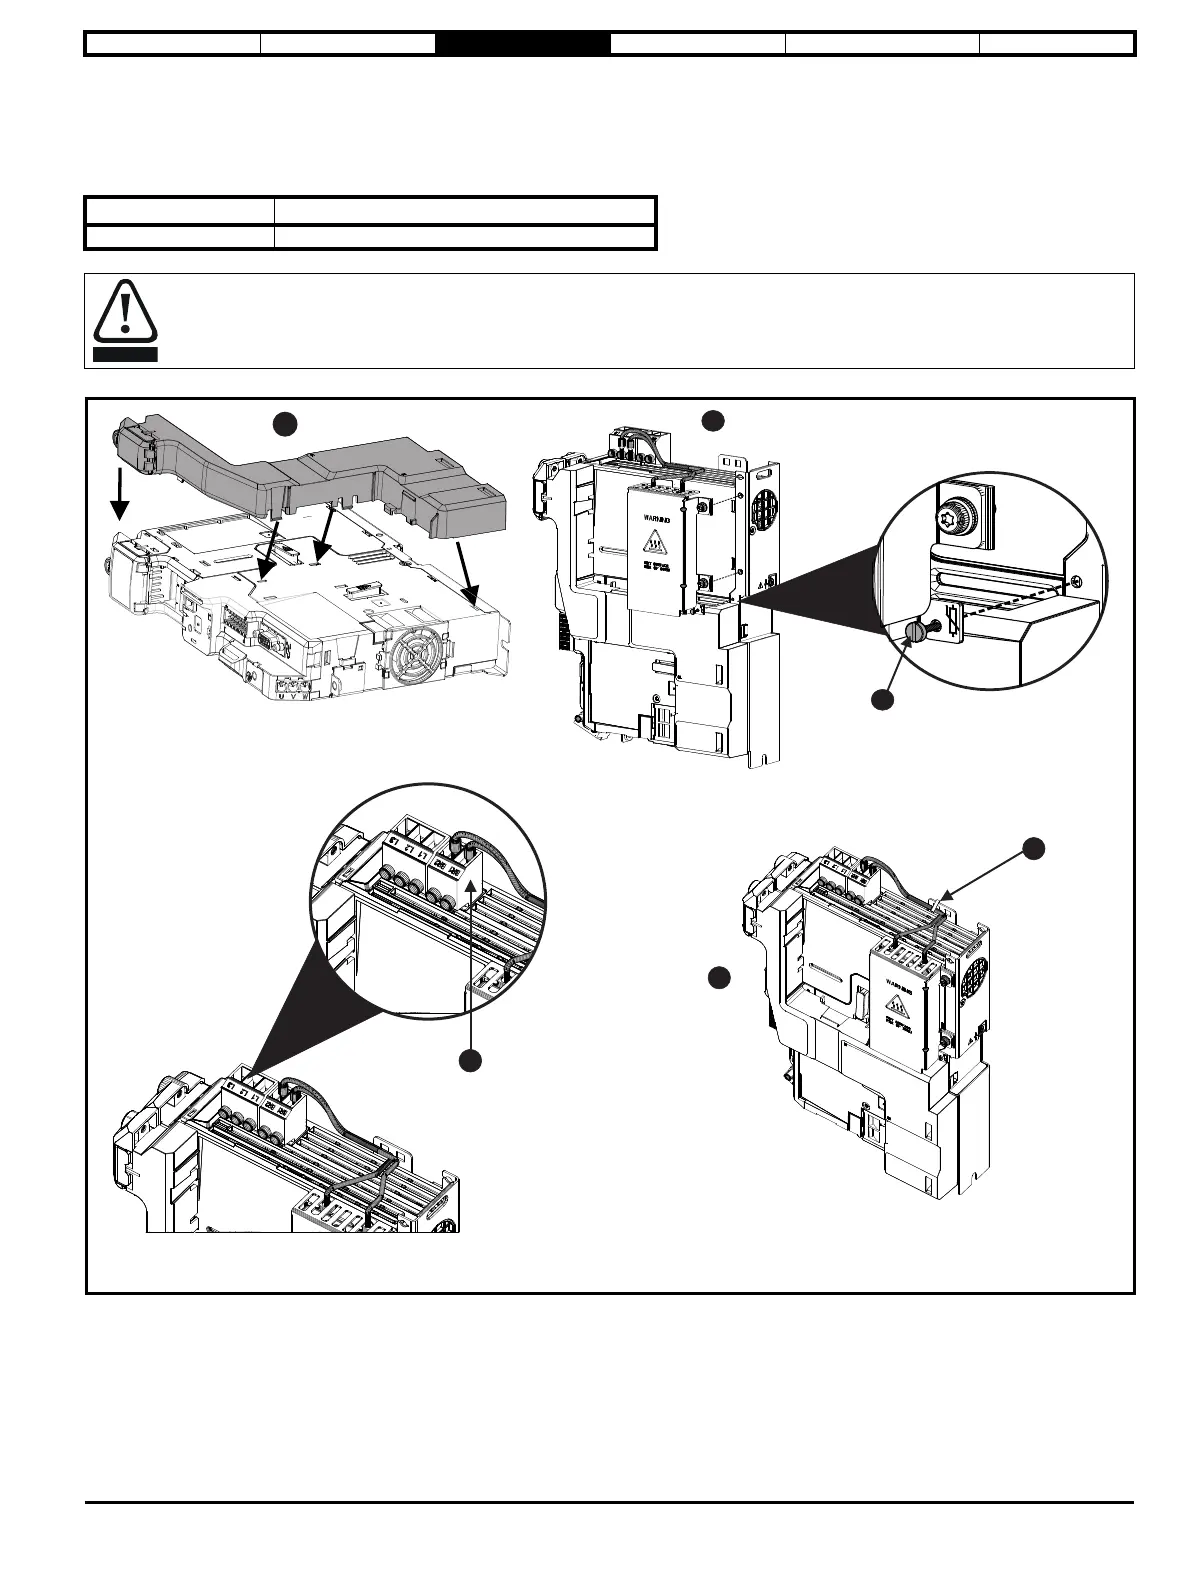
Figure 3-19 Installing a compact braking resistor
1. Install SI Option module mounting kit.
2. Secure the compact brake assembly to the metal side panel using two M3 mounting screws. Attach and secure the M2 screw (A).
3. Connect the brake resistor cables to terminals BR1 and BR2 on the brake terminal connector.
4. Secure cables to bracket (B).
Model size Part number
All 9500-1049
The compact braking resistor must only be used with the Digitax HD M75X drive range.