12
BATTERY MODE SET UP METHOD OF THE
CHARGER
Do not to set charger unless you have
professional
training
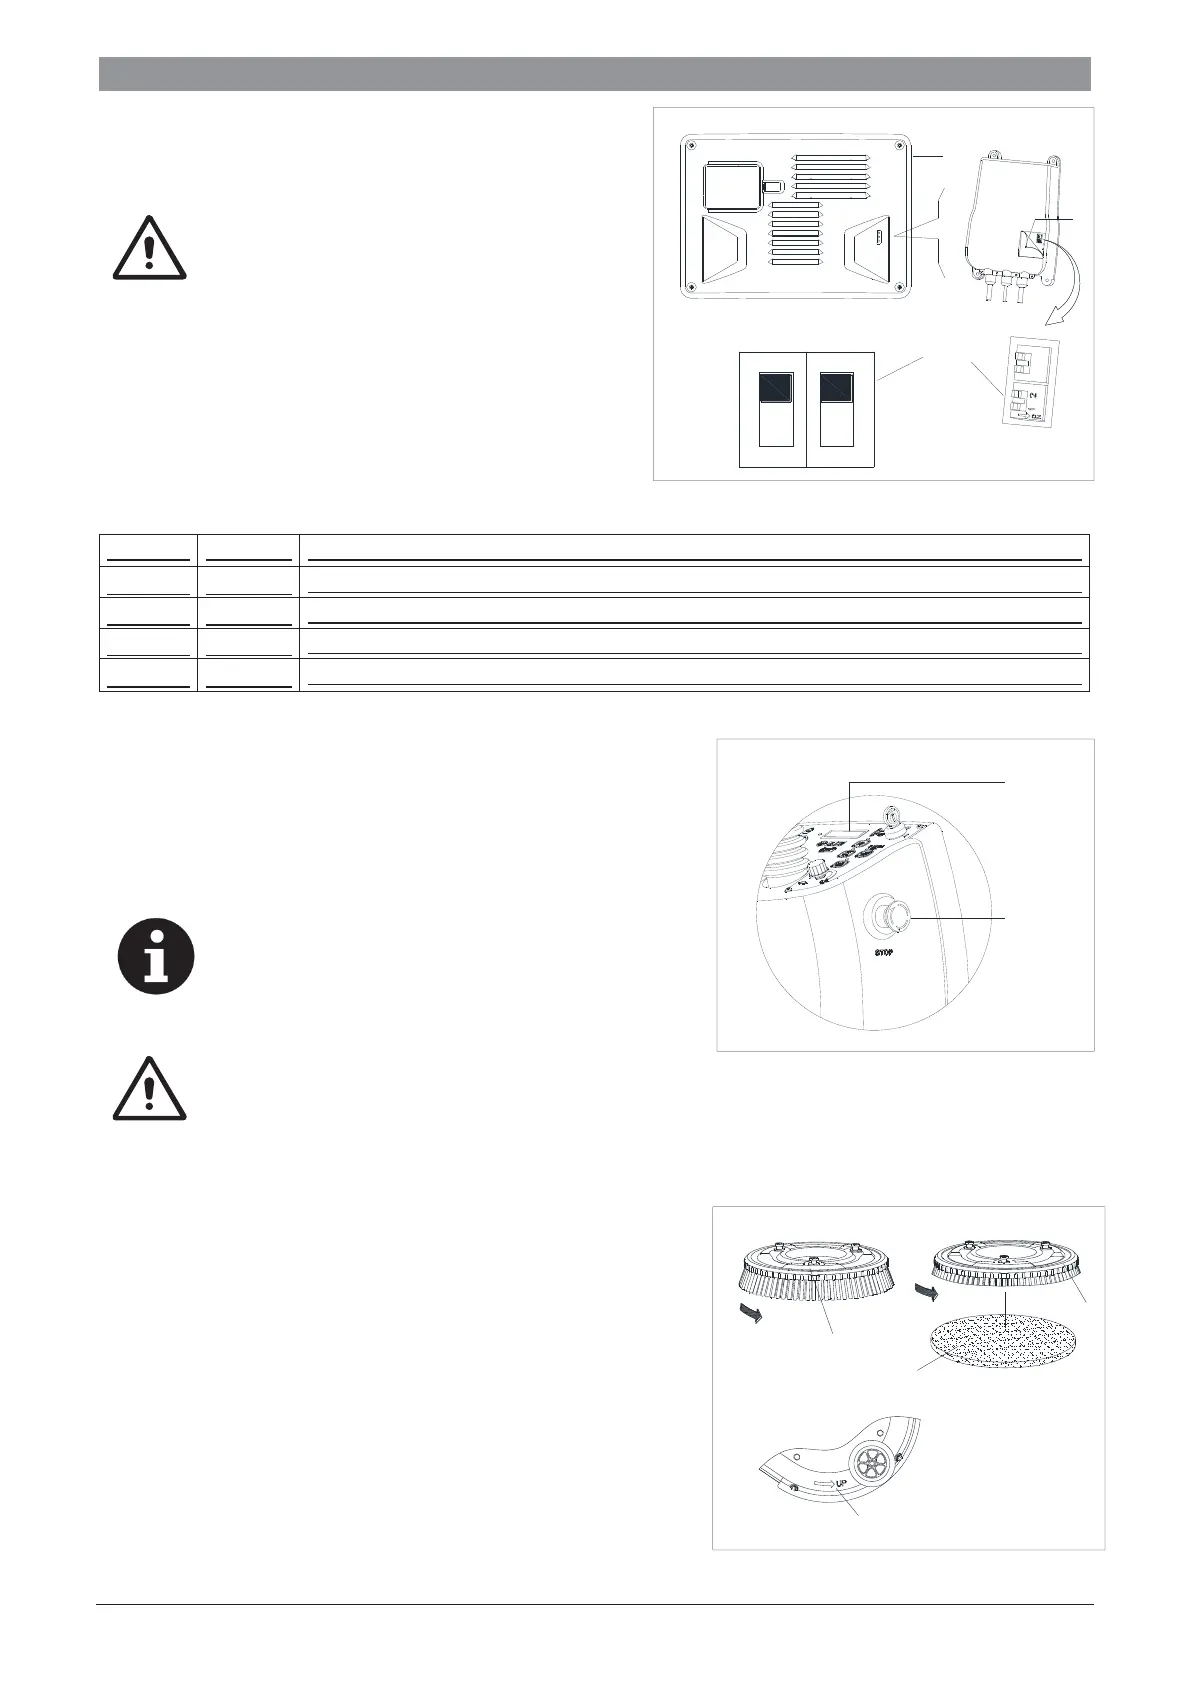
1. Turn off the machine and disassemble the control cover
(A as Figure 6) from the machine. Then pry open the
label on the charger cover (B as Figure 6). you will find
the 2 sets of dipswitches (SW1 and SW2) in the charger.
2. Only the set of dipswitch SW1 (the one on the left side)
has effect on charging curve selection accordingly to the
table below.
IUIa-ACD for Lead-acid (Wet) batteries
IUIa-GEL for Gel batteries of Exide-Sonnenschein
IUU0-GEL for HAZE Gel and AGM batteries of other manufacturers
IUIUa-AGM for Discover AGM batteries
EMERGENCY BRAKING
If there is any emergency during machine operating, press the
emergency switch (A, Figure 6), then all functions of machine will
stop, no display on control panel (B, Figure 6)
BRUSH/PAD INSTALLATION AND UNINSTALLATION
NOTE
Install suitable brush (A, Figure
8
) or Pad (B and
C, Figure
8
) according to the type of floor to be
cleaned.
CAUTION
Before installation or uninstallation of brush or
pad, make sure all the switches on machine are in
off position and lifting up the squeegee from the
floor. The operator must be equipped with suitable
personnel protection devices such as gloves to
reduce the risk of accidents. Proceed as following:
1. Turn off the machine and lift up the brushes (9 as figure 1) from
the floor.
2. Put the brush/pad holder on the floor under the brush hub and
align their center, then rotary the brush/pad holder in the
direction (D as Figure 8) show to install it manually.
3. Press One-Start button (38 as Figure 2) on control panel, lift the
brushes (9 as Figure 2) up from the floor, then press brush
release button (40 as Figure 2) to release brushes automatically.
Rotary in the opposite direction (D as Figure 7) can manually
disassemble the brush/pad holder.
B
A
A
D
C
B
B
DP1
SW 1
A
DP2
ON
OFF
ON
OFF
 Loading...