20
Use on-board charger for battery charging
7. Open the protection cover (E, Figure19), connect the charger connector (A, Figure 19) to the main power supply,
all machine functions are shut off. The red LED (D, Figure 19) turns on means the charging is ongoing.
8. The batteries are fully charged when the green LED (C) becomes on.
9. Disconnect battery charge cable from electric mains after charging is completed, and then store the battery
charger cable (F, Figure19) in the storage box (G, Figure19).
NOTE
For further information about on
-board charger (A, Figure19
), please refer to relevant manual
from service center.
BRUSH/PAD CLEANING
CAUTION!
It is advisable to use protective gloves when cleaning the brush/pad because there may be sharp
debris.
1. Remove the brush/pad from the machine, as shown in the Use chapter.
2. Clean and wash the brush/pad with water and detergent.
3. Check that the brushes/pads are in working condition and not excessively worn; if necessary replace them.
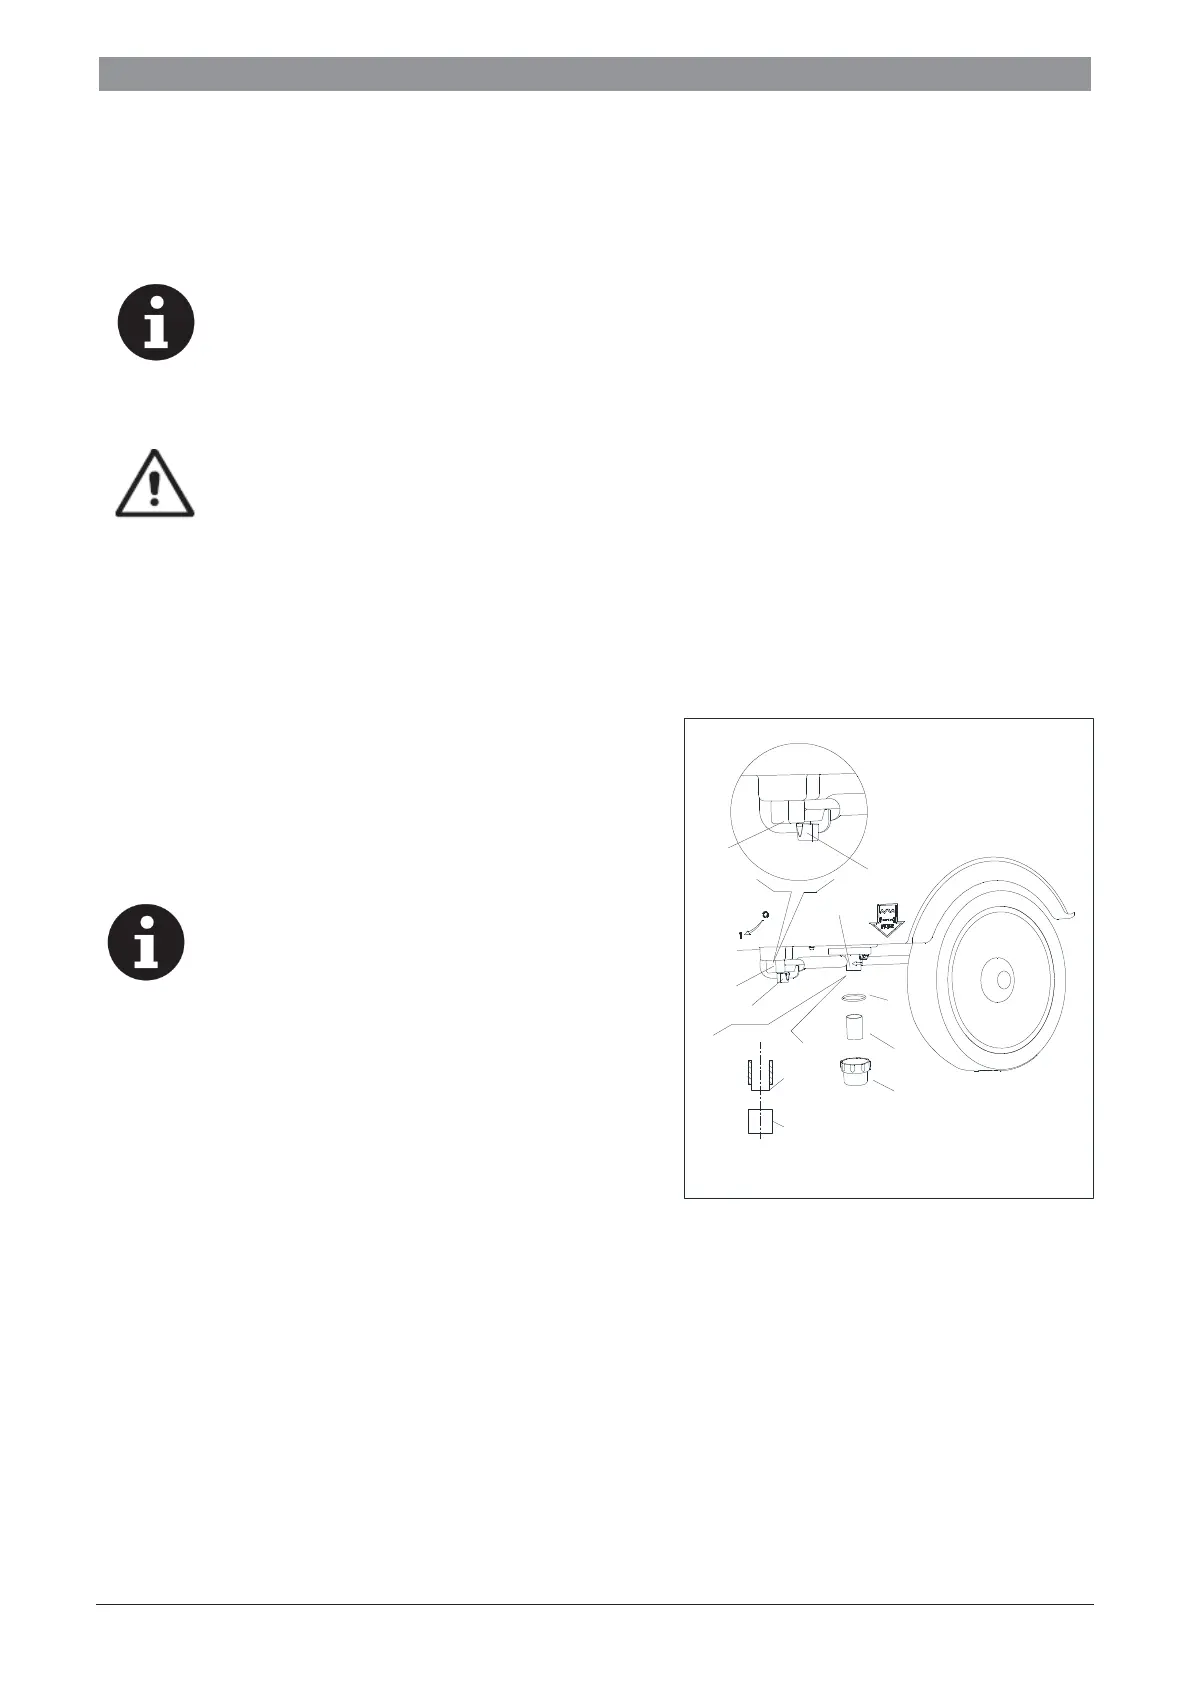
SOLUTION FILTER CLEANING
1. Drive the machine on a level floor.
2. Ensure that the machine is off and the ignition key (24) has
been removed.
3. Turn the valve (A, Figure 20) to off “0”.
4. Remove the filter cover (D, Figure 20), clean the filter (E,
Figure 20), then assemble it to the filter body (F, Figure 20).
NOTE
The filter screen (E) must be correctly
positioned to the housing of filter support (H).
5. Turn the valve to open “1”.
G
E
D
F
A
C
E
H
B
A
 Loading...