14
2. Carefully overturn the recovery tank (F, Figure 10).
3. Open the cap (I Figure 10).
4. Replace or fill the jug (H Figure 10) with any standard gallon container of detergent suitable for the work to be
per formed (highly concentrated detergents). Do not fill the detergent tank completely, leave a few centimeters
from the edge.
only low-foam and non-
flammable detergents, intended for automatic scrubber applications.
NOTE
To install a new jug container, determine the cap size and if it is the smaller cap, remove the
reducing adapter from the hose cap (I Figure
10
). Insert the suction tube into the jug (H Figure
10). Pushdown firmly on the cap (I) and twist at the same time to put the cap back onto the jug
(H Figure
10
). In case of new system, system emptied for cleaning, etc., wait for the hoses to fill
up, before starting the Chemical Mixing System.
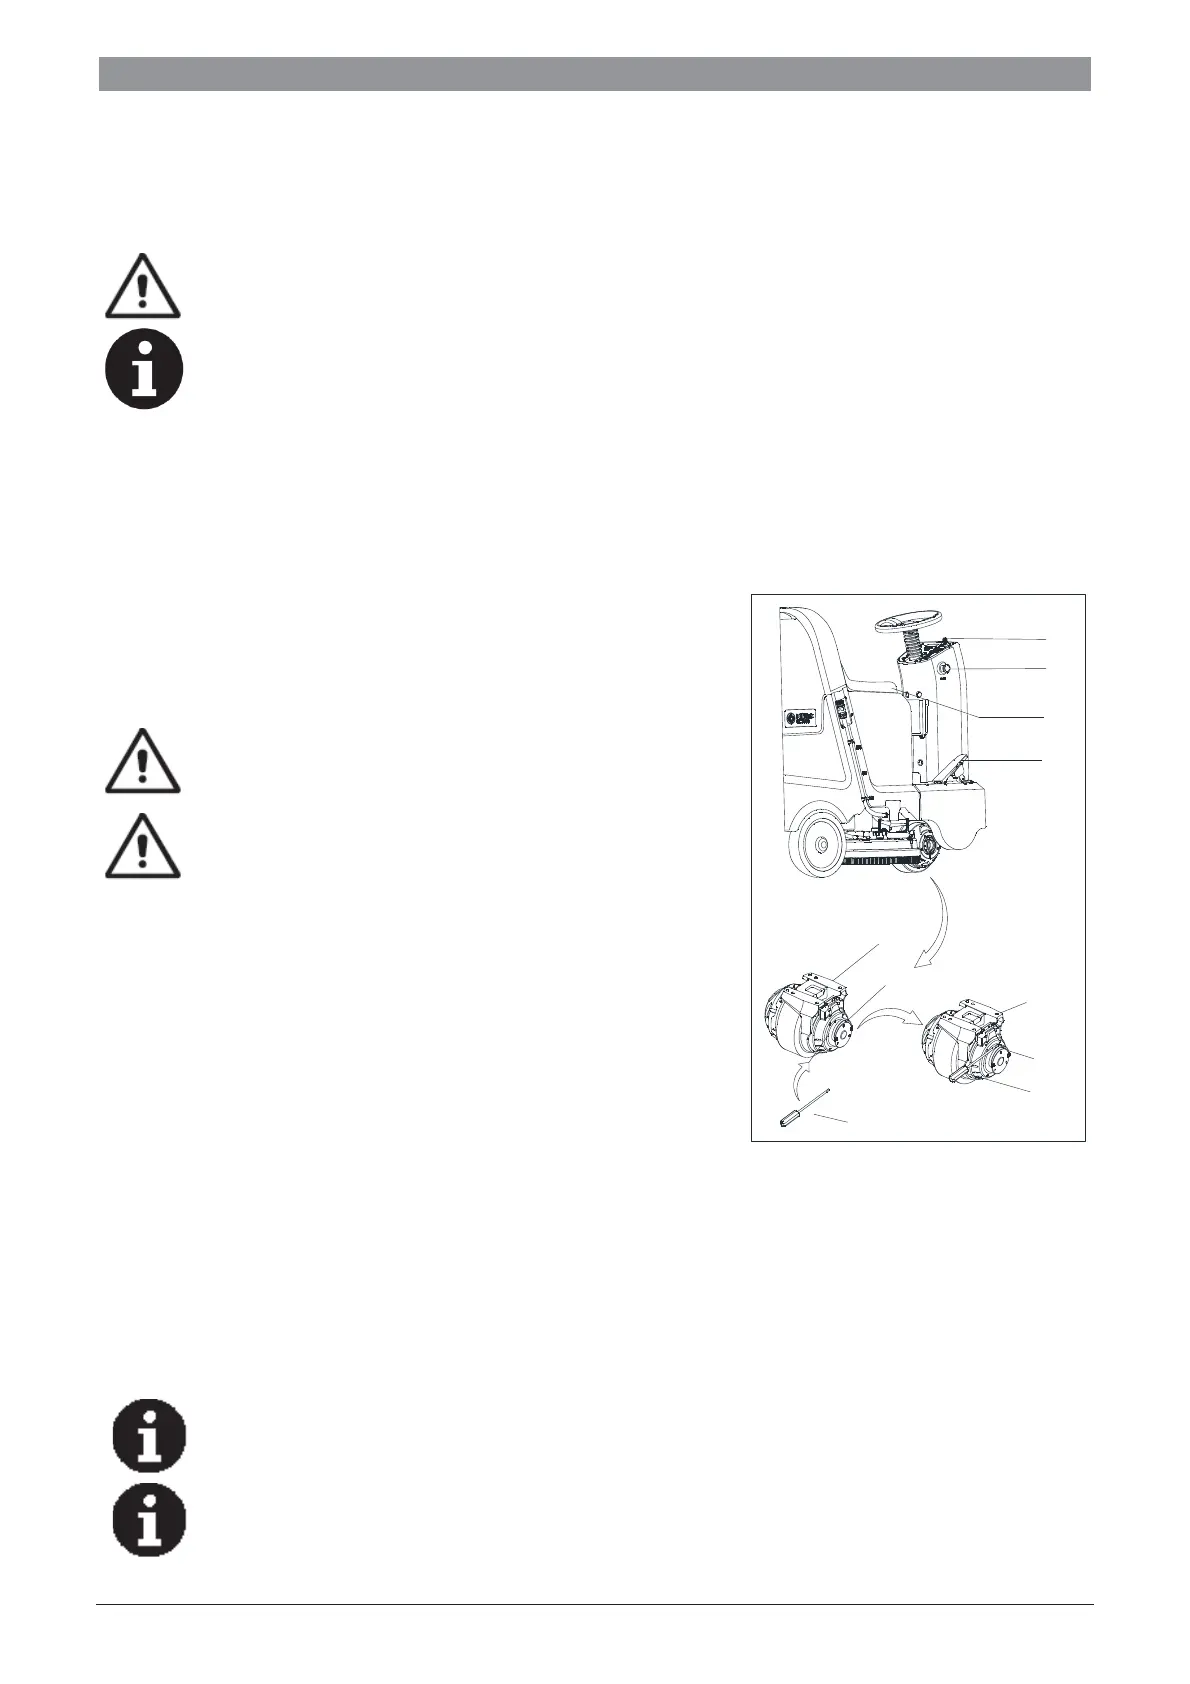
DRIVE MOTOR INSPECTION
1. Turn the key switch (G Figure 11) to “ON”
2. Depress the accelerate pedal (D Figure 11) slightly then loosen it to
check if the machine can be steered forward and stopped.
3. To ensure the security, confirm if the machine can be stopped im-
mediately by pressing the emergency button (F Figure11). Rotate
the emergency button to reset it.
Climbing capacity of the machine must not exceed 10%.
The brake of drive motor is unstuck when the motor
works normally, it locks when the motor stops working.
In some special cases, such as machine pack-
ing/unpacking, machine fault etc., need to move the ma-
chine without drive motor working, please insert A
screwdriver (Figure
11
A) drive motor brake (Figure 11
B) and motor (Figure
11
C) between the grooves (Figure
1
1
), the machine brake is released, the machine can be
moved, after completion, please take out the screwdriver,
otherwise will not be able to start the machine.
MACHINE START AND STOP
Starting the machine
1. Prepare the machine as shown in previous paragraph.
2. Sit on the seat (J, Figure 12), insert the key switch (B) and turn it to “I”. If the LCD (A, Figure 12) is 100%, the
batteries are fully charged for use. If the LCD (A, Figure 12) is 10%, batteries must be charged before operation.
[Refer to MENTAINENCE chapters for batteries charging]
3. Press One-Start button (D, Figure 12) to start the machine, the squeegee and brushes are released to the floor
automatically, vacuum motor begins to work.
NOTE
Make sure the squeegee assembly is lifted before the machine steer backward, or the Machine
will be stopped and LCD screen show “Error” information.
NOTE
Make sure to turn off brush button before brush assembly is lifted, and lift the brush assembly
before machine steers forward/backward.
C
B
A
C
B
A
D
G
F
E
 Loading...