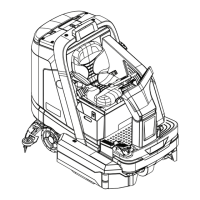
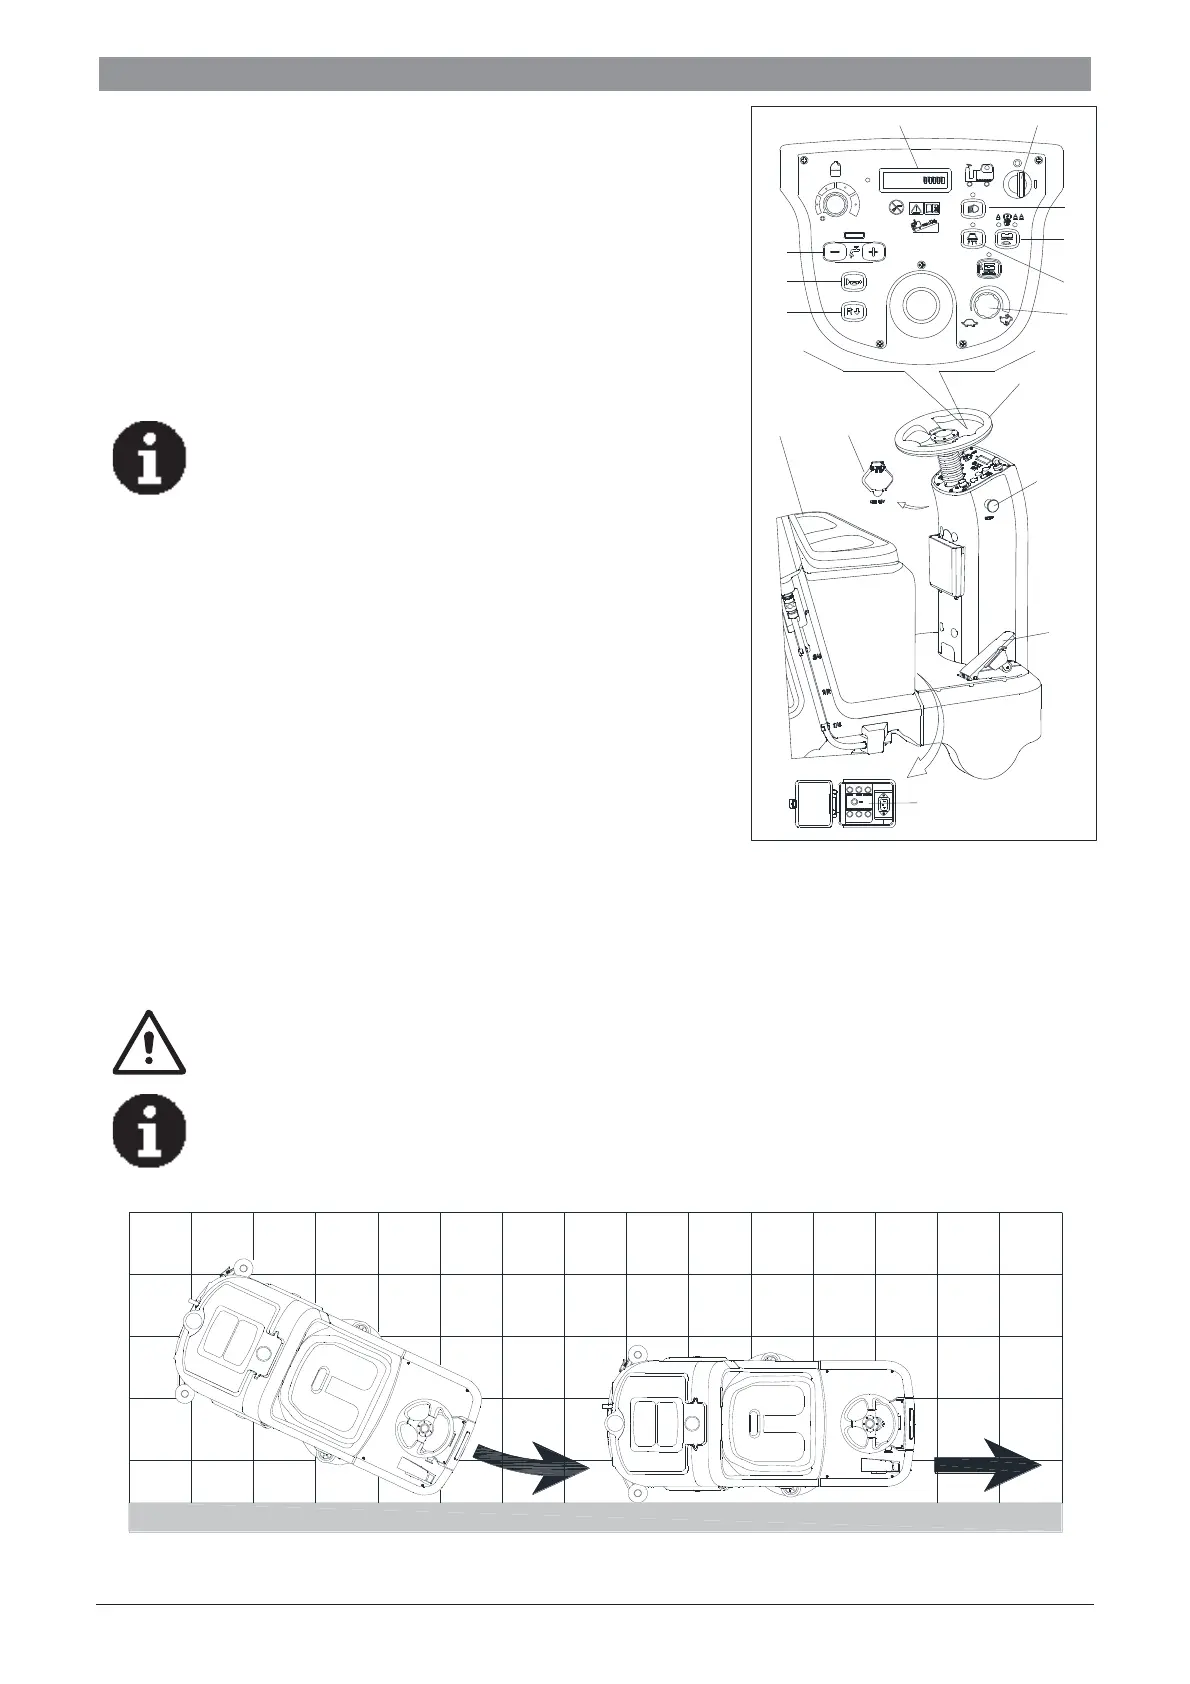
15
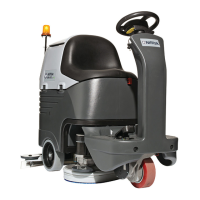
4. Depress the accelerate pedal (N Figure 12), operate the machine
forward or backward by steering wheel (L Figure 12) together with
forward-backward switch (I Figure 12), you can adjust speed by
speed adjusting knob (F Figure 12).
5. Adjust solution flow by solution adjusting button (G Figure 12)
base on cleaning requirement.
6. You can charge your phone or pad through USB charging port (K
Figure 12) when the key switch (A Figure 12) is turned to “ON”.
7. Press the horn button (H Figure 12) to warn people when necessary.
8. If necessary, press the emergency button (M Figure 12) for machine
emergency stop.
NOTE
The brush motor, vacuum motor, drive motor and con-
trol circuit are protected by overload protector (P Fig-
ure
12
). When the overload protector trip, do not reset
it immediately without finding out the root cause, and
make sure the motor is cooling-off before reset.
Stopping the machine
9. Loosen the accelerate pedal (N, Figure 12), the machine stops run-
ning.
10. Press One-Start button (D, Figure 12) to stop brushes and vacuum
motor. The brushes and squeegee are lifted up from the floor auto-
matically. The vacuum system is closed after a few seconds delay.
11. Turn the key switch to “OFF”.
12. Ensure the machine is stopped.
MACHINE OPERATION (SCRUBBING AND DRYING)
1. Start the machine according to procedures in previous paragraphs.
2. Start cleaning by following procedures in section of “Starting the machine”.
3. If necessary, stop the machine to adjust squeegee according to section “Adjusting the balance of squeegee”.
CAUTION!
To avoid any damage to the floor surface, turn off the brush/pad
-
holder when the machine stop
in one place.
NOTE
For correct scrubbing/drying of floors at the sides of walls, we suggest to go near the walls with
right side (Bumper wheel side) of the machine as shown in below Figure 13.
J
AGM
F
L
C
A
I
H
D
M
N
B
P
100%
G
E
K
 Loading...