ENGLISH INSTRUCTIONS FOR USE
28 S W 5 5 00, F L O O R T E C R 9 8 5 - 14 664 7 2000
03/2016
MAIN BROOM REPLACEMENT
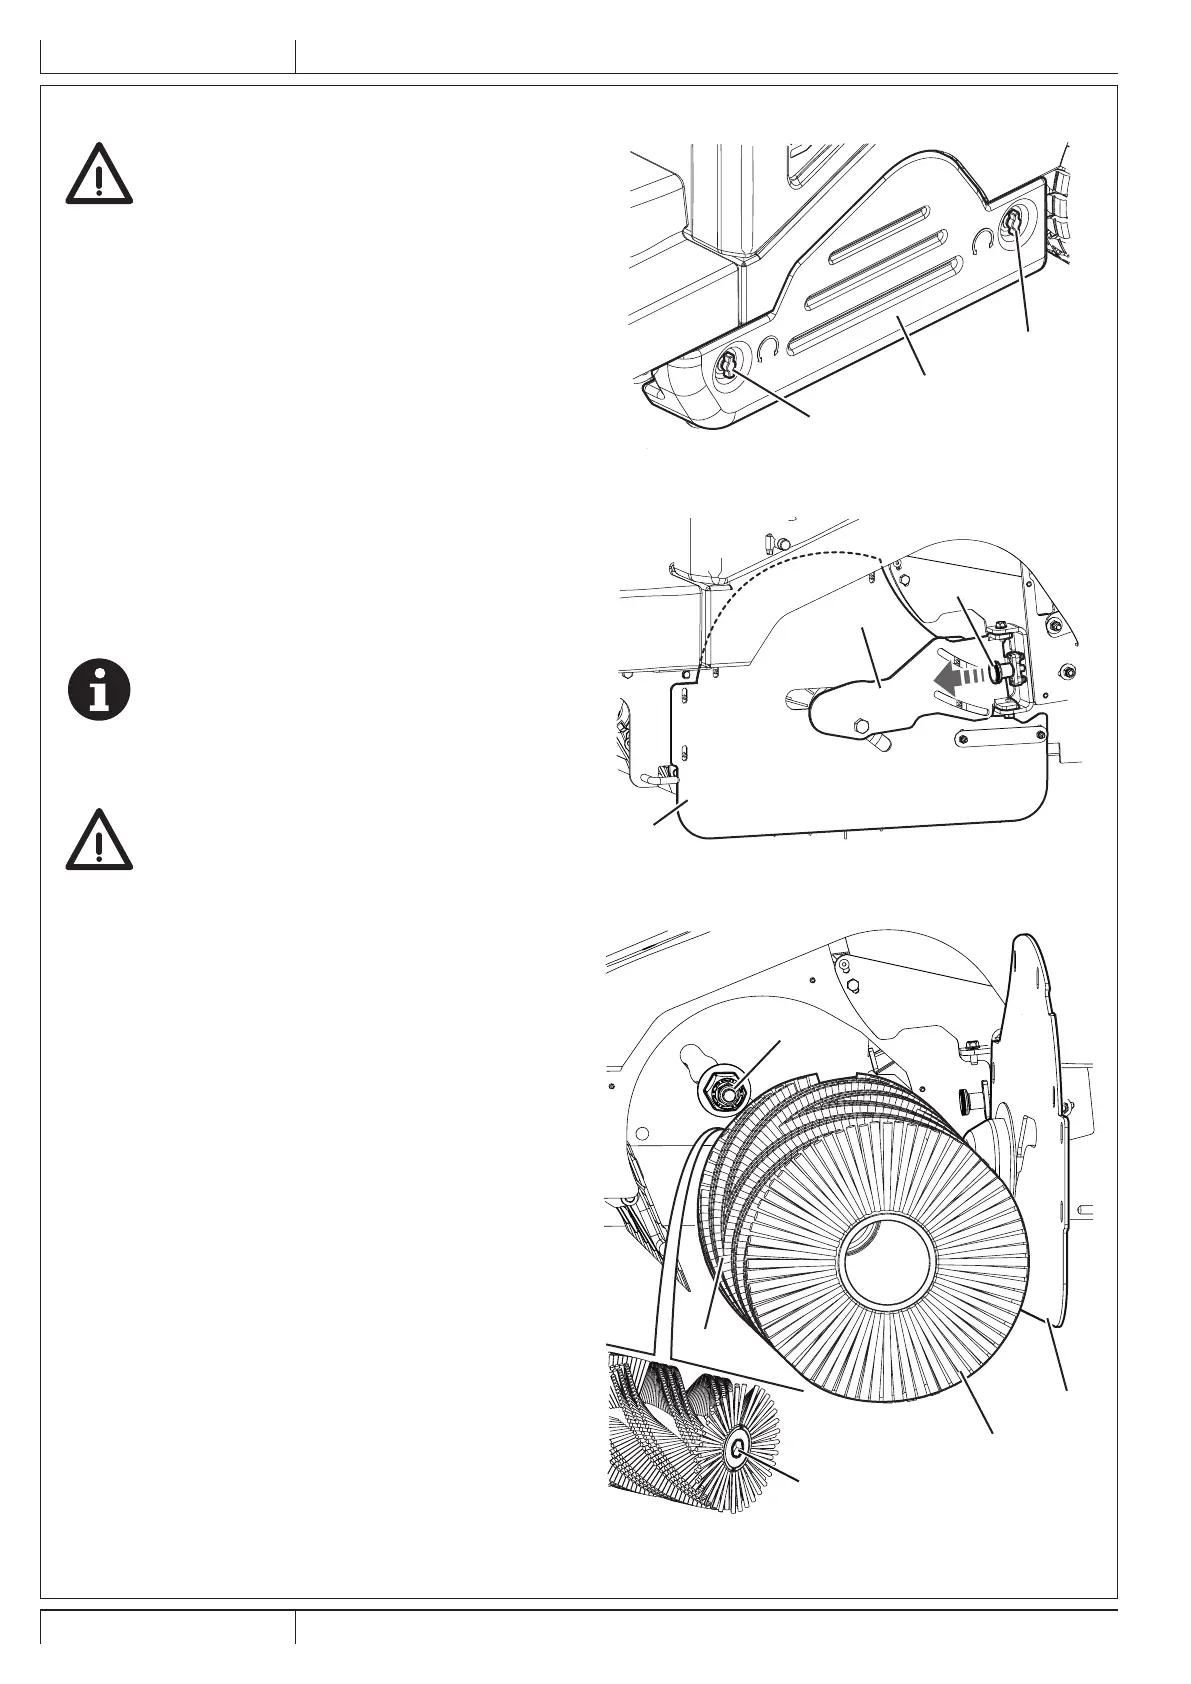
WARNING!
It is advisable to wear protective gloves when
replacing the main broom because there can be
sharp debris between the bristles.
1. D r i ve t h e m a ch i n e o n a l e ve l g r o u n d a n d e n g a g e t h e
parking rake.
2. E n su r e t h a t t h e m a i n b r o o m i s i n t h e l i f t e d p o si t i o n .
3. Turn the ignition ke (51) to 0 and remove it.
4 . R e m o ve t h e l e f t d o o r ( A , F i g . 10) b y t u r n i n g t h e f a st e n e r s
( B ) .
5 . Pull the kno (C, Fig. 11) as indicated the arrow to
d i se n g a g e t h e cl o si n g su p p o r t ( D ) .
6. T u r n a n d o p e n t h e c l o si n g su p p o r t ( D ) t o g e t h e r w i t h t h e l e f t
side skirt ().
7 . R e m o ve t h e m a i n b r o o m ( F , F i g . 12) .
8 . Check that the drive hu (G) is free from dirt or foreign
m a t e r i a l s ( co r d s, r a g s, e t c. ) a cci d e n t a l l y r o l l e d u p .
9 . T h e n e w m a i n b r o o m m u st b e i n st a l l e d w i t h t h e b r i st l e s
rows ent as shown in the figure ().
10. I n st a l l t h e n e w m a i n b r o o m a n d e n su r e t h a t t h e h e xa g o n a l
mesh () fits into the relevant drive hu (G).
11. Turn and close the closing support (, Fig. 11) when
closing, slightl pull the kno (C) until it clicks.
N O T E
When closing, manually push the main broom to
engage it in the conical hub of the closing support
(D).
12. Refit the left door (A, Fig. 10) and close it with the fasteners
( B ) .
CAUTION!
Check and adjust the main broom height as
shown in the previous paragraph.
A
B
B
P 1009 04
Figure 10
D
C
P 1009 05
Figure 11
I
F
E
G
H
P 1009 06
Figure 12
 Loading...