INSTRUCTIONS FOR USE ENGLISH
14 664 7 2000 - S W 5 5 00, F L O O R T E C R 9 8 5 29
03/2016
SIDE BROOM HEIGHT CHECK AND ADJUSTMENT
N O T E
Brooms with harder or softer bristles are available.
This procedure is applicable to all types of brooms.
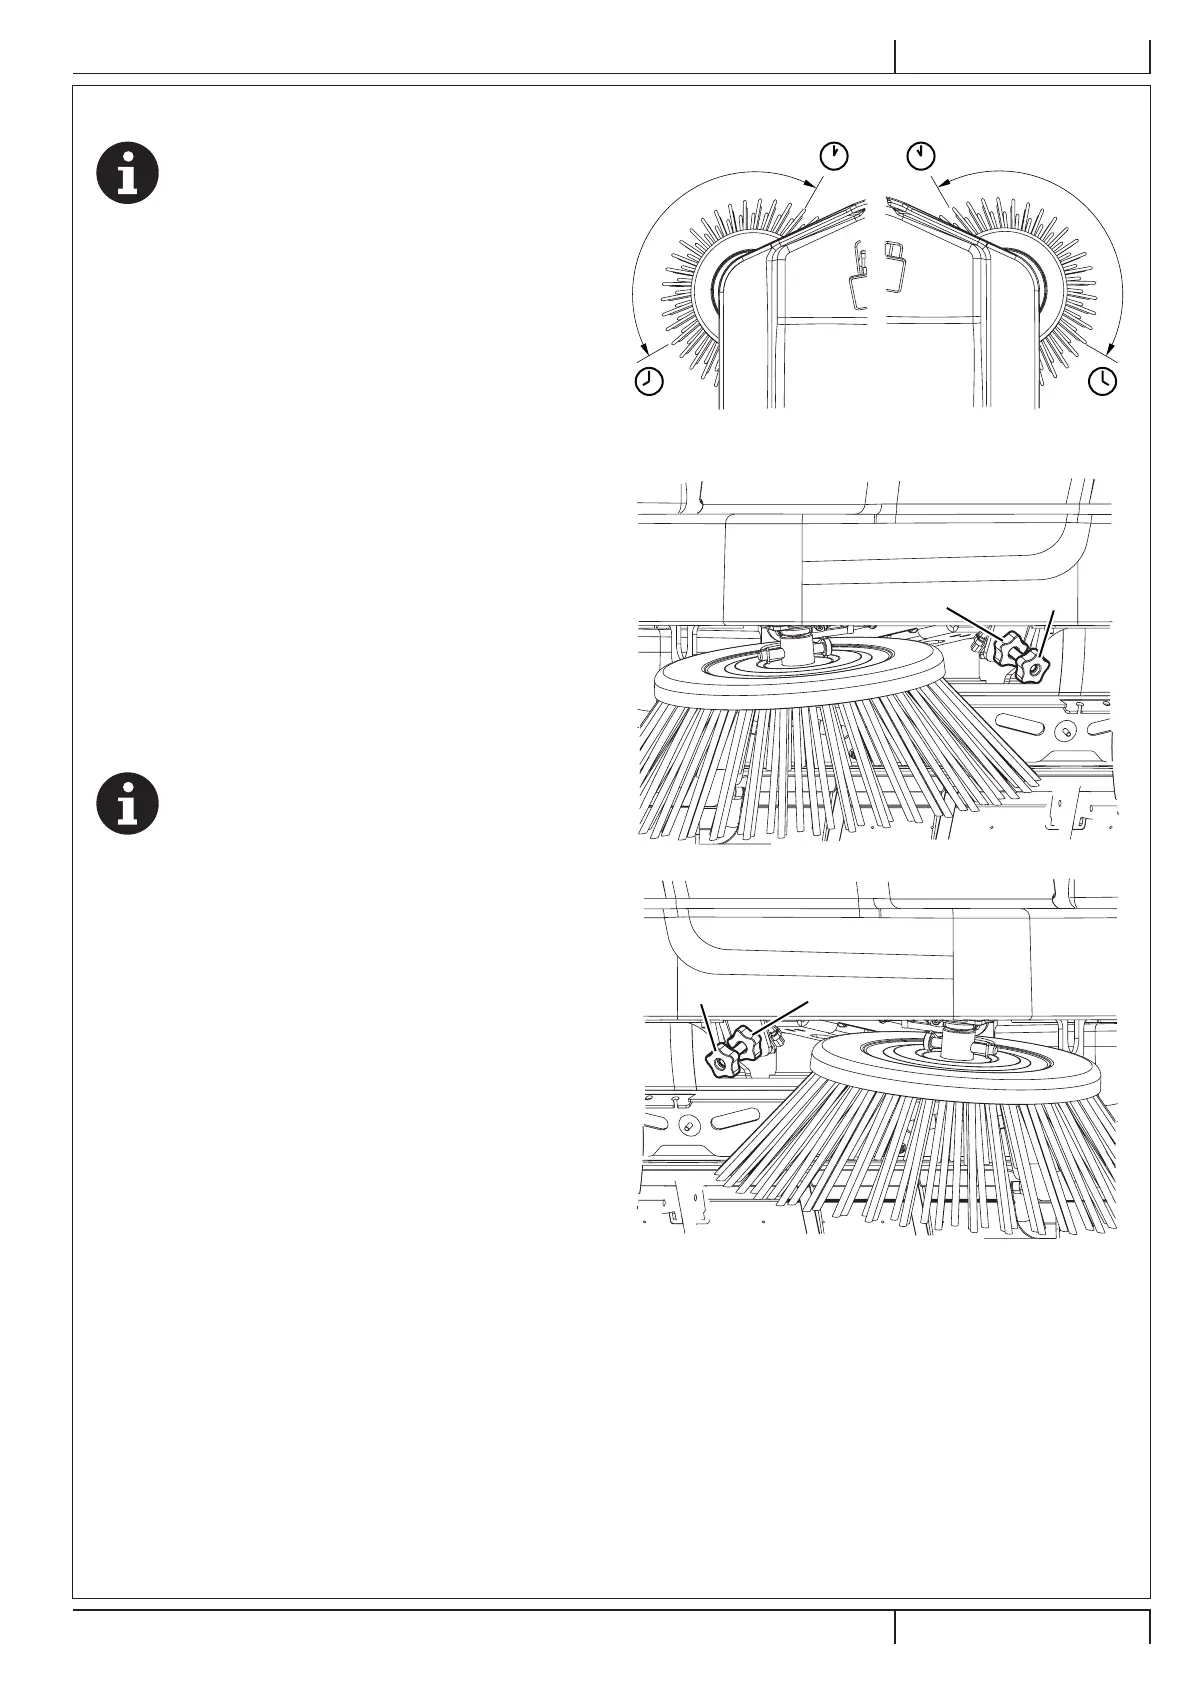
1. Check the side room distance from the ground, according
to the following procedure:
• D r i ve t h e m a c h i n e o n a l e ve l g r o u n d .
• K e e p t h e m a c h i n e st a t i o n a r y , l o w e r t h e si d e b r o o m s
a n d t u r n t h e m o n f o r a f e w se co n d s.
• S t o p a n d l i f t t h e si d e b r o o m s, t h e n m o ve t h e m a ch i n e .
• Check that the side room prints are as shown in the
figure (A and B, Fig. 13).
f the print is not within specifications, adust the side
b r o o m h e i g h t a cco r d i n g t o t h e f o l l o w i n g p r o ce d u r e .
2. ngage the parking rake.
3. Turn the ignition ke (51) to 0.
4 . F o r t h e r i g h t si d e b r o o m , o p e r a t e o n t h e i d l e g e a r b y
loosening the kno (C, Fig. 14), then turn the adustment
kno () and note the following:
• To increase the print, turn the kno counter-clockwise.
• To decrease the print, turn the kno clockwise.
5 . After adusting, lock the idle gear with the kno (C).
6. F o r t h e l e f t si d e b r o o m , o p e r a t e o n t h e i d l e g e a r b y
loosening the kno () and adust the kno (F).
7 . After adusting, lock the idle gear with the kno ().
8 . Perform step 1 again to check the print of the side room
o n t h e g r o u n d .
9 . W h e n t h e b r o o m i s t o o w o r n t o b e a d j u st e d , r e p l a ce i t a s
sh o w n i n t h e n e xt p a r a g r a p h .
N O T E
If necessary, the side broom tilting can be adjusted
too (see the procedure in the Service Manual).
B A
P 1009 07
Figure 13
FE
P 1009 08
Figure 14
 Loading...