INSTRUCTIONS FOR USE ENGLISH
14 664 7 2000 - S W 5 5 00, F L O O R T E C R 9 8 5 31
03/2016
The dust filter must e regularl cleaned to maintain the
efficienc of the vacuum sstem. Follow the recommended filter
service intervals for the longest filter life.
WARNING!
– Wear safety glasses when cleaning the lter.
– Do not puncture the lter.
– Clean the lter in a well-ventilated area.
– Wear appropriate dust mask to avoid
breathing in dust.
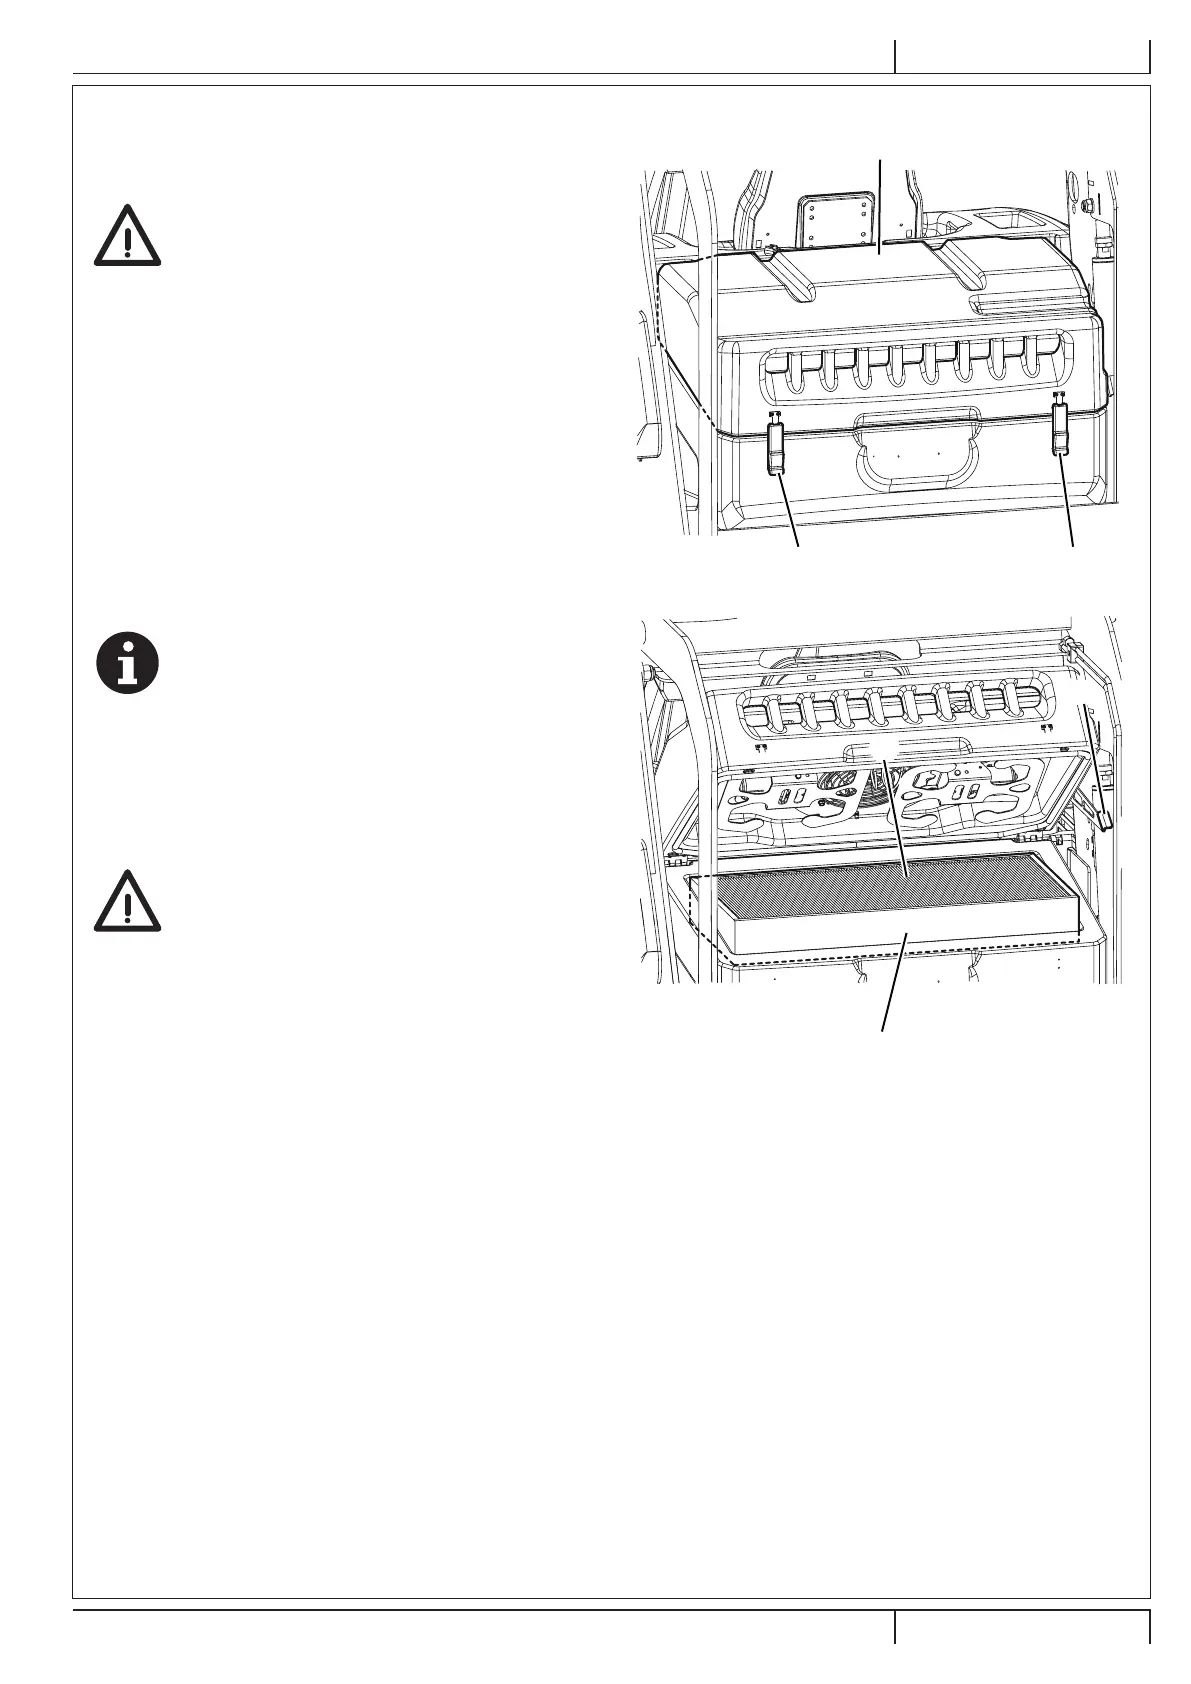
1. rive the machine on a level ground, engage the parking
rake and turn the ignition ke (51) to 0.
2. pen the engine compartment hood (19) and check that it
i s f a st e n e d w i t h t h e su p p o r t r o d ( 4 7 ) .
3. R e l e a se t h e f a st e n e r s ( A , F i g . 16) a n d o p e n t h e va cu u m
syst e m co ve r ( B ) .
4 . Lift the dust filter (C, Fig. 17) and remove it from the
m a ch i n e .
5 . Clean the filter using one of the methods elow:
Method “A”
Collect dust from the filter. Gentl tap the filter against a at
su r f a ce ( w i t h t h e d i r t y si d e d o w n ) t o r e m o ve d u st a n d d i r t .
N O T E
Take care not to damage the metal lip which extends
past the gasket.
Method “B”
Collect dust from the filter. Blow compressed air (maximum
pressure 6 Bar) into the clean side of the filter (in the opposite
direction of the airow).
Method “C” (only for optional polyester lter)
CAUTION!
For the paper lter: do not use water or
detergents to clean it, otherwise the lter could
be damaged.
Collect dust from the filter. Then soak the filter in warm water
f o r 15 m i n u t e s, t h e n r i n se i t u n d e r a g e n t l e st r e a m o f w a t e r
(maximum pressure 2.5 Bar). Let the filter dr completel efore
installing it ack into the machine.
For a etter cleaning, it is allowed to wash the filter with water
a n d n o n - l a t h e r i n g d e t e r g e n t s.
T h i s p r o vi d e s b e t t e r q u a l i t y cl e a n i n g b u t r e d u ce s t h e l i f e o f t h e
filter, which will have to e replaced more freuentl. The use of
inadeuate detergents can damage the filter.
6. nstall the filter in the reverse order of removal and note the
following:
• Clean the filter housing.
• nstall the filter with the wire gaue upwards ( Fig. 17).
• f the filter gasket is damaged or missing, it must e
r e p l a ce d .
7 . P r e ss t h e l e ve r ( E ) t o d i se n g a g e a n d cl o se t h e co ve r ( B ,
F i g . 16) .
8 . E n g a g e t h e f a st e n e r s ( A ) .
P 1009 10
Figure 16
E
D
P 1009 11
Figure 17
PANEL DUST FILTER CLEANING AND INTEGRITY CHECK
 Loading...