7210 SAS-M CHASSIS INSTALLATION GUIDE Installing the Chassis
Issue: 07 3HE 10089 AAAA TQZZA Edition 01 37
3.2.2 Desktop or Shelf Mounting
Before starting this procedure, ensure you have the following:
• four adhesive feet (provided with the 7210 SAS-M)
• an available grounding point near the installation location
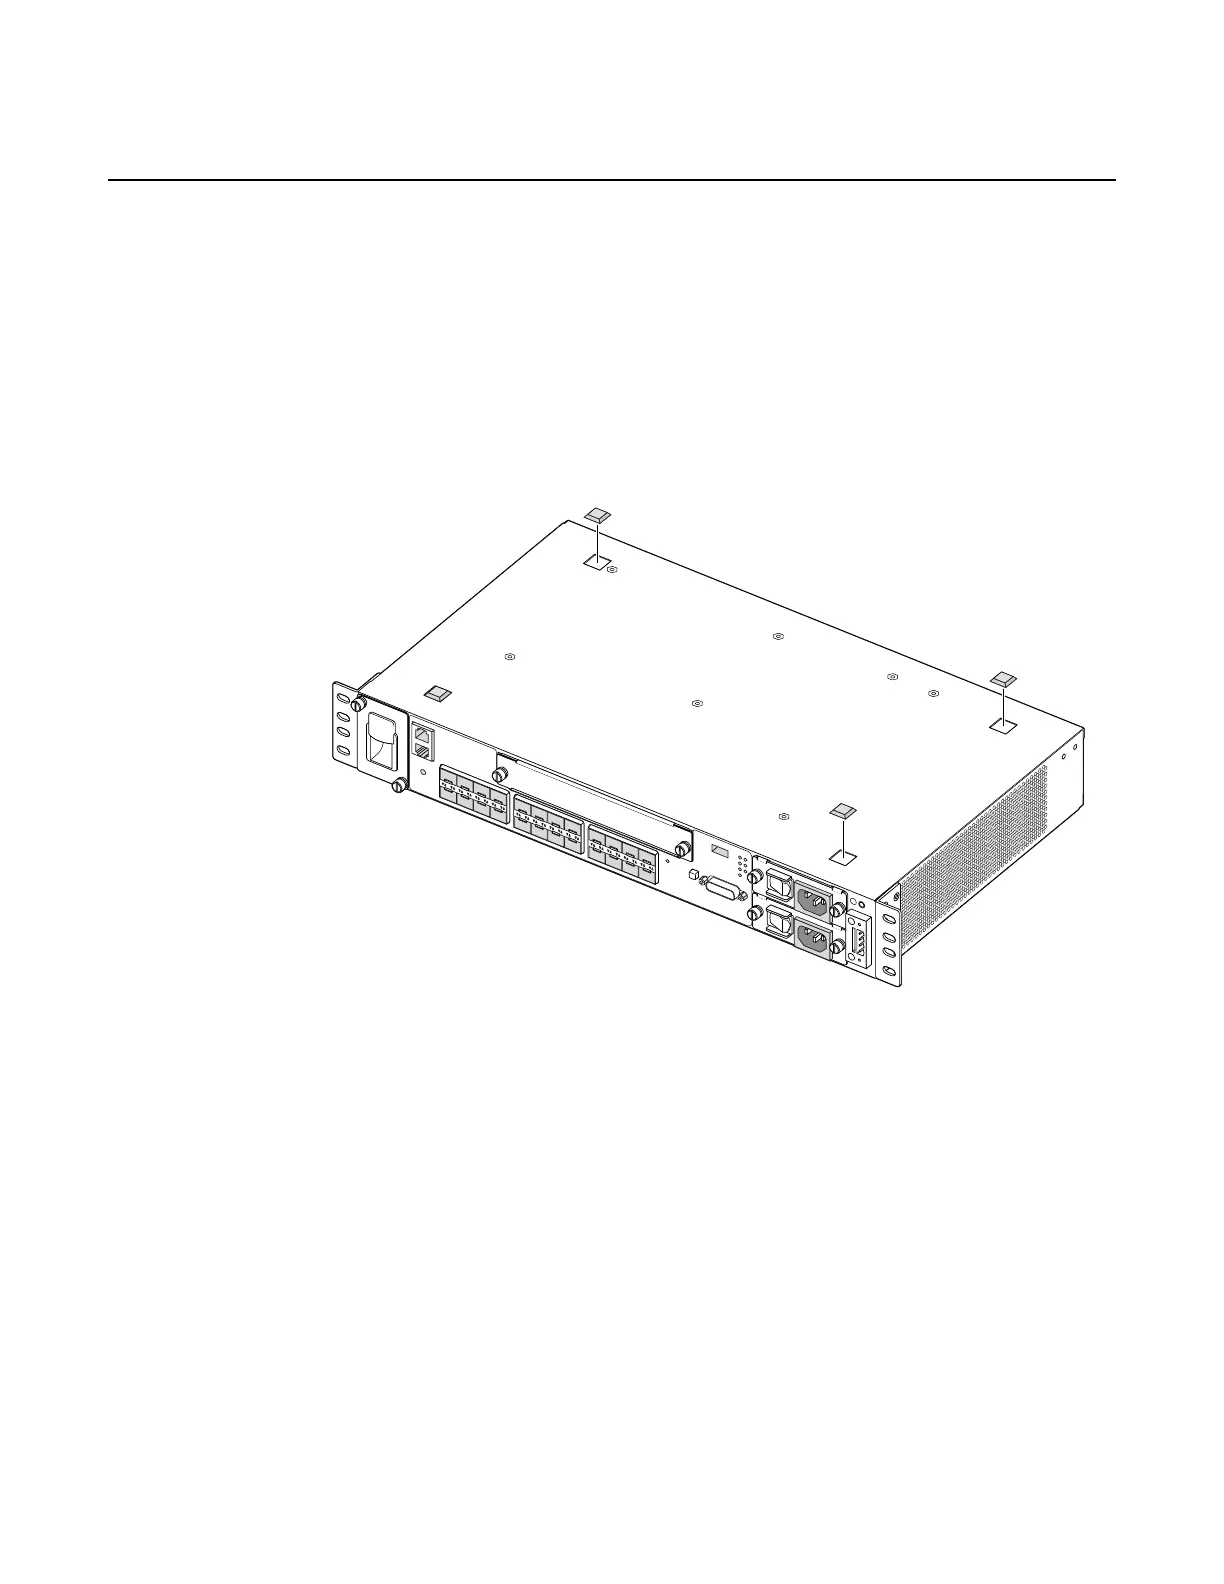
Step 1. Attach the four adhesive feet to the bottom of the first switch, as shown in
Figure 12.
Figure 12 Attaching the Adhesive Feet
Step 2. Set the device on a flat surface near an external power source, making sure
there are at least three inches of space on the front and sides for proper air
flow.
Step 3. If you are installing a single switch, proceed to "Grounding the Chassis" on
page 38.
Step 4. If you are installing multiple switches, attach four adhesive feet to each
switch. Place each device squarely on top of the one below, in any order.
 Loading...