4-1
4 ESM System Operation
4. ESM System Op.
4 ESM System Operation
4.1 ESM Setup & Initialization
This section details the steps and system checks that should be taken to bring the ESM
to a “Ready” state in preparation to receive samples from an external sample handling
device.
1. Ensure that the FLEX2 and ESM are each plugged into an appropriate power
supply.
2. Verify the AD/Valve cable is secured to the
ports on the rear of the ESM and the right
cover of the FLEX2. The cable is secured
with a locking connector sleeve labeled with
a red marker. When installing the cable,
align the red marker on the connector with
the notch on either cable port and slide into
place. To disconnect, slide the connector
sleeve back and pull the cable straight out.
CAUTION: Twisting the cable/cable connector may
cause damage to the system.
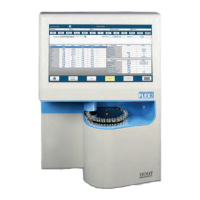
3. Verify that the ESM COM cable is properly connected and secured to the COM
port on the rear of the FLEX2 and that on the rear of the ESM (Fig.4.1 and 4.2,
respectively).
4. Ensure that the Ethernet cable is securely plugged into a port on the ambr®
computer and the network port on the rear of the FLEX2 (Fig. 4.1). See Section
3.3 for additional connectivity options.
5. Verify all segments of the ESM External Tubing set are secured in their respective
positions (For more information on installing the ESM External Tubing set see
Section 5.1.2)
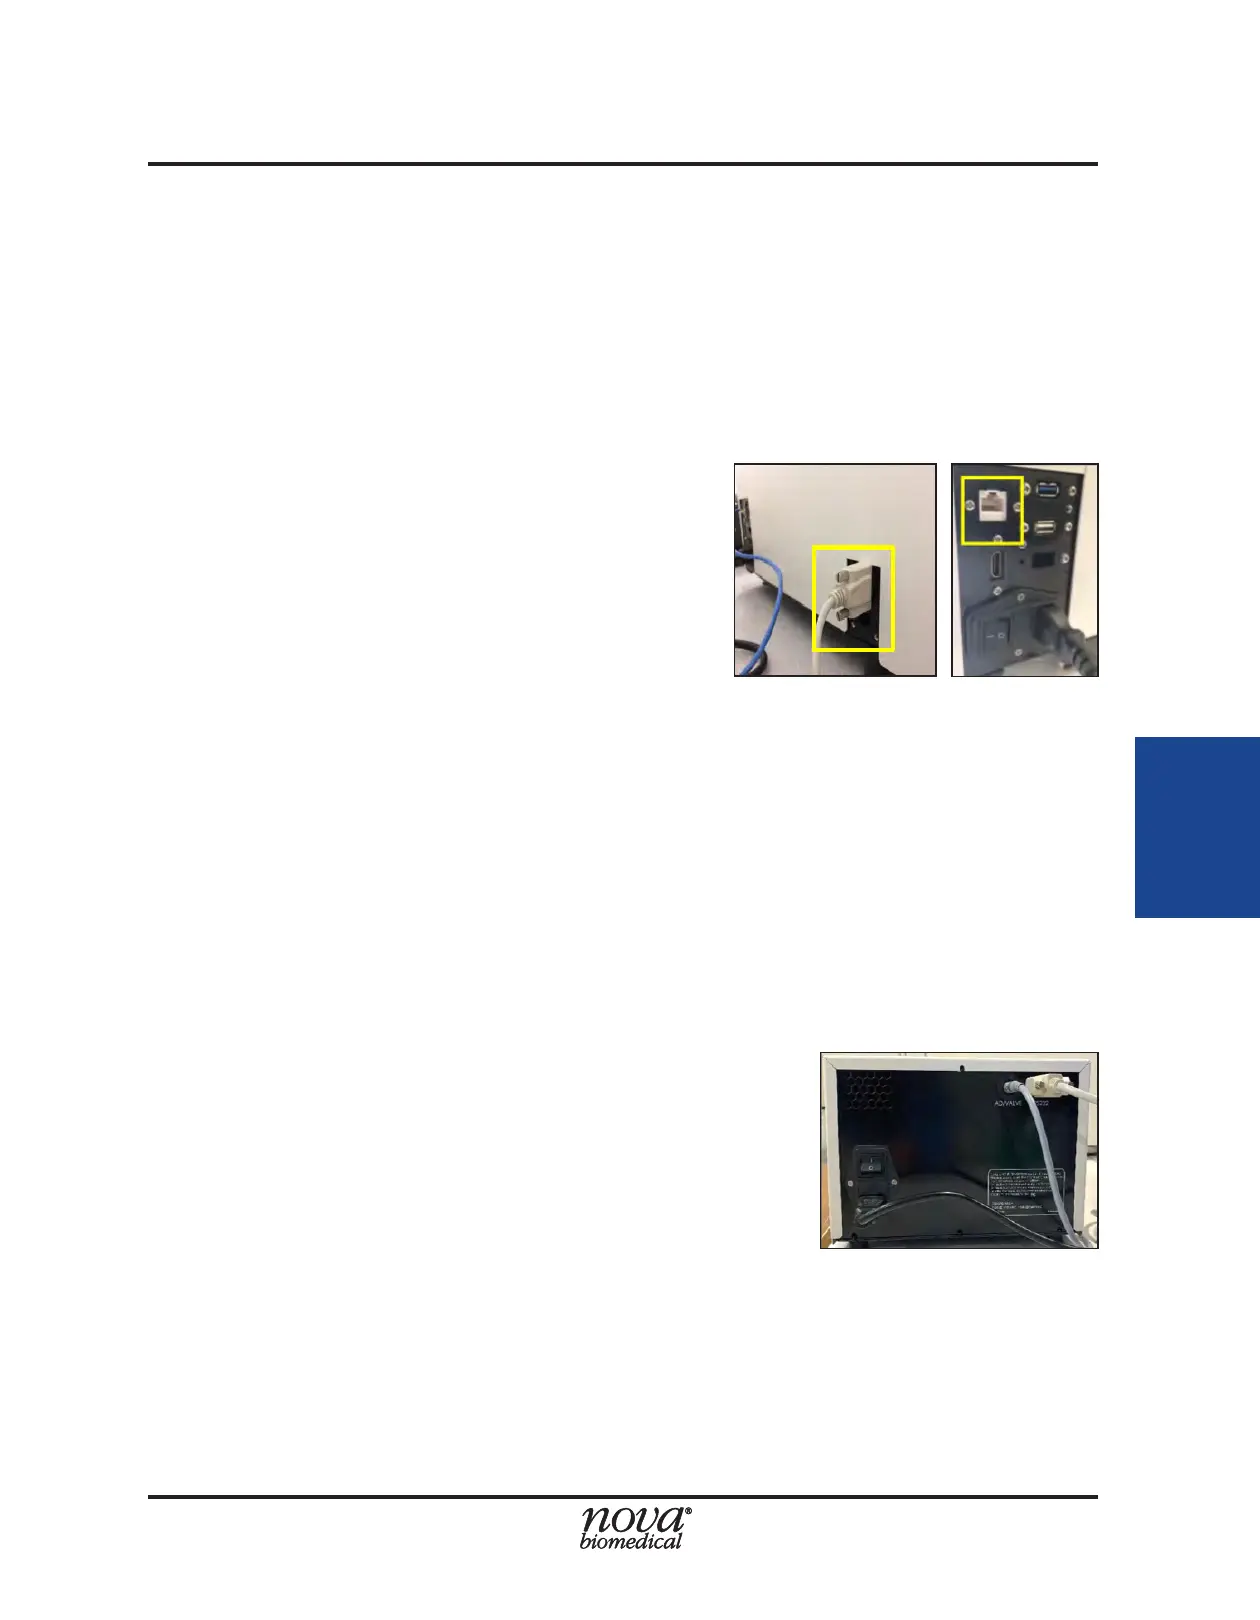
6. To start up the ESM, ip the switch on the rear panel
of the ESM to the On position (Fig. 4.2).
7. ESM operation requiers the FLEX2 to be powered
on. Power on the FLEX2 by ipping the rear switch to
the On position. Once the FLEX2 startup sequence
is complete, verify that the ESM status icon is
present in the FLEX2 status bar. Select the ESM
status icon to verify the Connected, Initialized, and
Primed status read as "True." For more information
regarding ESM System status, refer to Section 4.2.
- If an ESM reagent cartridge is present when the system is powered on, the
ESM syringe pump will begin to pump uid and will automatically attempt to run
an initialization sequence.
- If no reagent cartridge is installed, the syringe pump will not move, and the ESM
will remain in an idle and unready state.
Figure 4.1 FLEX2 COM Port (left) and NIC (right)
Figure 4.2 ESM Rear View