5-4
BioProfile FLEX2 ESM Instructions for Use Manual
4. Replace the Cup Wash (CW) Line: Carefully
disconnect the CW line from the ESM syringe pump
(Fig. 5.4) by turning the tting counterclockwise until
it releases. Carefully pull the other end of the CW
line off the metal port on the sample cup to which it
is attached (Fig. 5.5-5.6). Discard the old tubing.
Secure the tting at one end of the new CW line to
the syringe pump by turning it clockwise until nger
tight. Slide the free end of the new CW tubing securely
onto either port on the sample cup
5. Replace the Performance Check (PC) Line:
Carefully disconnect the PC line from the ESM
syringe pump (Fig. 5.4) by turning the fitting
counterclockwise until it releases. Carefully pull the
other end of the PC line off the metal port on the
sample cup to which it is attached (Fig. 5.5). Discard
the old tubing. Secure the tting at one end of the
new PC line to the syringe pump by turning it clockwise
until nger tight. Slide the free end of the new PC
tubing securely onto either port on the sample cup.
NOTE: The connection of the Cup Wash (CW) and
Performance Check (PC) tubing lines to the
metal ports on the sample cup is arbitrary—
either line can be connected to either port.
6. Complete Change ESM Tubing Sequence: Verify
all new tubing connections, and then press the green
Continue button on the Command Bar. The system
will automatically prime the new uid lines.
5.1.3 Change ESM Syringe
The Change ESM Syringe function allows an operator with appropriate privileges to
replace the plunger and barrel of the syringe pump assembly on the ESM. Nova Biomedical
recommends that the ESM syringe be replaced annually, or as needed.
To change the ESM syringe:
1. Select the Change ESM Syringe button from within
the ESM Maintenance menu.
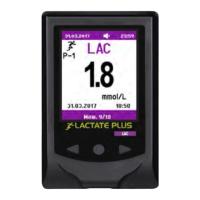
2. Select the Start button in the Command Bar to begin
the Change ESM Syringe sequence. The analyzer
will remove any remaining uid from the syringe and
will position the plunger all the way to the bottom of
its axis (Fig. 5.7).
3. When the syringe plunger is all the way down and
the Continue button appears, remove the syringe
by loosening the thumb screw at the bottom, then
unthread the syringe from the valve assembly to
remove it (Fig 5.8).
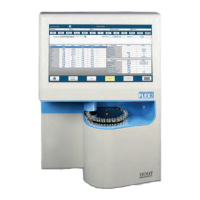
Figure 5.5 ESM Sample, Cup Wash, and
Performance check tubing connections to
Sample Cup for ambr® 15/250, PN 59975
CW/PC
CF
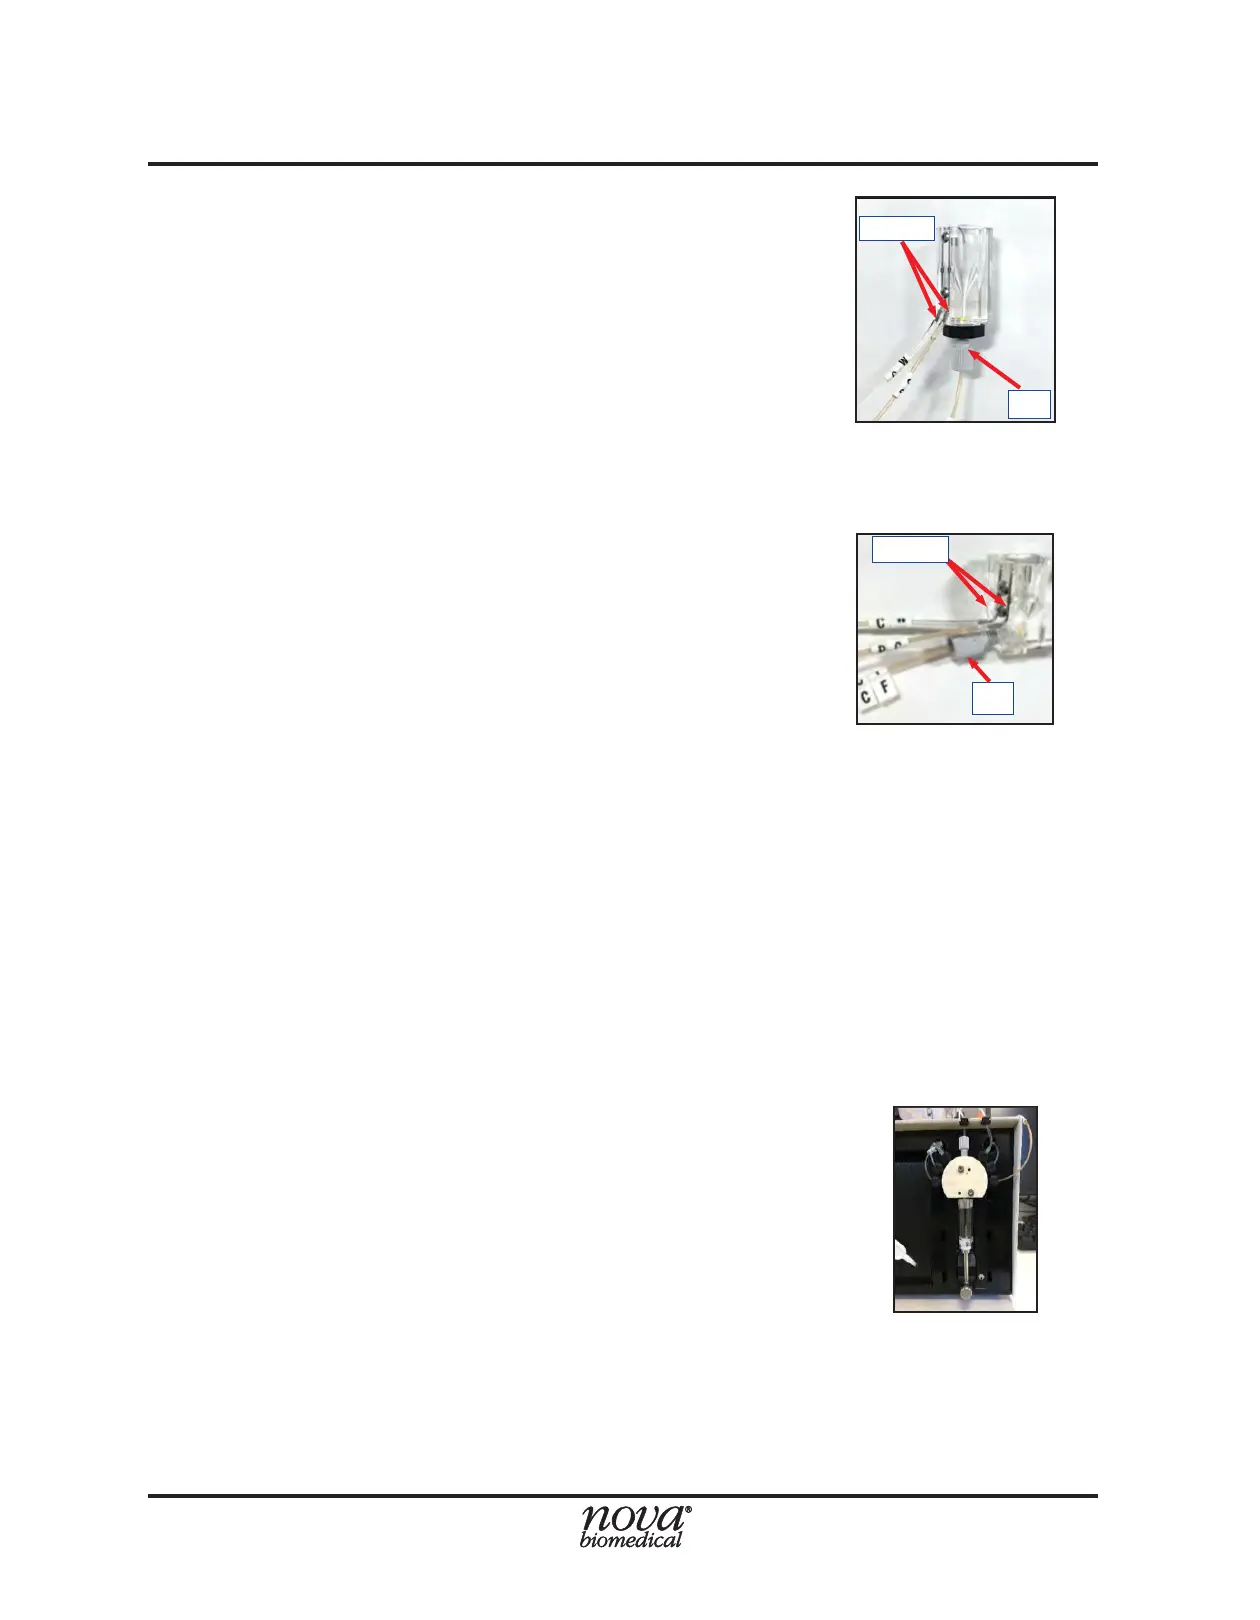
Figure 5.6 ESM Sample, Cup Wash, and
Performance check tubing connections
to Sample Cup for ambr® 15+Analysis
Module PN 60094.
CF
CW/PC
Figure 5.7 Syringe ready for
replacement