4-3
4 ESM System Operation
4. ESM System Op.
Step 2: Reagent Cartridge Installation
Inside the ESM reagent cartridge bay is an RFID reader that recognizes if a reagent
cartridge is present. An ESM Reagent Cartridge must be installed and recognized by
the FLEX2 for the system to be made ready for sampling. If a reagent cartridge is in
place when the FLEX2 + ESM is powered on, the FLEX2 Smart Maintenance system
will automatically recognize its RFID tag and install the pack and will attempt to run an
initialization procedure. The Smart Maintenance system continuously monitors the status
of the reagents to track uid depletion and cartridge expiry.
The ESM Reagent Cartridge contains System Fluid solution for cleaning the sample cup
and ow path between sampling. The reagent cartridge also contains Deproteinizing
solution, Performance Check solution, and a waste collection pouch for System Fluid
and residual sample waste. The reagent cartridge is sized for approximately 200 sample
draws from the external liquid handling system and its on-board use life is 30 days.
WARNING: The ESM Reagent Cartridge will contain waste cell culture material
when removed from the system which is considered biohazardous. Use
of protective equipment is recommended when handling the reagent
cartridge, and waste should be disposed of in accordance with your
facility's standard operating procedures
The new ESM Reagent Cartridge packaging will include the aforementioned black septum
and white pinch valve tubing segment, which should both be installed prior to the new
reagent cartridge.
To install the ESM Reagent Cartridge:
1. Replace the septum and pinch valve tubing before
removing the existing reagent cartridge (See Step 1).
2. Remove the used ESM Reagent Cartridge by pulling
on the handle and discard.
3. Remove the new ESM Reagent Cartridge from its
shipping packaging and gently invert a few times.
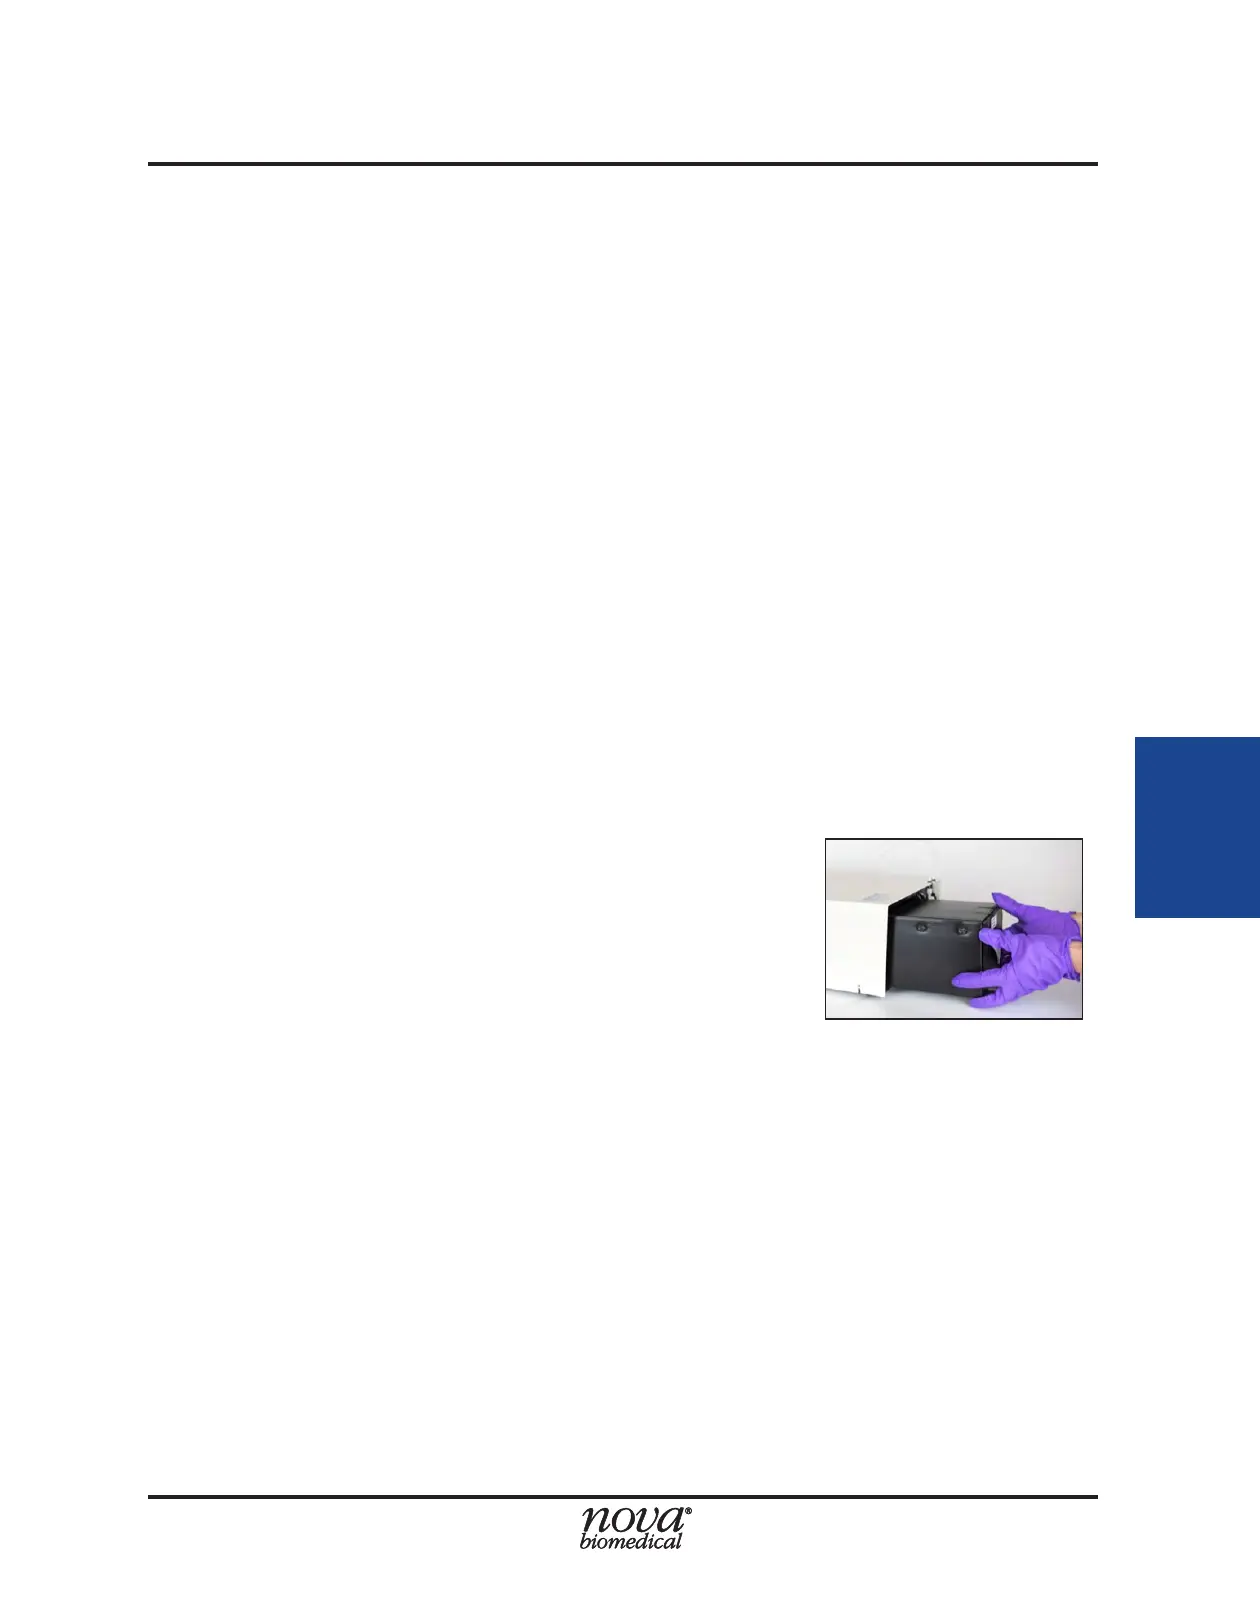
4. Point the tments downward to remove air from
inside the tments, and gently slide the pack into the ESM pack bay until secure
(Fig. 4.4). You should feel some resistance as the needle tments at the back of
the pack engage with the needle shrouds at the rear of the pack bay. Continue
pushing until the face of the pack sits behind the bottom lip of the reagent pack
bay. It should not sit ush with the front of the ESM.
5. The FLEX2 automatically employs Smart Maintenance to detect the new pack
using an optical detection sensor in the ESM. Priming will occur automatically
upon insertion, and updated pack information will appear in the FLEX2 User
Interface Status Bar and ESM Status window (See Section 4.2 for more details).
WARNING: The needle tments inside the reagent pack bay are sharp. To avoid injury,
never stick your hands inside the pack bay.
Figure 4.4 Proper reagent installation
technique