NVIDIA DGX H100 Service Manual
6.4. Replacing the U.2 NVMe Drive
1. Make sure that you requested and obtained the replacement drive from NVIDIA Enterprise Sup-
port.
2. Back up any critical data to a network shared volume or some other means of backup.
3. Power o the system using the power button.
4. Remove the bezel. Refer to Removing and Attaching the Bezel for more information.
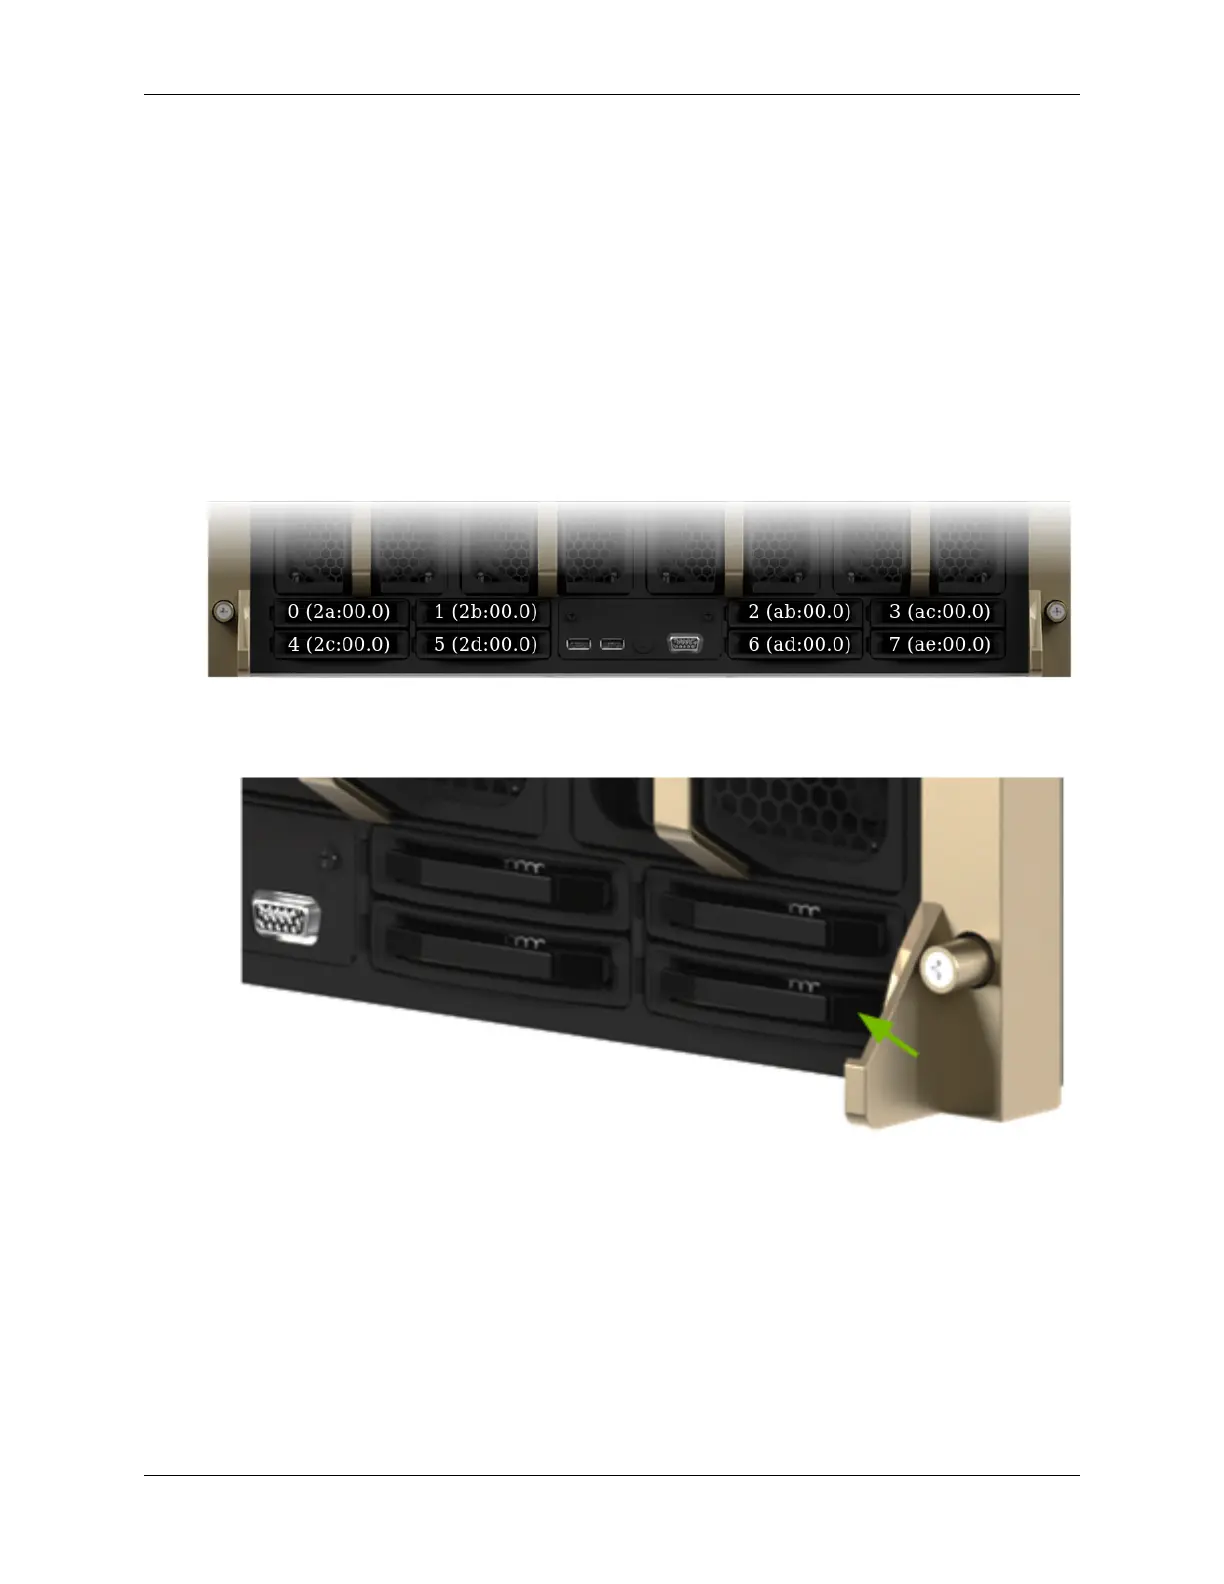
5. After the system powers o, use the following gure to identify the drive to replace on the chas-
sis.
The gures in the following procedures show replacing drive number 7 at PCI address ae.
6. Remove the NVMe drive.
1. Press the tab on the right side of the drive to release the lever:
2. Pull the drive out by using the lever:
6.4. Replacing the U.2 NVMe Drive 39

 Loading...