NVIDIA DGX H100 Service Manual
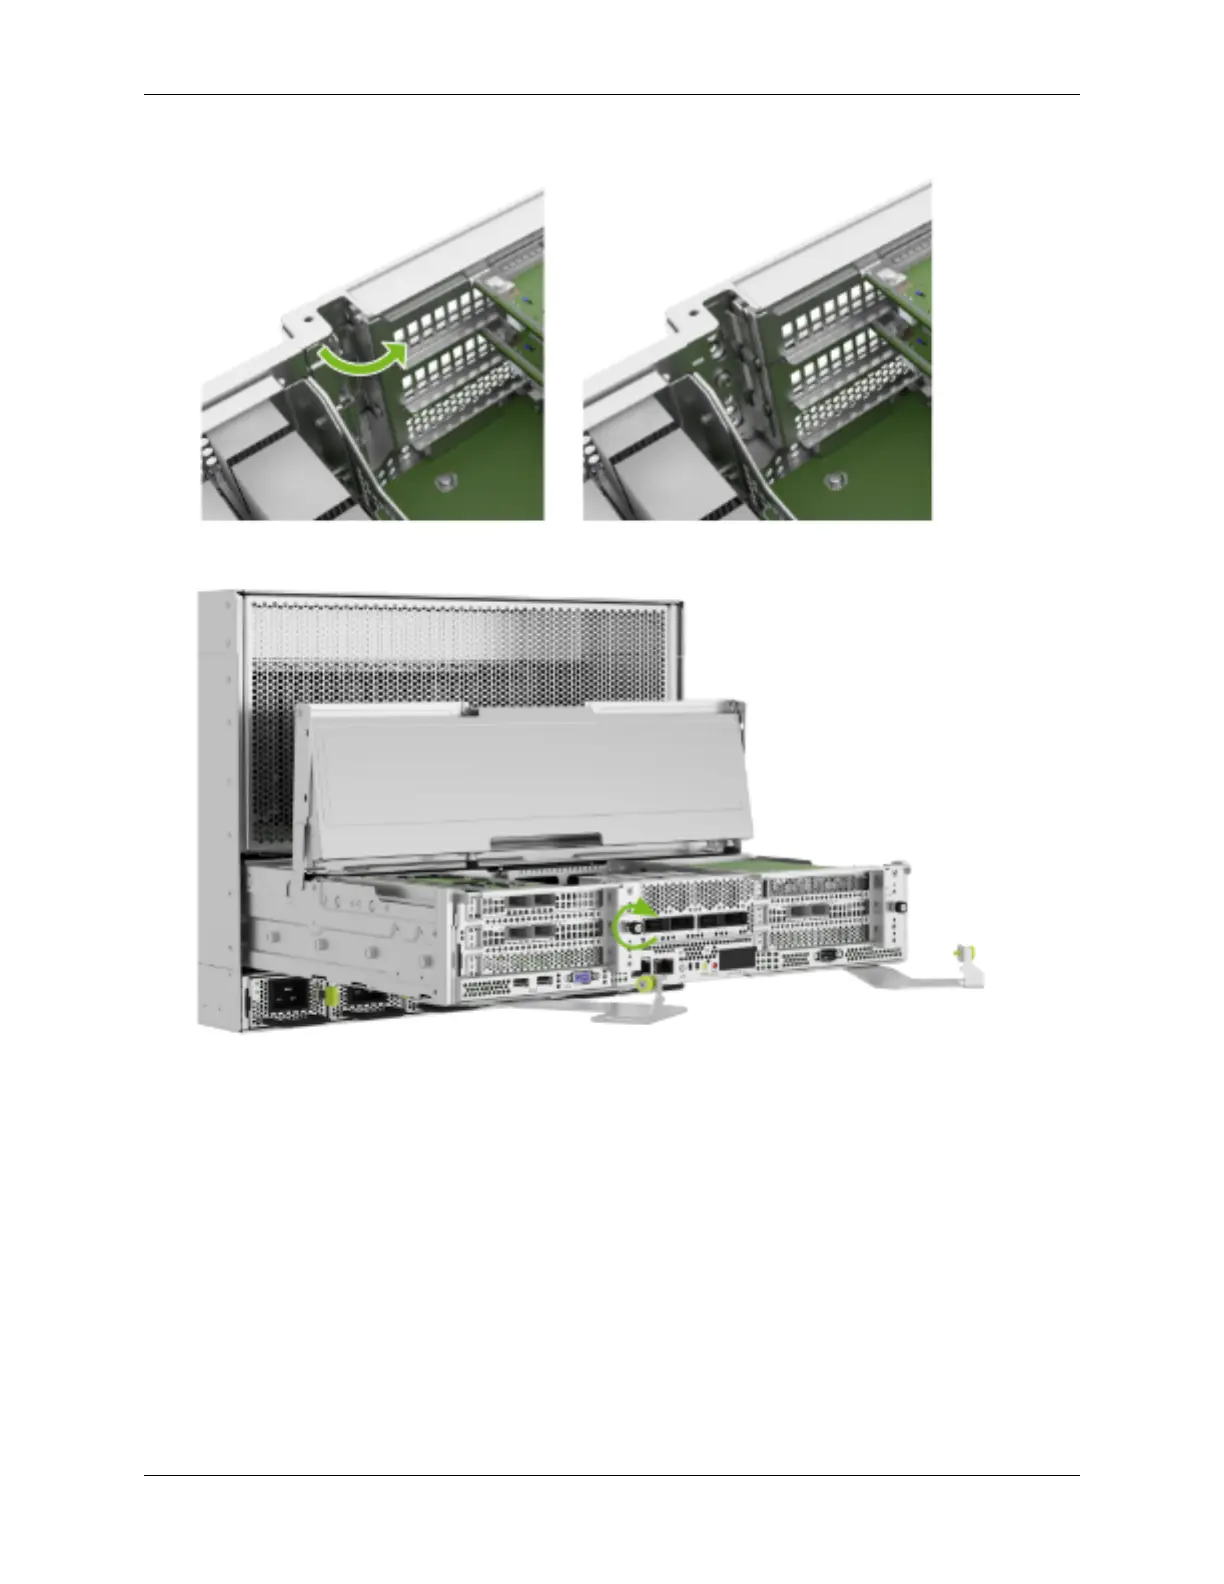
4. Tighten the thumbscrew to make sure the locking latch mechanism stays in place:
15.11. Power On the System and Conrm
Replacement
1. Close the motherboard tray IO door and insert the motherboard tray. Refer to Motherboard Tray
- Opening and Closing the IO door for more information.
2. Connect all the cables and power cords to the motherboard tray.
3. Apply power to the system and then log in.
4. Restore the date on the system. If you do not use network time protocol (NTP), perform the
following steps to set the date manually.
a. Set the date:
15.11. Power On the System and Conrm Replacement 95

 Loading...