SAMM User Manual
53
3. Launch SAMM.
4. Click the Add data icon.
5. Click Connect To...
6. Select BlueView ProViewer from
the supported sensor list and click
Load.
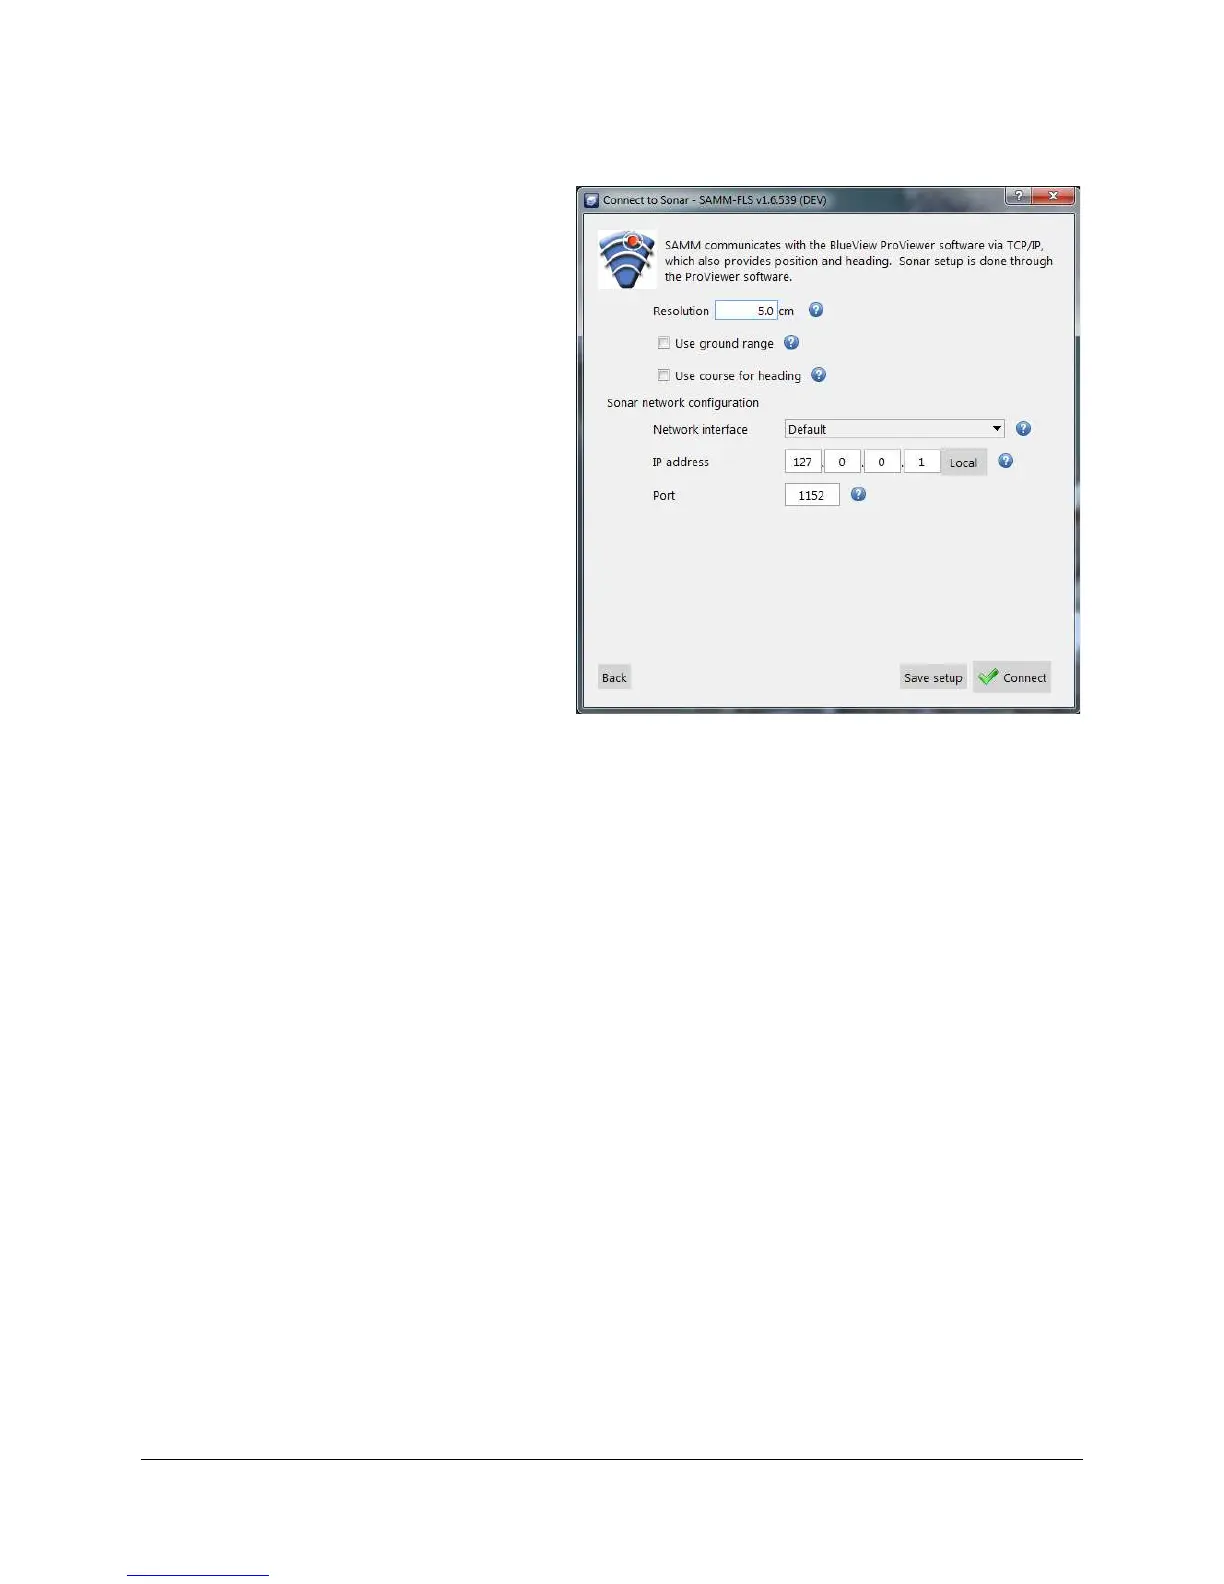
7. In the BlueView interface window
(Figure 44), set processing
parameters as necessary.
8. If SAMM and ProViewer are
running on the same computer, do
not change the IP address from
127.0.0.1. If ProViewer is
running on a different computer
than SAMM, select an appropriate
network from the Network
interface dropdown and enter the
IP address of the computer
running the ProViewer software in
the IP address field.
Do not change the port number
from 1152 unless you changed it
in the sonar software. Then, enter
the matching port number in the
Port field. (The option to log data
in *.son format is not yet
available.)
9. Click the Connect button .
Figure 44. BlueView Interfacing
10. Monitor the connection status in the Device status popup and in the status bar on the
bottom left. Acquisition begins automatically. SAMM flashes a warning if it is not
recording. Click the Record toggle icon to switch recording on and off.
 Loading...