SAMM User Manual
73
If the Display Options item “Mark position with a pin” is checked, a small blue
marker appears over the mosaic, marking the recorded position of the contact.
A blue crosshair appears on the marked contact in the PPI. The marker stays at the
contact position and reappears in the PPI when the FLS covers the target again.
To mark a contact in the Mosaic window: (for FLS or SLS users)
1. Click the Mark contact tool icon in the toolbar.
2. The “Mark Contact” dialog opens. You can define or auto generate contact name, set
resolution and size of the contact image.
3. A white square frame appears around the mouse cursor in the Mosaic window. Click on
the target.
A contact thumbnail is saved in the database.
The thumbnail appears in the mosaic window.
A small blue marker appears over the mosaic, marking the recorded position of the
contact.
4. Click the Select Tool icon to exit the “Mark contact” mode.
To turn on/off the display of the blue pins or the images:
1. Click the Display options icon
2. check/uncheck the box next to Mark position with a pin or Render the image over
the swaths.
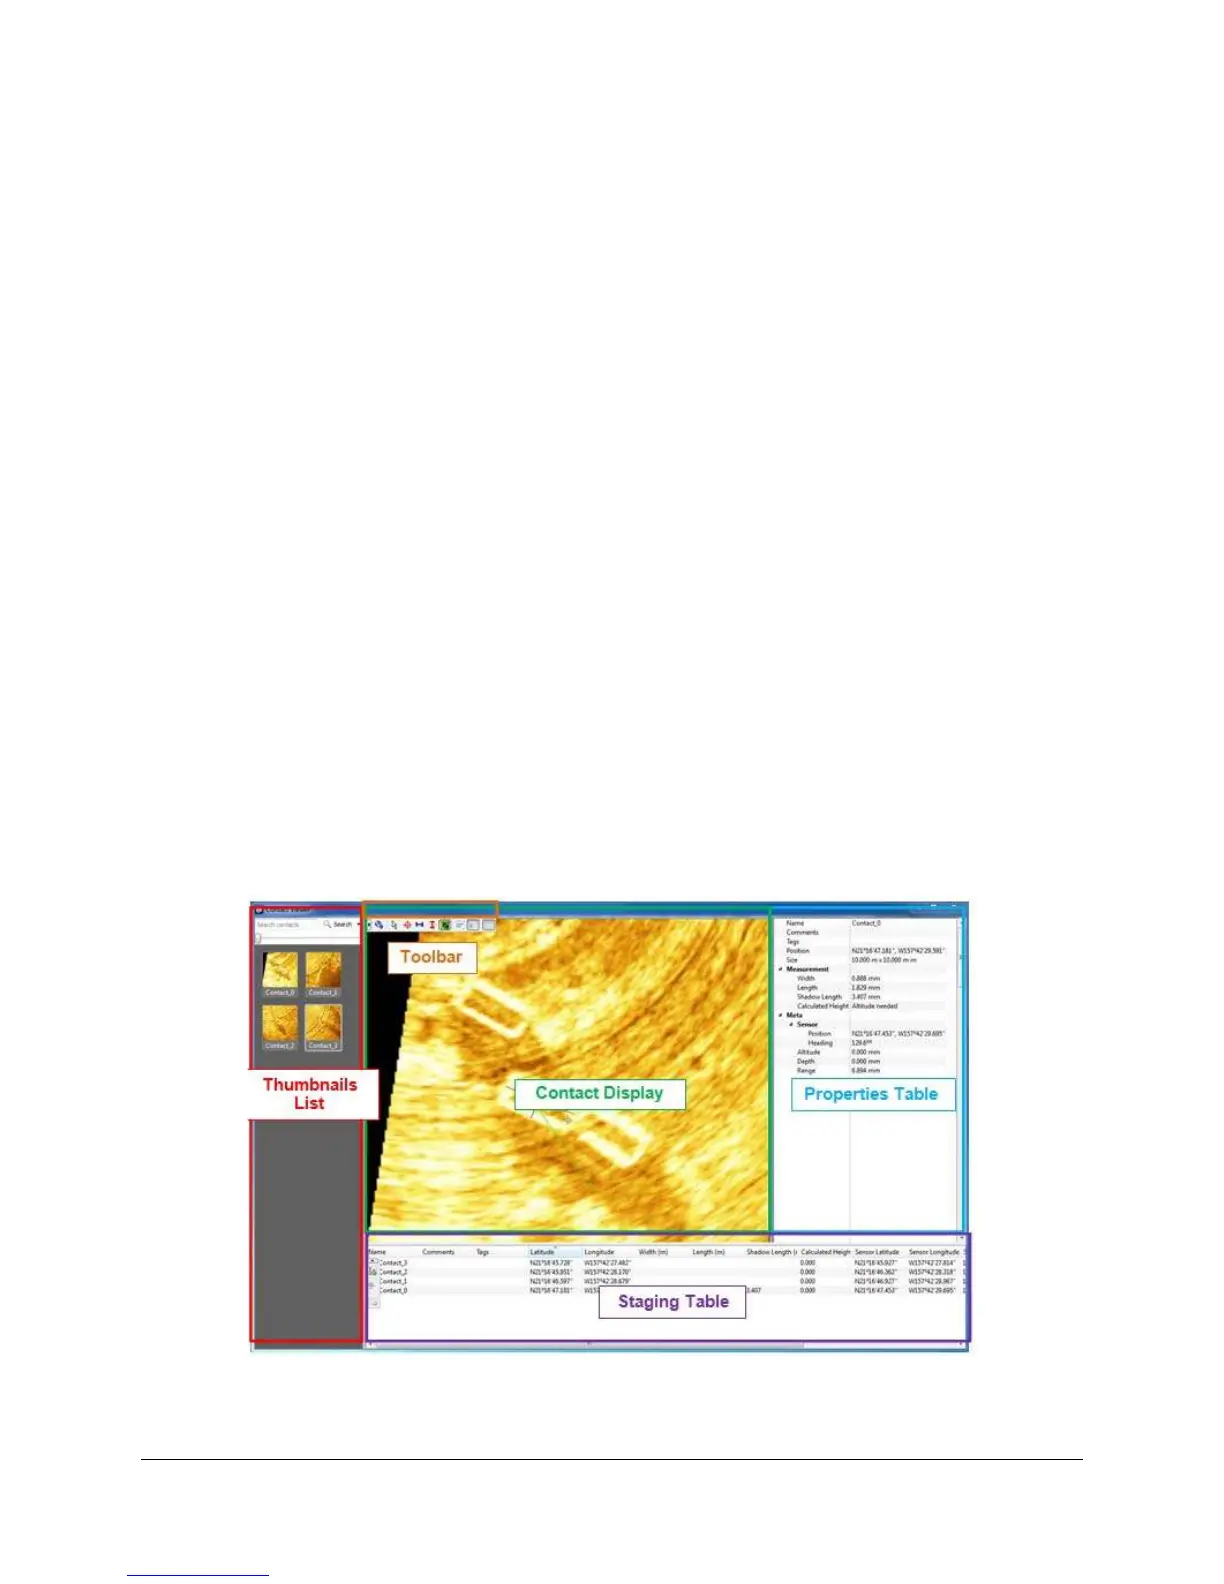
8.2 Elements of the Contacts Window
Click the Contacts icon to open the contact database. Elements of the Contacts window are
labelled in Figure 65. This section introduces the elements of the contact window and covers the
Contacts window display options. Usage of these elements in the contacts workflow will be
described in the following sections.
Figure 65. Contacts Window
 Loading...