BM/2/AS
Maintenance
GB - 23
FIG. 2
1
10
8
9
32
5
4
4
5a
7
6
12
11
6
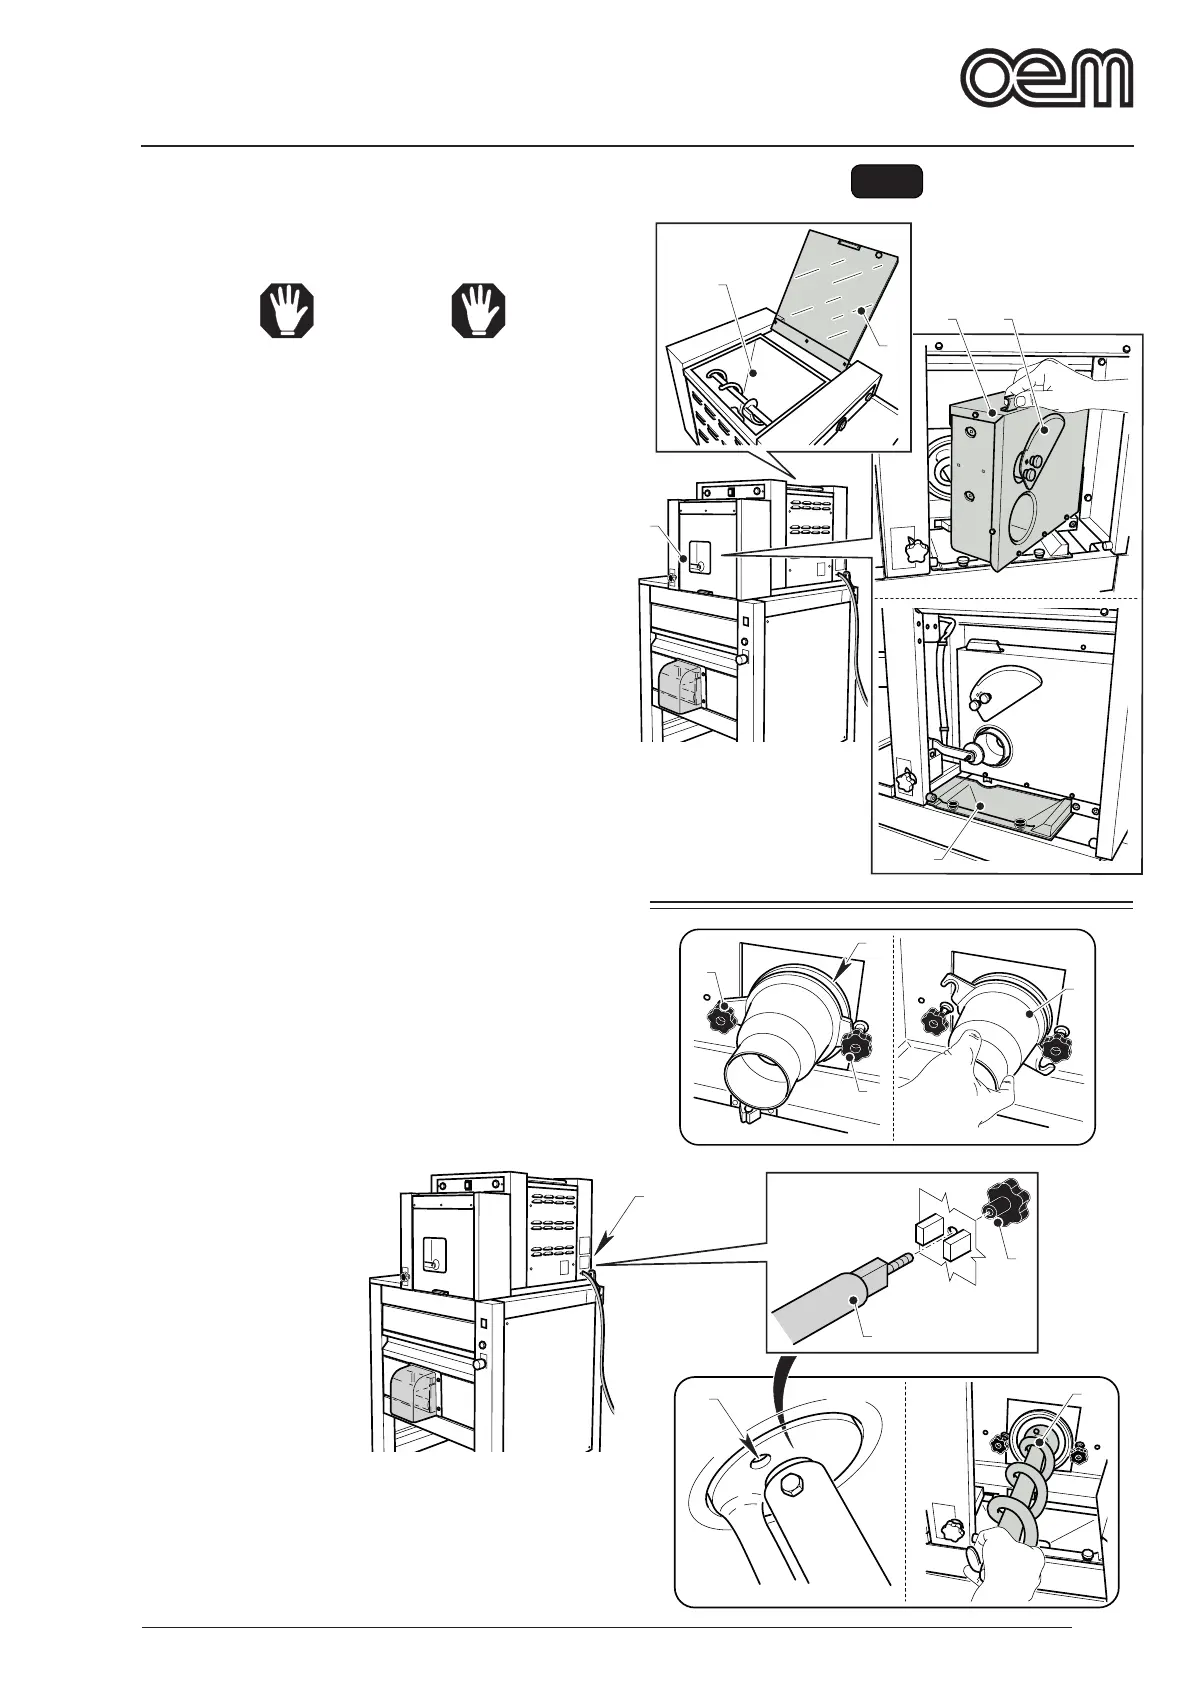
6.1.b.b - Cone and screw cleaning (Fig. 1)
• Open the front door (1) and the interior door (2).
WARNING
Be careful with the blade (3) as there is a risk of
cutting yourself.
Use appropriate personal protection devices such
as cutproof gloves.
• Unscrew the two knobs (4) and remove the cone (5).
• Unscrew the knob (6) to release the screw (7) and
remove it.
• Raise the door (8) and thoroughly clean the inside
of the hopper (9) and the chute (10) using a cloth
soaked in water and dishwashing liquid and remove
any dough leftovers.
• Handwash the cone (5) with dishwashing liquid and
dry it.
• Also thoroughly clean the cone tting area (5a) to
prevent that the dirt forms a thick layer, which could
damage the blade during use.
• Handwash the screw (7) or wash it in a dishwasher.
• Ret the screw (7) taking care to t the drive pins
(11) into place in the holes on the ange and make
sure that the milled shaft (12) properly ts into place
in the catches of the rear panel.
• Tighten the knob (6).
• Ret the cone (4).